Findings
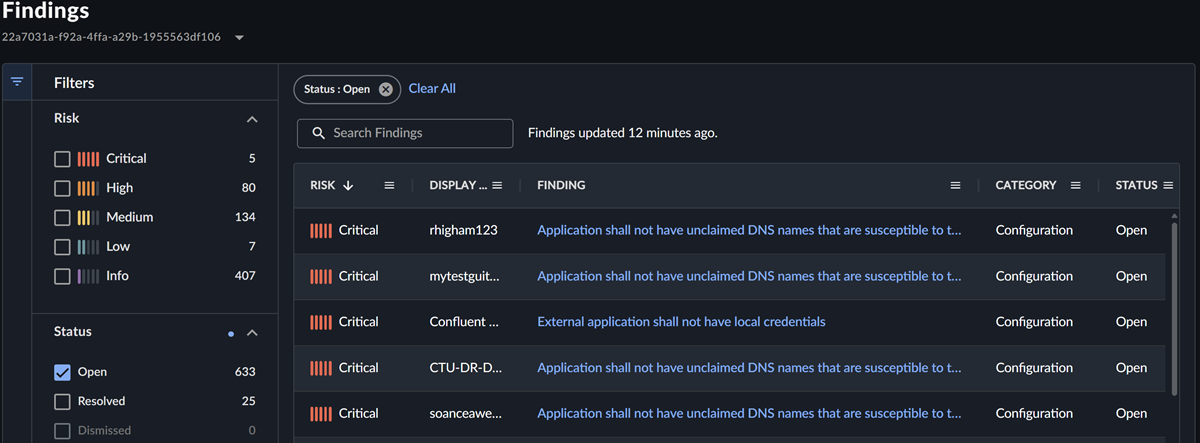
The Findings page shows a table of all findings sorted by risk. Findings are the output of the posture checks that are run against your identity infrastructure. Each finding has a status, assigned risk level, and category.
Findings status
New findings have a status of Open that you can change from finding details as you triage and mitigate issues. The status can be one of the following:
- Open: The finding hasn't yet been addressed or still exists in the environment.
- Resolved: The finding has been addressed or mitigated.
- Dismissed: The finding is expected and doesn't need to be addressed.
Findings risk level
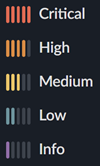
Each finding is assigned one of the following risk levels based on the underlying check and the potential security risk that it poses to your organization:
- Critical: Finding should be addressed immediately because it poses a significant risk.
- High: Finding should be addressed immediately.
- Medium: Finding should be addressed, but it doesn't pose a significant risk.
- Low: Finding poses a minor risk.
- Info: Finding poses little to no risk, but should be reviewed when time allows.
Findings category
Findings are categorized as follows based on the type of check that has been performed, aligning to the MITRE ATT&CK framework where applicable:
- User Behavior
- Configuration
- Entra Conditional Access Gaps
- Dormant Resources
- Lateral Movement
- Credential Compromise
- Persistence
- Privilege Escalation
- Defense Evasion
- Exfiltration
- VIP Exposure
Triage findings
Triage findings by addressing those with the highest risk level first to have the biggest impact on reducing your identity attack surface and improving your posture score.
Warning
Evaluate each finding and its recommendation based on your business needs, your unique environment, your risk tolerance, and your ability to address it. This is important because configuration changes could have an adverse impact on users, applications, and access. Make sure you assess this potential impact based on your environment and test when possible before applying the recommendation.
It may not be feasible to remediate all findings, because there may be issues outside of your control, such as third-party applications that require elevated permissions or only support weaker authentication mechanisms. However, these still represent a potential risk to your organization that you should be aware of and continue to monitor.
After the finding has been evaluated, take one of the following actions:
- Resolve the finding by remediating the issue within the identity system where it was identified to remove it from your overall risk score when it's next calculated, which occurs every 24 hours.
- Dismiss the finding, which will suppress future instances of this finding for the object in question and exclude it from your overall risk score. The finding will continue to be available in the findings table, but won't be included in the dashboard.
- Leave the finding open to track findings that can't be addressed, which will continue to contribute to your overall risk score.
Identity Findings table
The Identity Findings table includes controls to sort, filter, and arrange data. Use the collapsible filter menu on the left of the table to narrow down the list of findings.
As you select filters, the table and URL update dynamically to reflect your choices. You can share the URL with colleagues or save it to see a specific list of findings.
Selected filters appear above the table. Click X to remove a single filter or Clear All to remove all filters and view all findings.
Filter findings
Filter the Identity Findings table using a combination of the following filters:
- Risk: Risk level of the finding.
-
Status: The status of the finding, which can be one of the following:
- Open
- Resolved
- Dismissed
-
Reference Type: The type of object that the finding relates to, which can be one of the following:
- User Object
- Application
- Group Object
- Device Object
- Tenant Configuration
-
Category: Category of the finding.
- Is New: Findings that were first seen within the last seven days.
- Finding: Title of the finding.
- First Seen: When the finding was first seen.
- Last Seen: When the finding was last seen.
- Last Modified: When the finding was last modified.
View findings details
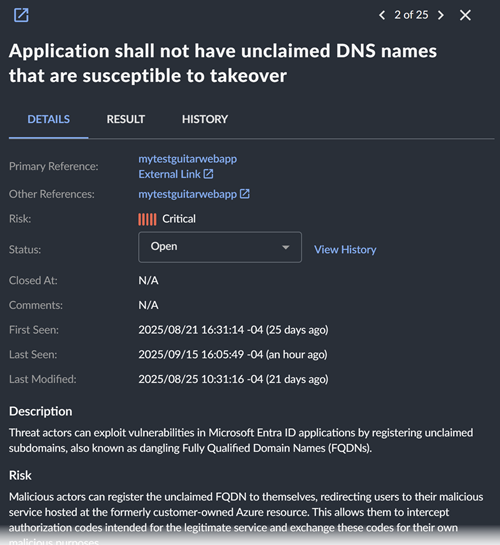
Click a link in the Findings column to view the details panel that includes its associated object, risk, first seen timestamp, last seen timestamp, last modified timestamp, and recommendation.
To view additional details of the finding, click the New Tab icon to open the full page view in a new tab. The following information shows in both views:
- Finding Details: Finding summary including risk level, status, comments, timestamps, and tags.
- Description: A description of the finding.
- Definition: Information about the associated identity check and references.
- Recommendation: Sophos recommendations for mitigating the finding.
Update finding status
Update the status of a finding by clicking the Status drop-down and choosing the desired status:
- Open: The finding hasn't yet been addressed or still exists in the environment.
- Dismissed: The finding is expected and doesn't need to be addressed. New findings for this issue won't be generated.
- Resolved: The finding has been addressed or mitigated.
After the status is set as Resolved or Dismissed, the finding is no longer considered a risk to your environment. If a finding is resolved manually and we see it again, the finding will be reopened by the system. Make sure the necessary mitigation actions or closure tasks have been completed.
Findings are automatically resolved by the system when they no longer appear. Findings that are resolved by the system include a comment indicating this.
Result Tab
The Result tab shows the raw output in JSON format from the check that was performed. Use this to see additional details about the finding that was generated.
History Tab
The History tab shows previous actions taken on the finding. Click View Diff to see the exact change details.