ITDR integration guide
After ITDR has been enabled on your tenant, click My Products > Identity > Settings from the navigation menu to start integrating with Microsoft Entra ID or on-premises Active Directory (AD).
Microsoft Entra ID
The setup process uses the Sophos Master Application in Azure to automatically create the required application and grant the necessary permissions within your Azure tenant.
Prerequisites
The following prerequisites must be met before integrating:
- Sophos Fusion Administrator role
- Entra ID Admin role with permissions to Grant Tenant Wide Admin Consent
- Microsoft Entra ID P1 or above license
Set up the Microsoft Entra ID integration
To set up the integration, do as follows:
- In Sophos Fusion, go to Identity > Settings > Integrations.
-
The Identity Settings page shows two integration cards:
- Microsoft Entra ID for cloud-based identity monitoring
- On-Premise Active Directory for on-premises AD environments
-
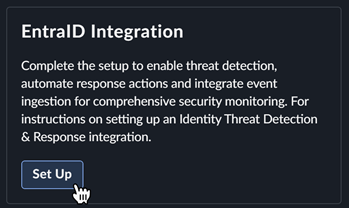
Click Set Up on the Microsoft EntraID Integration card.
-
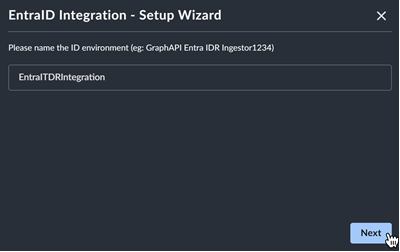
Enter a name for the integration and click Next.
-
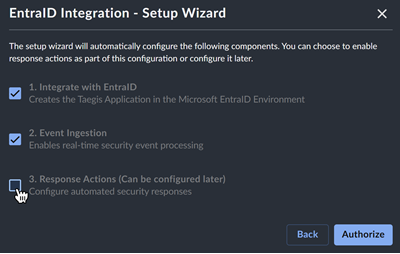
If you want to enable response actions, select the checkbox. You can also configure response actions later.
-
Click Authorize to go to Microsoft's identity provider to grant access.
- Sign in with a user account that lets you grant organization-wide consent for integration with the Entra ID tenant.
- Approve the listed permissions to give ITDR access to Entra ID. For more information, see the Microsoft documentation.
-
When the consent process is successful, you're returned to Sophos ITDR.
Note
If the consent process fails, see the Recover from integration failures section to complete the integration.
-
Click View Identity Risk Posture to return to the ITDR Overview Dashboard.
Note
Depending on the size of your tenant, it may take a few minutes to start seeing data.
Recover from integration failures
If the admin consent process detailed in the Set up the Entra ID integration section fails with an error stating that applications weren't found, it's typically due to replication delays in Microsoft's infrastructure.
In this scenario, complete the integration as follows.
- Wait 15 to 30 minutes for the service principals to replicate across Microsoft's infrastructure.
- Go to Identity > Settings.
-
In the Configured Integrations table, click the three dots in the Actions column and select Grant Admin Consent to go to Microsoft's identity provider to complete the authorization.

-
Sign in with a user account that lets you grant organization-wide consent for integration with the Entra ID tenant.
- Approve the listed permissions to give ITDR access to Entra ID. For more information, see the Microsoft documentation.
- After granting consent, return to Identity > Settings and click the Refresh icon in the Actions column of the Configured Integrations table to re-provision the integrations.
On-premises Active Directory
The on-premises Active Directory integration lets you deploy the Sophos ITDR sensor to extend identity security monitoring to your on-premises AD environment. The ITDR sensor currently supports English language only.
Note
The on-premises AD integration can be deployed independently without a Microsoft Entra ID integration. When used without Entra ID, visibility and posture assessments are limited to your on-premises AD environment only.
Prerequisites
The following prerequisites must be met before integrating:
- Sophos Fusion Administrator role.
- An Active Directory server running a supported Windows Server version (2016–2025) with Microsoft .NET Framework 4.8 installed. See the Download .NET Framework 4.8 page.
- Knowledge of your AD domain names, such as
CORP.LOCALorCHILD.CORP.LOCAL. - A read-only service account in AD.
- Outbound firewall access enabled to Sophos ITDR AD domains if your firewall blocks by default. See Sophos ITDR Active Directory domains.
Set up the on-premises Active Directory integration
To set up the integration, do as follows:
- In Sophos Fusion, go to Identity > Settings > Integrations.
-
The Identity Settings page shows two integration cards:
- Microsoft Entra ID for cloud-based identity monitoring
- On-Premise Active Directory for on-premises AD environments
-
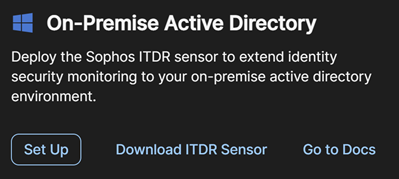
Click Set Up on the On-Premise Active Directory card.
Tip
The card also has links to download the ITDR sensor and to open the documentation if needed before setup.
-
Fill in the following fields and then click Next.
Field Description Example Name the directory service A display name for this integration Production ADActive Directory domains to monitor Comma-separated list of AD domain names to monitor CORP.LOCAL, CHILD.CORP.LOCAL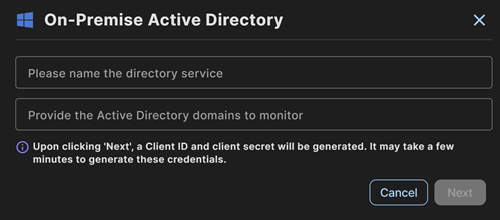
Tip
When you click Next, a Client ID and Client Secret are automatically generated. This process may take a few minutes.
-
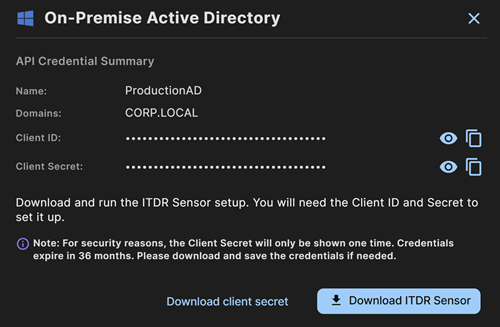
After credentials are generated, the API Credential Summary shows the following:
- Name: The display name you entered.
- Domains: The AD domains you specified.
- Client ID: Auto-generated identifier for the ITDR sensor.
- Client Secret: Auto-generated secret for the ITDR sensor.
Note
The Client Secret is only shown once. You must copy or download the secret before closing this dialog. It cannot be retrieved again. Credentials expire in 36 months.
-
Click Download client secret to save the credentials as a file, or click the Copy icon next to each field to copy the Client ID and Client Secret to your clipboard.
Download and install the ITDR sensor
To download and install the sensor, do as follows:
- Click Download ITDR Sensor to download the sensor installer.
- Transfer the installer to the Windows Server that will host the sensor on your on-premises network.
-
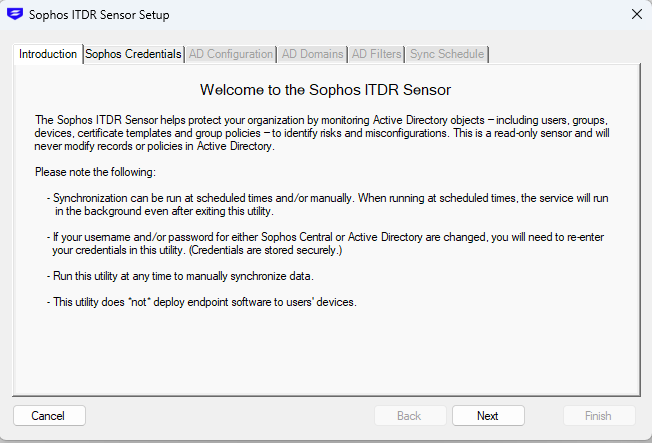
Run the installer on that server and work through the setup wizard.
-
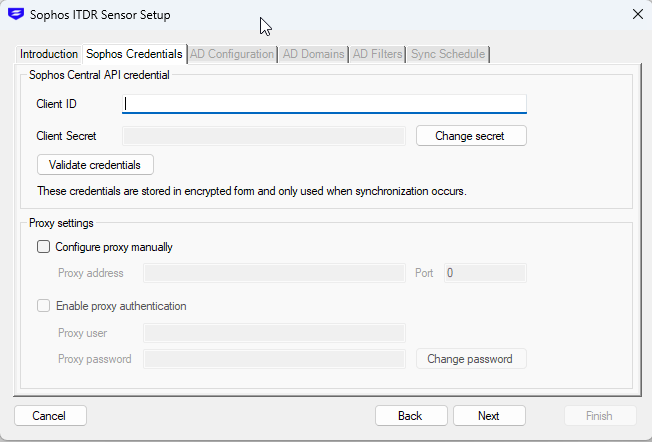
When prompted, enter the Client ID and Client Secret you generated in Sophos Fusion, then click Next.
-
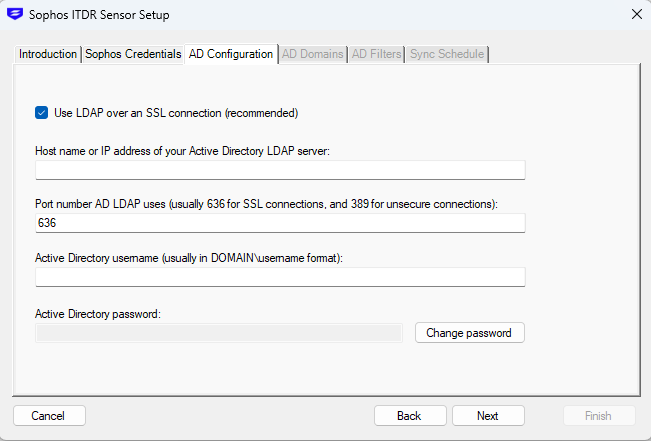
Configure LDAP settings, then click Next. We recommend selecting LDAP over SSL for secure communication.
-
Enter the Service Account username and password, then click Next.
-
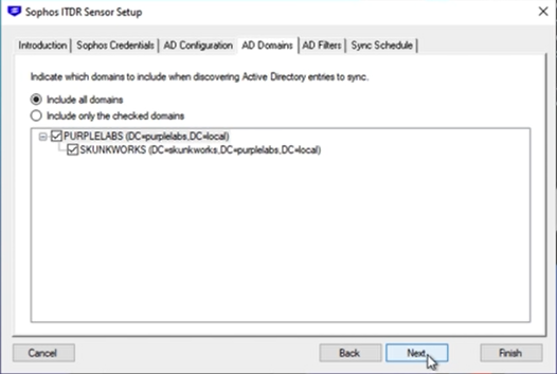
Select the Domains you want to include in monitoring, then click Next.
-
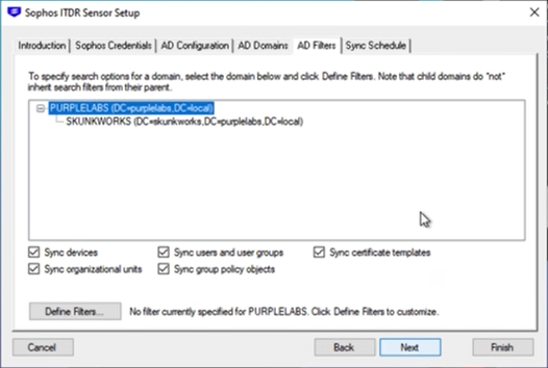
On the AD Filters tab, leave the default settings selected to ensure all required object types are collected, then click Next.
-
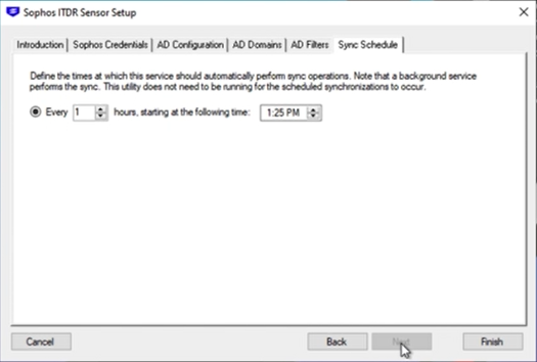
On the Sync Schedule tab, leave the default interval set to 1 hour to ensure timely updates, then click Finish.
-
After the wizard completes, a communication status window appears. Click Sync Now to run the initial full sync of your AD environment.
Note
The first sync may take several minutes depending on the size of your AD environment. Subsequent syncs send only incremental changes.
Verify the integration
When the ITDR sensor is installed and running, do as follows to verify the integration:
- In Sophos Fusion, go to Identity > Settings > Integrations.
-
Your new integration shows in the Configured Integrations table with the following details:
- Type: On-Prem Active Directory
- Health: Healthy
- Status: Enabled
-
If the Health status shows Unhealthy, verify the following:
- The ITDR sensor service is running on the host server.
- The Client ID and Client Secret were entered correctly.
- The server has outbound network connectivity to Sophos cloud services.
Sophos ITDR Active Directory domains
If you're using the ITDR sensor and your firewall blocks outbound access by default, you must allow the following pre-signed S3 domains to enable outbound communication.
Ports:
443(HTTPS)53(DNS)
Domains:
tf-presigned-url-eu-west-1-prod-itdr-bucket.s3.eu-west-1.amazonaws.com
tf-presigned-url-eu-central-1-prod-itdr-bucket.s3.eu-central-1.amazonaws.com
tf-presigned-url-us-east-2-prod-itdr-bucket.s3.us-east-2.amazonaws.com
tf-presigned-url-us-west-2-prod-itdr-bucket.s3.us-west-2.amazonaws.com
tf-presigned-url-ca-central-1-prod-itdr-bucket.s3.ca-central-1.amazonaws.com
tf-presigned-url-ap-southeast-2-prod-itdr-bucket.s3.ap-southeast-2.amazonaws.com
tf-presigned-url-ap-northeast-1-prod-itdr-bucket.s3.ap-northeast-1.amazonaws.com
tf-presigned-url-ap-south-1-prod-itdr-bucket.s3.ap-south-1.amazonaws.com
tf-presigned-url-sa-east-1-prod-itdr-bucket.s3.sa-east-1.amazonaws.com
tf-presigned-url-me-central-1-prod-itdr-bucket.s3.me-central-1.amazonaws.com
Set up response actions
You can optionally follow these steps if you didn't configure the response actions during initial setup:
- In Sophos Fusion, go to Identity > Settings > Integrations.
- Click Set Up on the Response Actions card.
- Click a currently configured Integration from the menu.
- Click Authorize to be returned to Microsoft's identity provider to grant access.
- Sign in with a user account that lets you grant organization-wide consent for integration with the Entra ID tenant. Then approve the listed permissions to give ITDR access to Entra ID. For more information, see the Microsoft documentation.
- When setup is complete, click Close.
When configured, response actions are available within the Actions menu throughout the Sophos ITDR application.