Switches
You can manage Sophos Switch from Sophos Central. The Switches page lets you add new switches, create sites and stacks for them, move them between sites and stacks, run commands, and view and synchronize settings.
Getting started
Click Getting started to start the assistant. The assistant guides you through the following tasks to help you start managing switches in Sophos Central:
- Default site settings: Click Review to review and change the default site settings. See Site management.
- Add another site/stack: Click Create site/stack to create a site or stack. See Add sites and stacks.
- Add your first switch: Click Add switch to start the registration process. See Add switches.
Click X in the Getting started window to close the assistant.
Add switches
To add switches to Sophos Central, you must register them. Do as follows:
- Go to My Products > Switches > Switches and click Add switches.
-
Connect the switches to your network so that they can reach the internet. Turn on the switches or restart them if they're already turned on.
Note
After turning your switches on, you have 15 minutes to register them with Sophos Central. If a switch isn't registered within 15 minutes, you must restart it and start the registration steps again.
-
Enter the serial number of the switch in the field of Step 3. If you're registering multiple switches, enter one serial number per line.
- Select a site from the drop-down menu or click the arrow
 for a site to select from the stacks at that site. Sophos Central applies the default template if you don't select a site or stack.
 - Click Register.
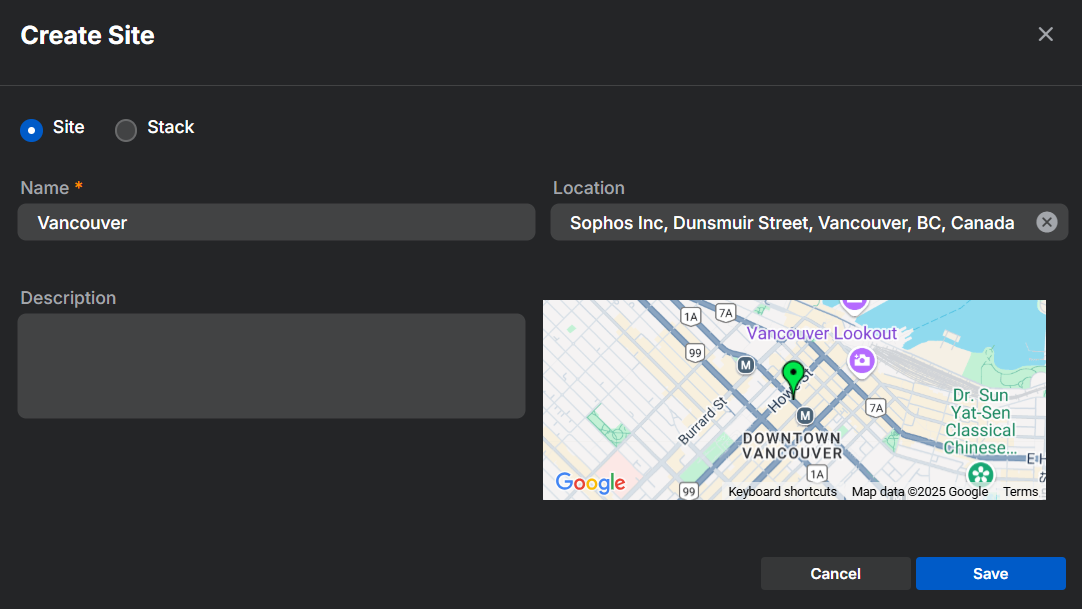
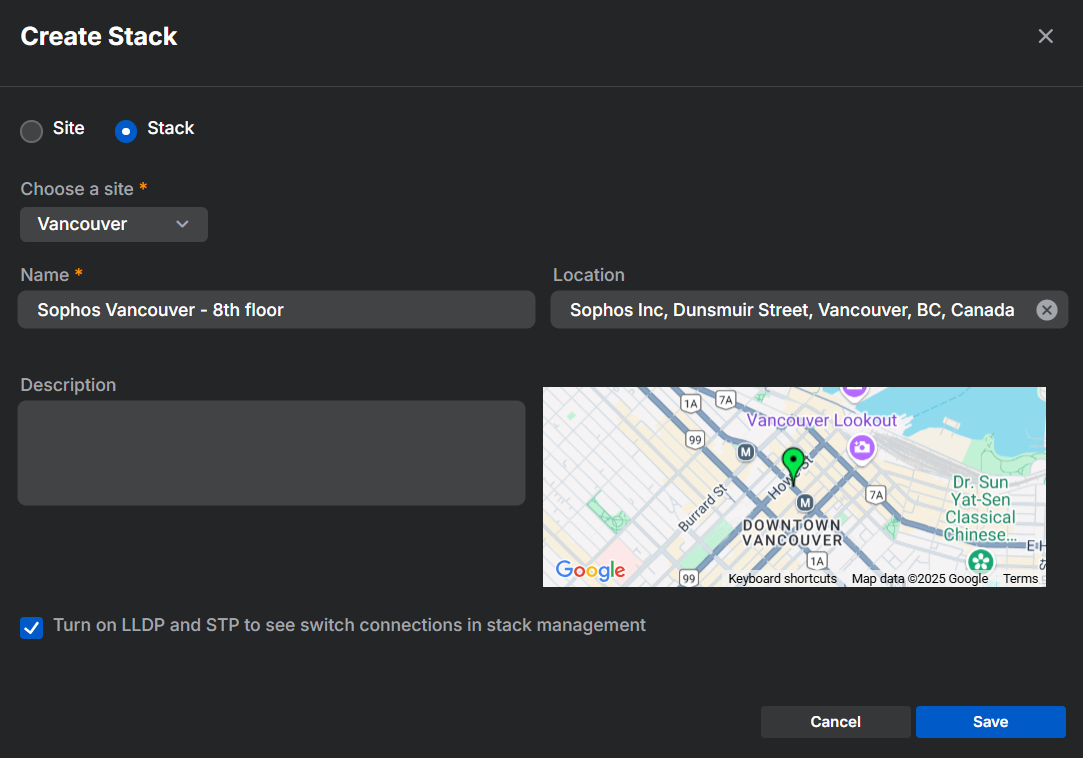
Add sites and stacks
To create sites and stacks, go to My Products > Switches > Switches, select the switches you want to add, click Create site/stack, then click Site or Stack, depending on what you want to create.
We recommend that you add switches to a stack only if they're physically connected to each other or will have identical configurations. Otherwise, create a site instead.
- Enter a name for the site.
- Optional: Enter the location. Sophos Central uses Google Maps. You must enter a real address.
- Optional: Enter a description for the site.
- Click Save.
- Select the site from the drop-down menu where you want to add the stack.
- Enter a name for the stack.
- Optional: Enter the location. Sophos Central uses Google Maps. You must enter a real address.
- Optional: Enter a description for the stack.
- Click Save.
Synchronize, move, and run commands
You can manage certain tasks for all your switches from the Switches page. Select the sites, stacks, and switches you want to manage, then click the following options:
- Synchronize: Synchronize the selected switches with Sophos Central. Click Synchronize again to send any queued settings in Sophos Central to your switches. You can monitor the progress in the Task queue. See Task queue.
-
Move: Move the selected switches to a new site or stack. You can move entire stacks to a new site, or move switches individually.
- Stacks: After selecting the stacks and clicking Move, select the new site from the drop-down menu and click Save.
- Switches: After selecting the sites and stacks and clicking Move, select Select switches to move individually, select a new site or stack from the drop-down menu, and click Save.
Warning
Moving your switch to a new site or stack clears the switch-level settings applied in Sophos Central. Sophos Central then updates the switches with the new site configuration, which is added to the existing settings on the switch.
-
Run commands: Run CLI commands on the selected switches. Enter one command per line and press Execute when finished. Sophos Central creates a task that runs the commands individually in the order entered. See CLI commands.
Note
Changes made in the CLI, even when the commands are run in Sophos Central, aren't shown in Sophos Central.
Warning
If you select a site, stack, or multiple switches, Sophos Central sends the commands to all the selected switches.
Switch, site, and stack details
The overview page shows information about all the switches you've registered with Sophos Central. You can choose Tree view to organize your switches by site or Flat view to see a list of all your switches. The list is separated into pages if there are more than 10 switches or sites. You can view your switches and sites 10, 25, or 50 at a time.
The page shows the following information for each switch:
- Serial number: The serial number of the switch. Click the serial number to view the switch configuration page.
- Alerts: The number of alerts for the switch. Click the alert number to open the alerts page and view more details. See Alerts.
-
Status: The status of the switch and your current support subscription. You'll see one of the following statuses:
- Synchronized: The switch is connected to Sophos Central, and all settings are synchronized.
- Waiting for sync: Changes have been made in Sophos Central and are awaiting synchronization with the switch.
- Pending: Changes have been pushed to the switch, and Sophos Central is awaiting confirmation.
- Syncing: Sophos Central is synchronizing settings with the switch.
- Out of sync: Sophos Central has detected settings on the switch that aren't synchronized.
- Manual synchronization needed: Automatic synchronization failed. Check the task queue for more details. See Task queue.
- Firmware too old: A new firmware version was released more than 180 days ago, and the switch hasn't been upgraded. You can't push any policies from Sophos Central until you update the firmware. See Manage firmware.
You must purchase a support subscription for each switch you've deployed. Your Sophos Switch support license subscription is synchronized to Sophos Central. If there's an issue with your support subscription, you'll see one of the following statuses:
- Suspended: Sophos Central has suspended switch management until a valid support subscription is applied.
- No subscription: No support subscription is applied to the switch.
- Oversubscribed: You have more switches registered in Sophos Central than support subscriptions.
-
Expired subscription: Your support subscription has expired.
Warning
You can't make changes to your switch without a valid Sophos Switch support license. See Sophos Switch support and services licensing.
-
Version: The firmware version of the switch. Click the version to manage the firmware on your switch. You can see the following icons next to your firmware version:
 : A green circle with an arrow indicates that a firmware upgrade is available for the switch. See Manage firmware.
 : A clock indicates that a firmware upgrade is scheduled.
- No icon indicates that the firmware is up to date.
-
Location: The location you've assigned to your switch. See Switch management.
- Ports: The number of ports the switch has.
- Model: The switch model.
- VLANs: The VLAN IDs that are active on the switch. Hover over a VLAN ID to show its name, VLAN ID, tagged ports, and untagged ports.
- Tags: Custom tags you've assigned to the switch. See Switch management.
- Backups: The number of backups stored in Sophos Central for the switch. A clock icon shows that scheduled backups are running for the switch. See Backup.
Manage firmware
Clicking the Version for a switch lets you manage its firmware. You can schedule upgrades for new firmware versions and swap them to previous ones stored on the backup partition.
- Go to My Products > Switches > Switches. If new firmware is available, a green circle with an arrow appears next to the firmware version in the switches overview table.
- Click the firmware version, then click Schedule an upgrade.
- Click Choose Schedule.
- Select Now to upgrade the switch firmware immediately, or click Custom to schedule a specific time for the upgrade.
- Click Save.
- Go to My Products > Switches > Switches.
- Click the firmware version for the switch you want to swap, then click Schedule swap firmware.
- Click Choose Schedule.
- Select Now to upgrade the switch firmware immediately, or click Custom to schedule a specific time for the upgrade.
- Click Save.