Create user groups
We recommend that you create a new user group or groups for your guest users.
You can use groups to give more granular access control. For example, you can put contractors and suppliers in different groups and give each group access to only the apps it needs.
Note
You can use existing groups if you prefer, but they must be security enabled. Groups created in Microsoft Entra ID (Azure AD) are automatically security enabled, but groups created from the Microsoft 365 portal or imported from AD aren't.
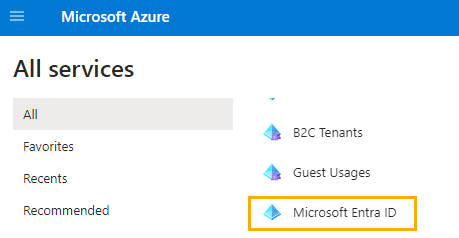
To create a user group in Microsoft Entra ID (Azure AD), do as follows.
- Sign in to the Azure portal using a Global administrator account for the directory.
-
Select Microsoft Entra ID.
-
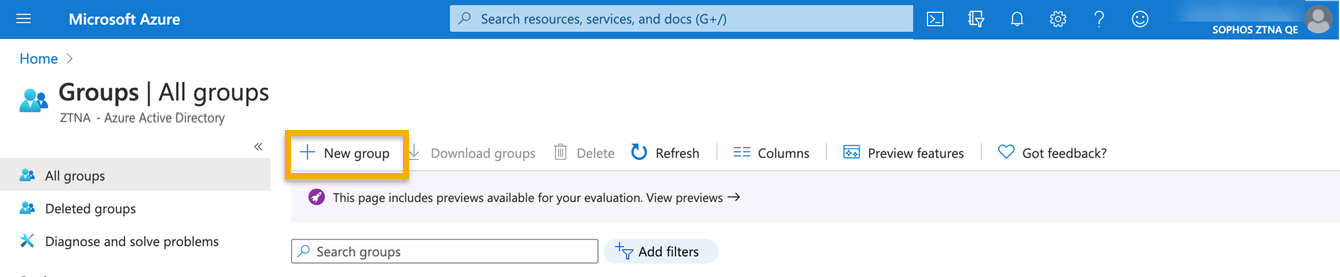
On the Active Directory page, select Groups. Click New Group.
-
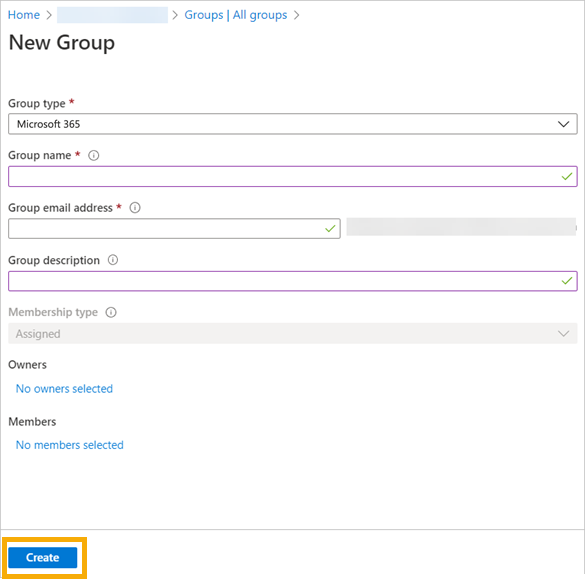
In the New Group dialog, fill out the fields.
- Select a Group type. In this example, Microsoft 365.
- Enter a Group name.
- Enter a Group email address or accept the default address shown.
- Select the Membership type. Use Assigned, which lets you choose specific users and give them unique permissions.
-
Click Create.
The group is created.
You add members to the group later.
Next, you assign resources (apps) to the new groups.