Add resources
Now you add the resources (apps and web pages) that users will access through the gateway.
The ZTNA agent intercepts traffic based on FQDN only. Users must access apps using the external FQDN of the app, not the IP address.
If you add a resource that redirects the user to a different URL after authentication or that links to other resources, add those resources too. For example, if you add wiki.mycompany.net and the wiki links to jira tickets, add jira.mycompany.net.
You can enforce the use of Protected Browser for agentless access to applications and resources. See Protected Browser Enforcement.
How to add resources
To get step-by-step instructions for on-premises gateway and Sophos Cloud gateway, click the tab for your deployment type below
To add resources, do as follows:
-
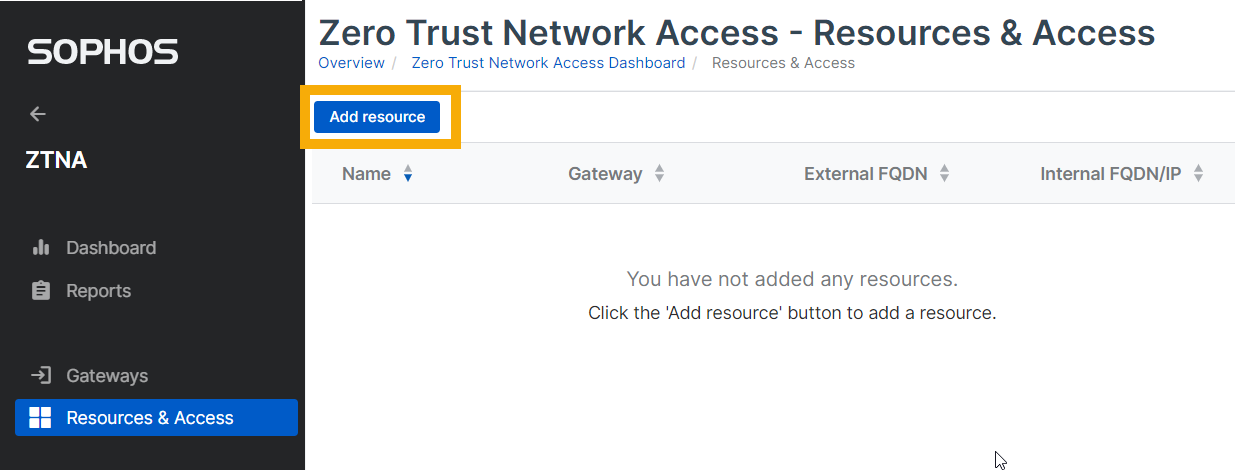
Go to My Products > ZTNA > Resources & Access and click Add Resource.
-
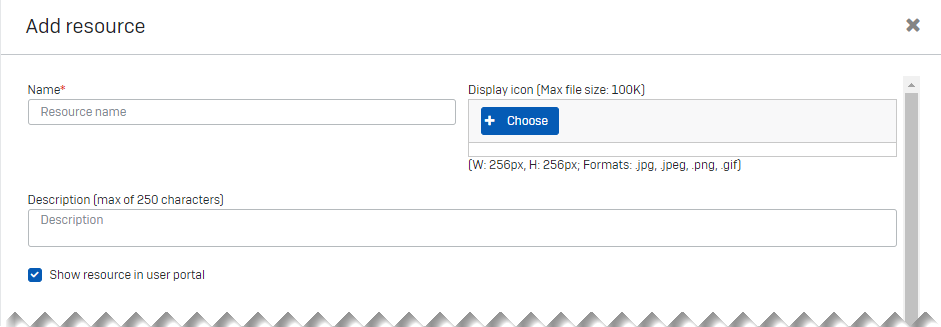
In Add Resource, do as follows:
- Enter the resource name and description.
- Check that Show resource in user portal is selected.
-
Specify the access type and resource details as follows:
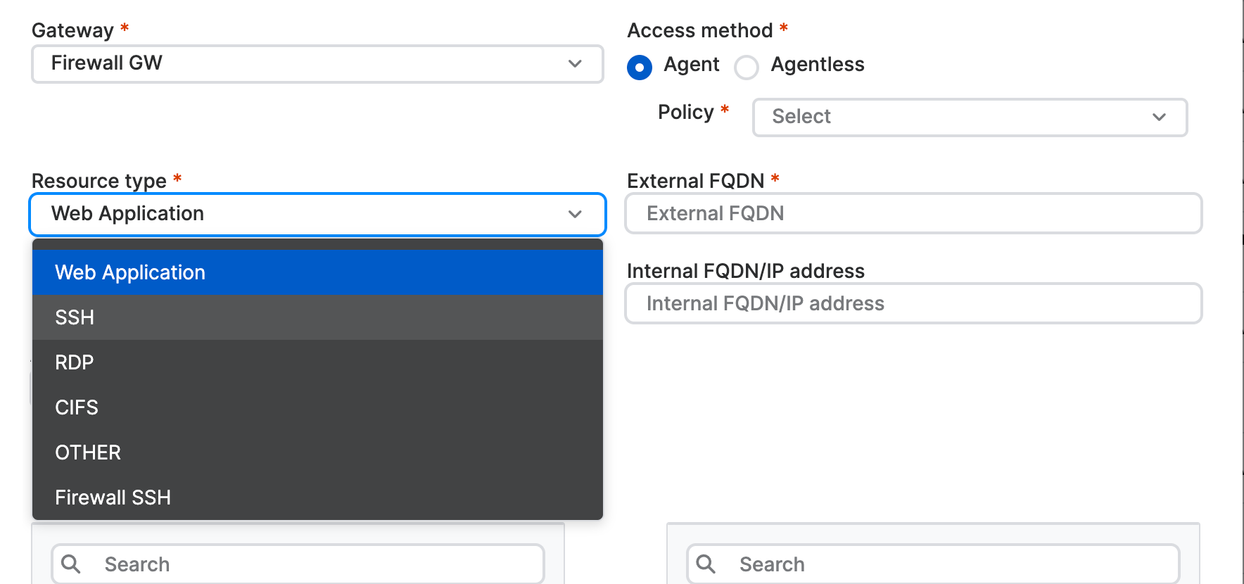
- Select a Gateway.
- In Access method, select Agent to access the resource with the ZTNA agent or Agentless to access the resource without it. Also select the Policy to apply.
- Select the Resource type (for example, Web Application).
-
Enter the External FQDN and Internal FQDN/IP address of the resource.
Warning
If you selected agentless access, the external FQDN must be publicly available. If you selected agent access, the external FQDN must not be publicly available.
Note
You don't need to add an internal FQDN or IP address. If you leave the Internal FQDN/IP address field blank, the external FQDN is added automatically.
-
Provide the port type and number (for example, HTTPS and port 443 for a web app).
You can use up to 20 TCP and UDP ports to provide access to a resource. You can add a comma separated port range. Example: TCP 26-27, 20-24.
-
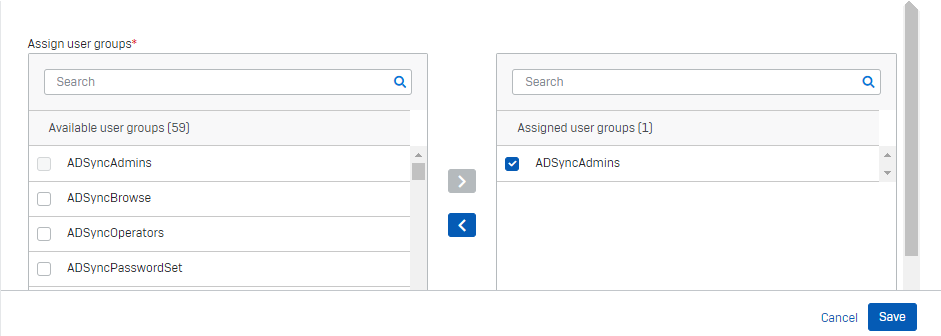
In Assign User Groups, select the available groups that need access to the resource. Move them to Assigned User Groups and select them.
Note
If you change the name of an assigned Microsoft Entra ID (Azure AD) user group later, the list isn't updated. Users won't be able to access the app, and you'll need to assign the group again.
-
Click Save.
-
Check that you can access the app you added.
You can verify the SSL certificate and ensure it's the same wildcard certificate that was uploaded to the gateway.
-
Repeat the above steps for any other resource that this resource might redirect the user to.
Note
To edit or remove resource information, go to Resources & access, then click the resource name to open Resource details.
Note
If you're using latency-sensitive applications, such as CIFS or SMB file shares, we recommend using on-premises gateways for better performance.
To add resources, do as follows:
-
Go to My Products > ZTNA > Resources & Access and click Add Resource.
-
In Add Resource, do as follows:
- Enter the resource name and description.
- Check that Show resource in user portal is selected.
-
Specify the access type and resource details as follows:
- Select a Gateway.
- In Access method, select Agent to access the resource with the ZTNA agent or Agentless to access the resource without it. Also select the Policy to apply.
-
Select the Resource type (for example, Web Application).
-
Enter the External FQDN and Internal FQDN/IP address of the resource.
Warning
If you selected agentless access, the external FQDN must be publicly available. If you selected agent access, the external FQDN must not be publicly available.
-
Provide the port type and number (for example, HTTPS and port 443 for a web app).
You can use up to 20 TCP and UDP ports to provide access to a resource. You can add a comma separated port range. Example: TCP 26-27, 20-24.
-
In Assign User Groups, select the available groups that need access to the resource. Move them to Assigned User Groups and select them.
Note
If you change the name of an assigned Microsoft Entra ID (Azure AD) user group later, the list isn't updated. Users won't be able to access the app, and you'll need to assign the group again.
-
Click Save.
You'll see a Resource added pop-up which shows the Alias domain.
-
Check that the Alias domain is the same as the one generated when you set up your gateway.
Note
If your Access method is Agent, the alias domain isn't generated.
-
Check that you can access the app you added.
You can verify the SSL certificate and ensure it's the same wildcard certificate that was uploaded to the gateway.
-
Repeat the above steps for any other resource that this resource might redirect the user to.
Note
You can turn off resource connection pooling. For details, see Sophos Central: ZTNA Settings.
DNS entries
The DNS entries required for agentless and agent based resources are different.
Agentless based resources
-
When you add a FQDN for the Sophos Cloud gateway, a gateway alias domain is generated. You must add this as a CNAME record on your public DNS server.
-
When you add a FQDN for the resource, a resource alias domain is generated. You must add this as a CNAME record on your public DNS server.
When you access a resource via its FQDN, you're redirected to the alias domain.
Agent based resources
-
When you add a FQDN for the Sophos Cloud gateway, a gateway alias domain is generated. You must add this as a CNAME record on your public DNS server.
-
An alias domain isn't generated for agent-based resources. Therefore, you shouldn't add CNAME records for resources.
-
Don't add any wildcard DNS entries.
IP based access
If a user attempts to access an internal resource by typing its IP address into the browser, the user goes directly to the resource, bypassing ZTNA. To ensure users access the internal resource by FQDN, you can add firewall rules.
Domain controller as an agent-based resource
You must define your domain controller as an agent-based resource to provide seamless connectivity to the resources behind it.
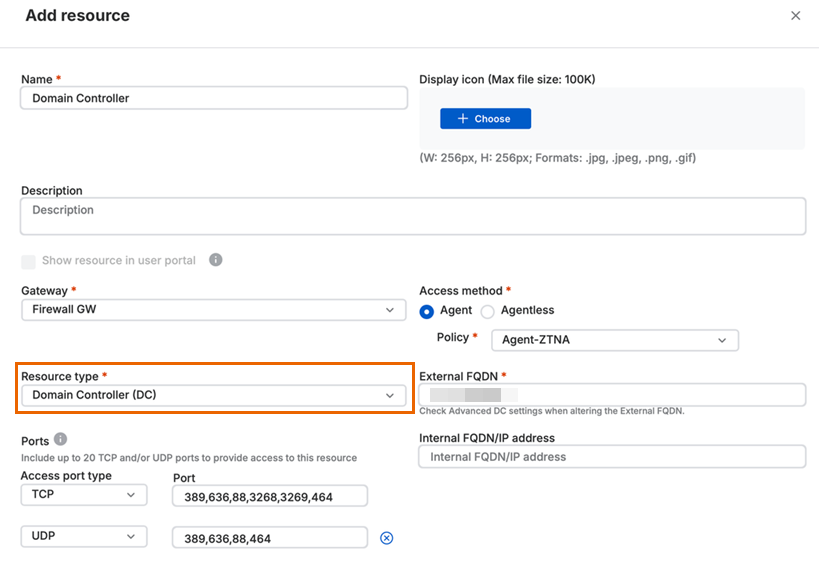
When you set the Resource type as Domain Controller (DC), the default port list is automatically populated with some of the default ports. You can edit the list to add custom ports.
The ports you should add are as follows:
TCP: 53, 80, 88, 135, 139, 389, 443, 464, 636, 3268, 3269, and 49152-65535.
UCP: 88, 389, 464, 636, 4389, and 63664.
Note
Make sure you verify and add the correct custom ports that you need. You can also raise a feature request to add a new built-in resource type in Sophos Community: Sophos ZTNA.
The External FQDN should be the external FQDN of the domain controller, not the root domain.
The DNS Service (SRV) records that discover servers for specific services are automatically added under Advanced Domain Controller settings. You can update these records.
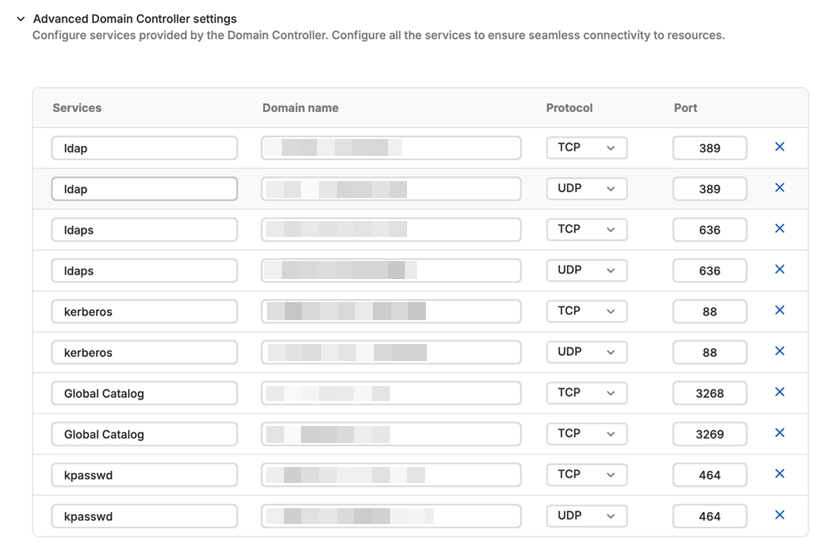
You can also add additional records. To do this, enter the service name and corresponding domain name, select the protocol, and enter the port number.
Note
- If you configure a domain controller with an external FQDN, you must make sure that the domain names for individual SRV records under advanced settings are correct.
- When you update the ports under advanced settings, you must make sure that the correct ports are shown in the ports field for the resource.
Under Assign user groups, make sure you assign all user groups that may need access to resources behind your domain controller.