Set up an identity provider
Now set up an identity provider. The ZTNA gateway authenticates users based on records held by the identity provider.
Note
You can only add one entry for each identity provider.
The steps depend on which provider you want to use.
You can use Microsoft AD (on-prem) for user synchronization and as an identity provider.
Note
If you're setting up an on-premises Microsoft AD as an identity provider, and hosting the gateway on an ESXi server or Microsoft Hyper-V server, your ZTNA gateway must be on version 2.1 or later.
If you're setting up an on-premises Microsoft AD as an identity provider, and hosting the gateway on Sophos Firewall, the firewall must be on version 19.5 MR3 or later.
Make sure you've already set up Active Directory user groups and synced them with Sophos Central. See Set up synchronization with Active Directory.
Note
Primary user groups aren't synced from Active Directory, so users belonging to these groups won't be able to access resources. You must make sure users are also members of other AD groups.
Note
In ZTNA, we only support a single domain. We don't support multiple child domains within a single forest scenario.
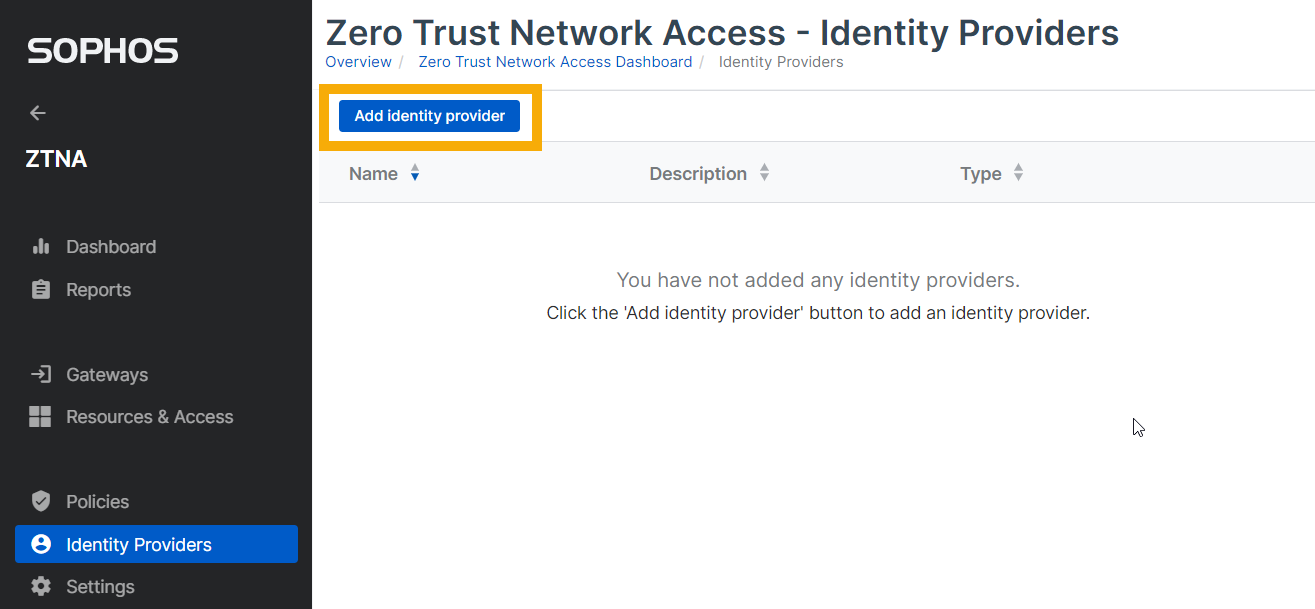
- Sign in to Sophos Central.
- Go to My Products > ZTNA > Identity Providers.
-
Click Add identity provider.
Identity provider settings
Enter your identity provider settings as follows:
- Enter a name and description.
- In Provider, make sure Microsoft AD (on-prem) is selected.
Configure Active Directory (AD) settings
-
Configure the following settings:
-
Enter your primary AD server's host and port details. You can enter your secondary server's details if needed.
Note
The secondary server must belong to the same domain as the primary server. If your primary server isn't available, the secondary server will provide redundancy.
-
Optional: Configure TLS and SSL settings.
You can select one of the following options:
- TLS Enabled: Uses TLS to protect the username and password information used to log in to the LDAP server.
- Start TLS: Allows the LDAP server to listen on an unencrypted port (normally 389) for LDAP connections, and then switch to TLS.
If you select Verify SSL certificate, you must upload your LDAP server's SSL certificate in one of the following formats:
.pem,.crt, or.cer. The maximum certificate size is 10 KB.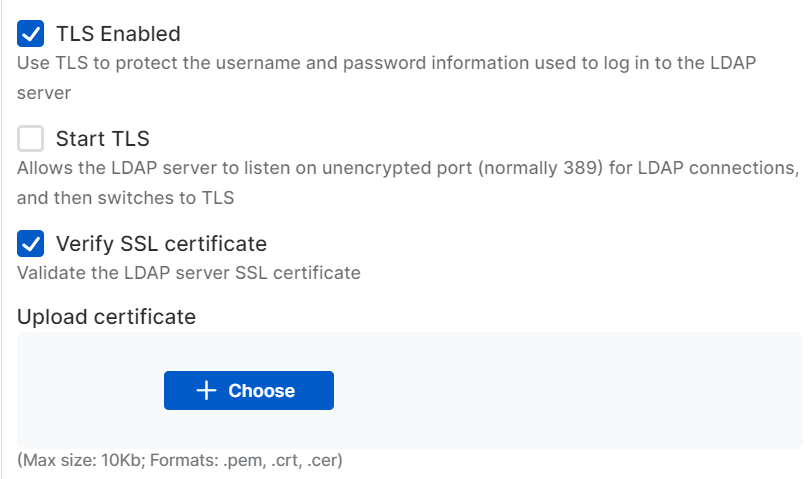
-
Account and password
In Bind DN, enter your domain controller details and your Bind password.
For more information, see Find the Bind and Base distinguished names on the AD server.
Active Directory search
-
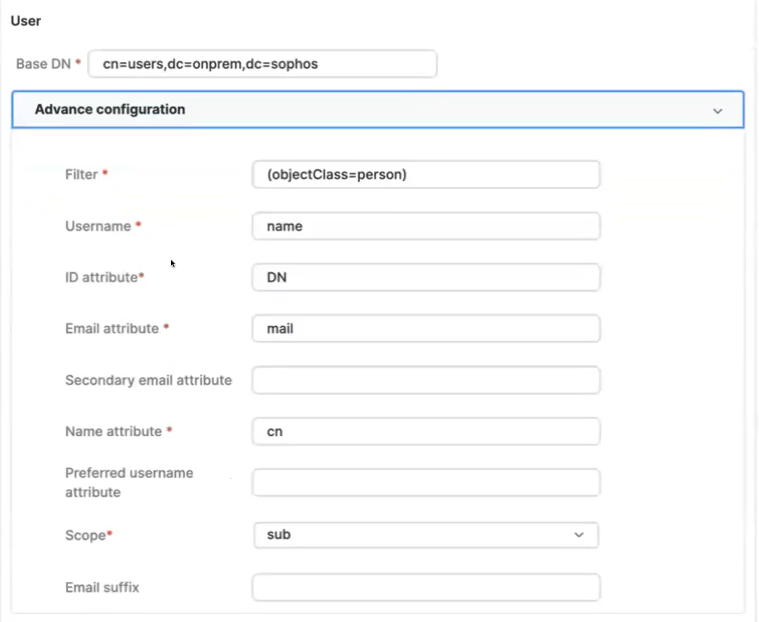
Under User, enter your AD server details in Base DN. The advanced configuration is set to default, but you can change it if needed.
-
Under User group, enter your AD user details in Base DN. The advanced configuration is set to default, but you can change it if needed.
Advanced Security Settings
- Optional: Turn on Captcha to ensure secure sign-in. This reduces the risk of a brute force attack on your directory.
-
Optional: Turn on Email-based One Time Password so you can authenticate users with multi-factor authentication (MFA). Enter the following SMTP settings:
- SMTP server host: The SMTP server's IP address or hostname.
- SMTP port number: The port number you access the SMTP server on.
- SMTP email: The default email address bounce-back messages are sent to.
- Email subject: The subject line for the email containing the one-time password (OTP).
- If the SMTP server requires credentials to relay emails, you must enter the SMTP login and SMTP password.
-
Optional: Configure TLS and SSL settings.
You can select one of the following options:
- TLS Enabled: Uses TLS to protect communication between the SMTP server and client.
- Start TLS: Starts the negotiation between the SMTP server and the client to choose the encryption method.
If you select one of the above options, you'll see the Verify SSL certificate option. If you select Verify SSL certificate, you must upload your SMTP server's SSL certificate in one of the following formats:
.pem,.crt, orcer. The maximum certificate size is 10 KB.
Test Connection
Optionally, you can test the connection.
Note
Before you test the connection, check whether the email field for the user on the primary AD server contains a valid email address. If the email address entered for a user is blank or invalid, then the test connection fails.
-
To test the connection, do as follows:
-
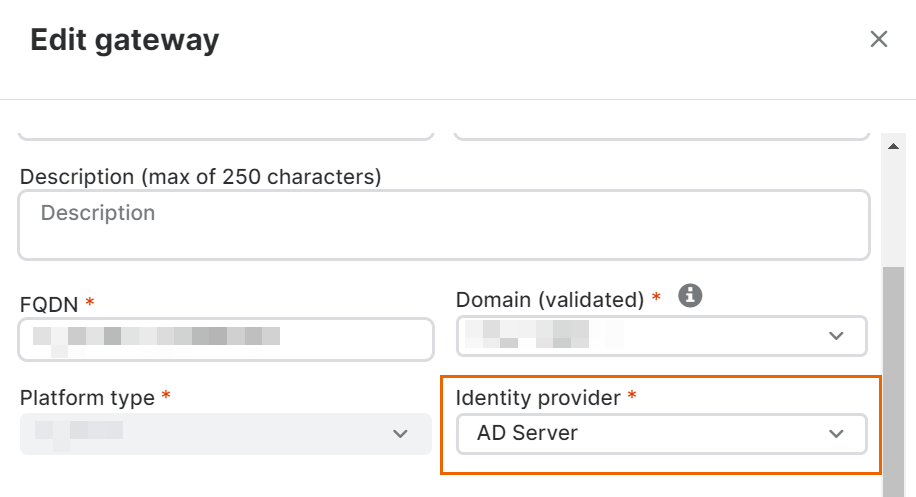
Assign your identity provider to a gateway. To do this, go to the Gateways page, click the name of your gateway, and click Edit. In Identity Provider, select the identity provider you just created.
Note
If you haven't created a gateway yet, test your connection after you create your gateway and assign it to your identity provider.
-
Go back to Identity Providers, and click the name of your new identity provider.
- Under Test Connection, select the gateway name, and optionally enter the username.
-
Click Test Connection and make sure the connection is made.
If you entered the username, you'll see which groups that user belongs to.
-
-
Click Save.
Your users will now be able to authenticate through the AD server when they access resources behind the gateway.
Note
If you use Microsoft AD (on-prem) as your identity provider and you access resources hosted behind different ZTNA gateways, you're prompted to authenticate with each gateway the first time you access a resource. If you use other IdPs, once you've authenticated with any ZTNA gateway, you aren't prompted to authenticate again when you access resources hosted behind different gateways.
Note
If you use Microsoft AD (on-prem) as your identity provider, you can only be authenticated on one device at a time. If you attempt to access resources using a secondary device, you're automatically logged out of the first device after authentication.
You can use Microsoft Entra ID (Azure AD) for user synchronization and as an identity provider.
Make sure you've already set up Microsoft Entra ID (Azure AD) user groups and synced them with Sophos Central.
- Sign in to Sophos Central.
- Go to My Products > ZTNA > Identity Providers.
-
Click Add identity provider.
-
Enter your identity provider settings as follows:
- Enter a name and description.
- In Provider, ensure Microsoft Entra ID (Azure AD) is selected.
-
Enter the Microsoft Entra ID (Azure AD) settings for Client ID, Tenant ID, and Client secret.
If you set up Microsoft Entra ID (Azure AD) as described in this guide, you gathered these settings when you created the tenant. See Set up directory service.
-
Click Test Connection and make sure the connection is made.
- Click Save.

If you're setting up Okta as an identity provider, your ZTNA gateway must be version 1.1 or later.
You can use Okta as your identity provider. To use Okta with ZTNA, you do as follows:
- Create an app integration.
- Add the identity provider to ZTNA.
Before you begin, make sure you fulfill the following requirements:
- You must have configured user groups in Okta. If you haven't, use Okta's tools to synchronize groups from your directory service to Okta. Make sure you've also synchronized your groups with Sophos Central.
- You must have configured an authorization server in Okta to support authentication based on OpenID Connect (OIDC). You can also use the default Okta authorization server with SSO and Universal Directory licenses. If you use a custom authorization server, you must have an API Access Management license.
Create an app integration
-
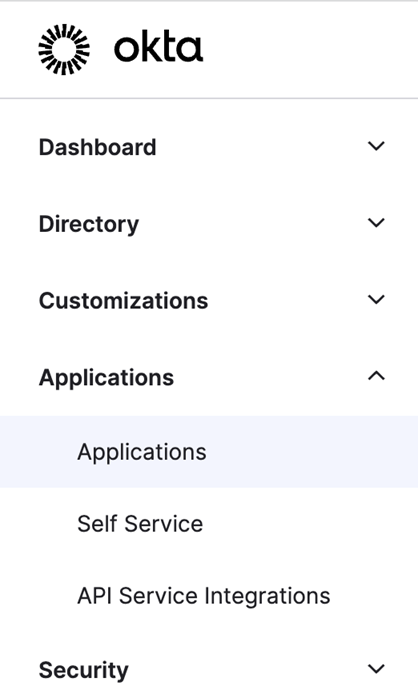
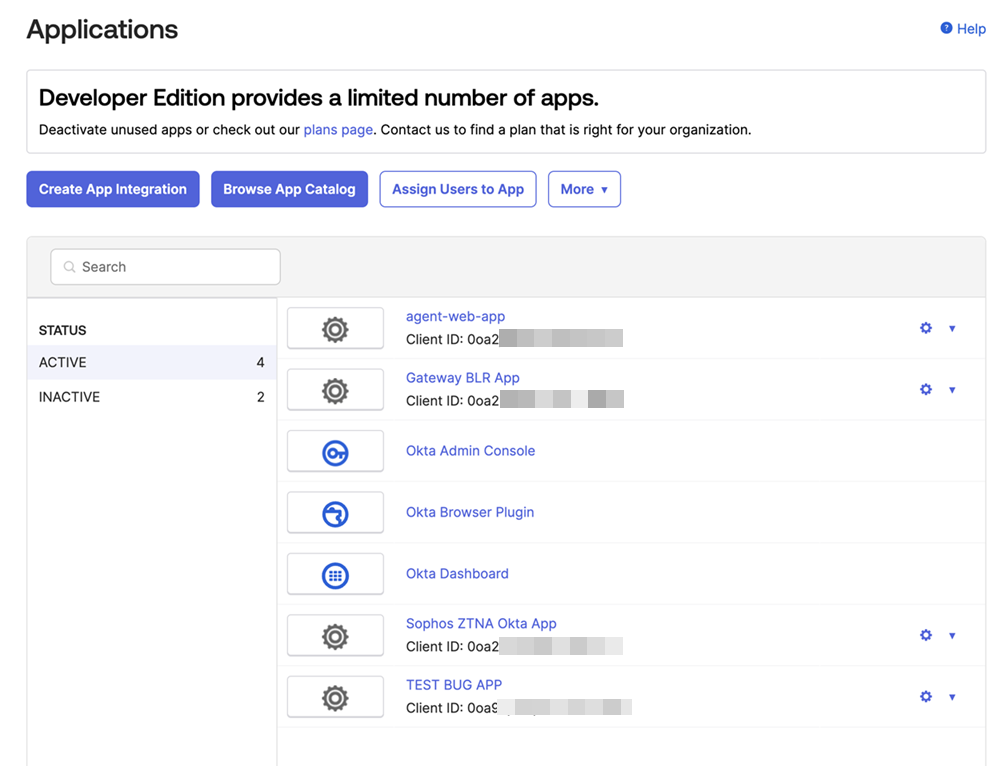
In the Okta dashboard, go to Applications.
-
Click Create App Integration.
-
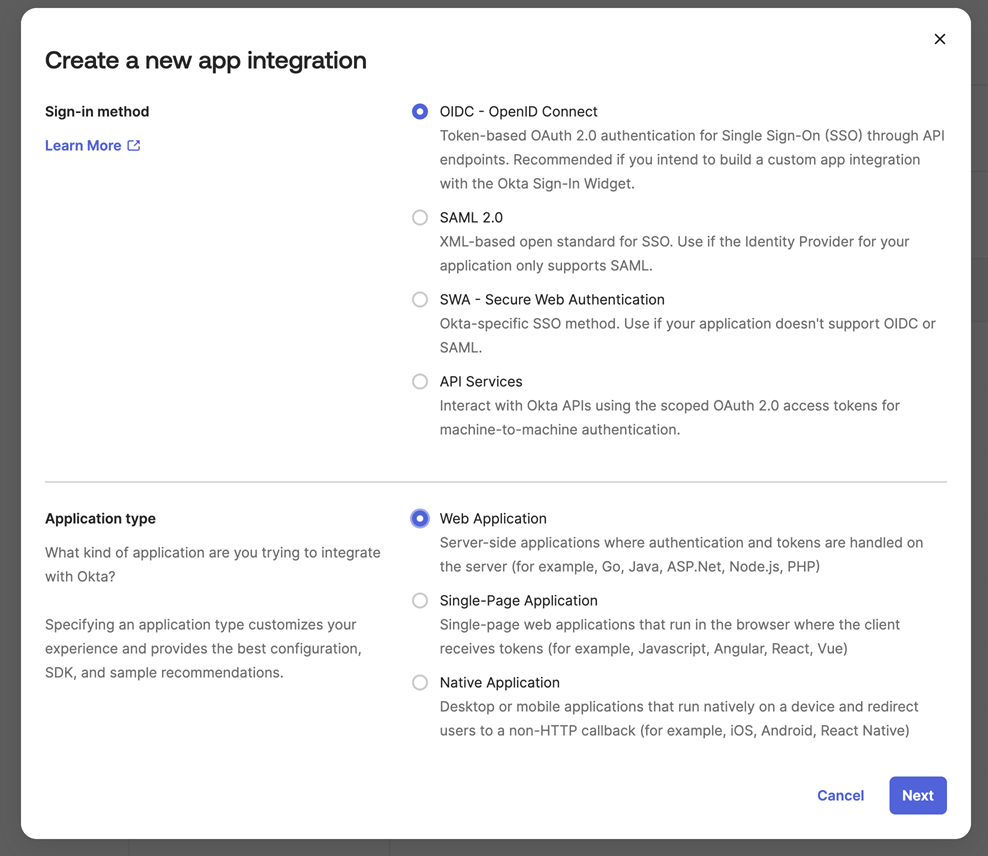
In Create a new app integration, do as follows:
- Select OIDC.
- Select Web Application.
-
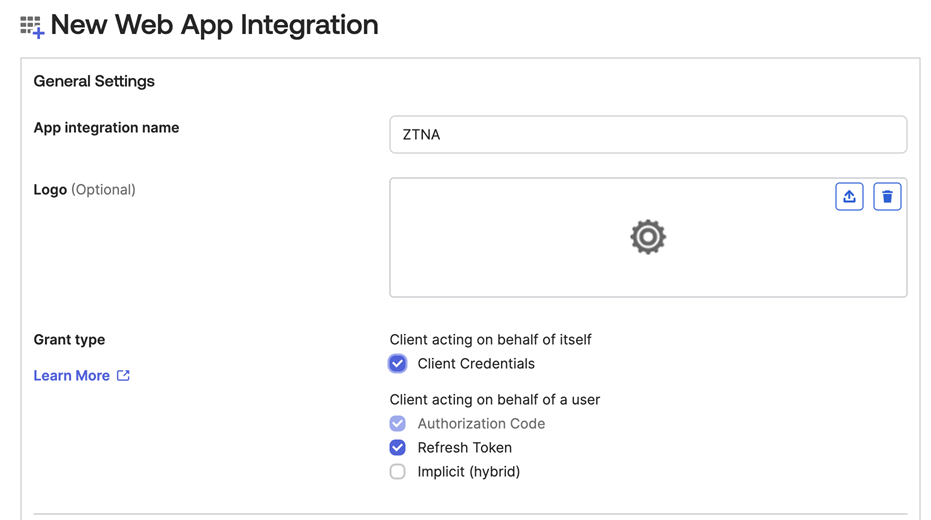
In New Web App Integration, do as follows:
- Enter a name.
- Select Client Credentials.
- Select Refresh Token.
-
On the same tab, in Sign-in redirect URIs, enter the address where Okta will send the authentication response and token. This must be the gateway host FQDN followed by /oauth2/callback. For example:
https://ztna.mycompany.net/oauth2/callback
Note
If you set up a gateway on Sophos Firewall, you must add a new redirect URI in the following format:
https://<gateway's external FQDN>/ztna-oauth2/callback. -
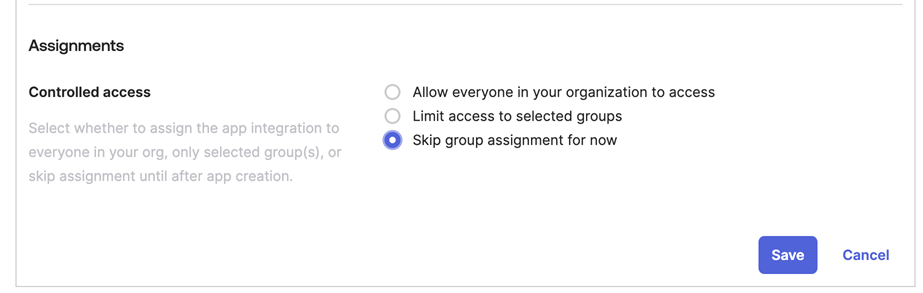
In Assignments, select Skip group assignment for now.
-
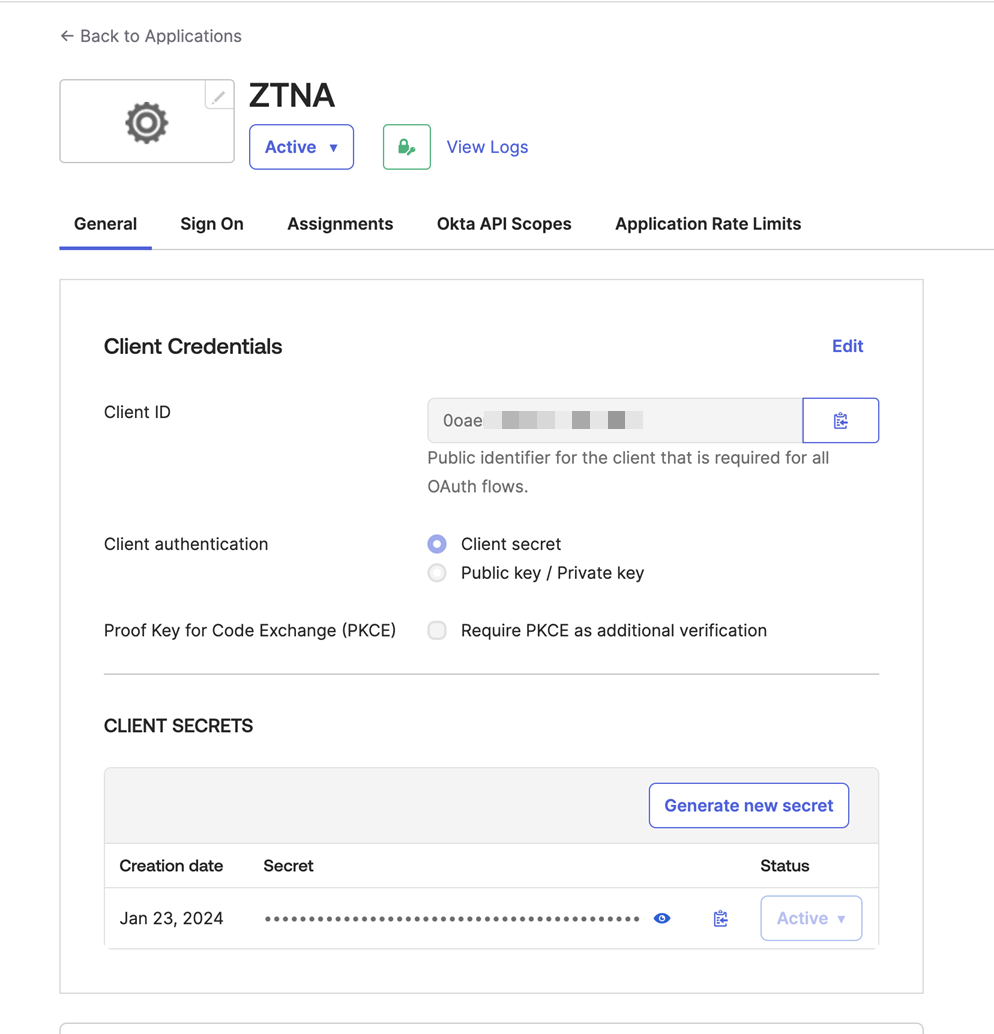
Open your new application. On the General tab, make a note of the Client ID and Client Secret. You'll need them when you set up Okta as your identity provider in Sophos Central.
-
On the Okta API Scopes tab, set the permissions that are needed:
- okta.groups.read
- okta.idps.read
You only need okta.idps.read if you're using AD Sync.

-
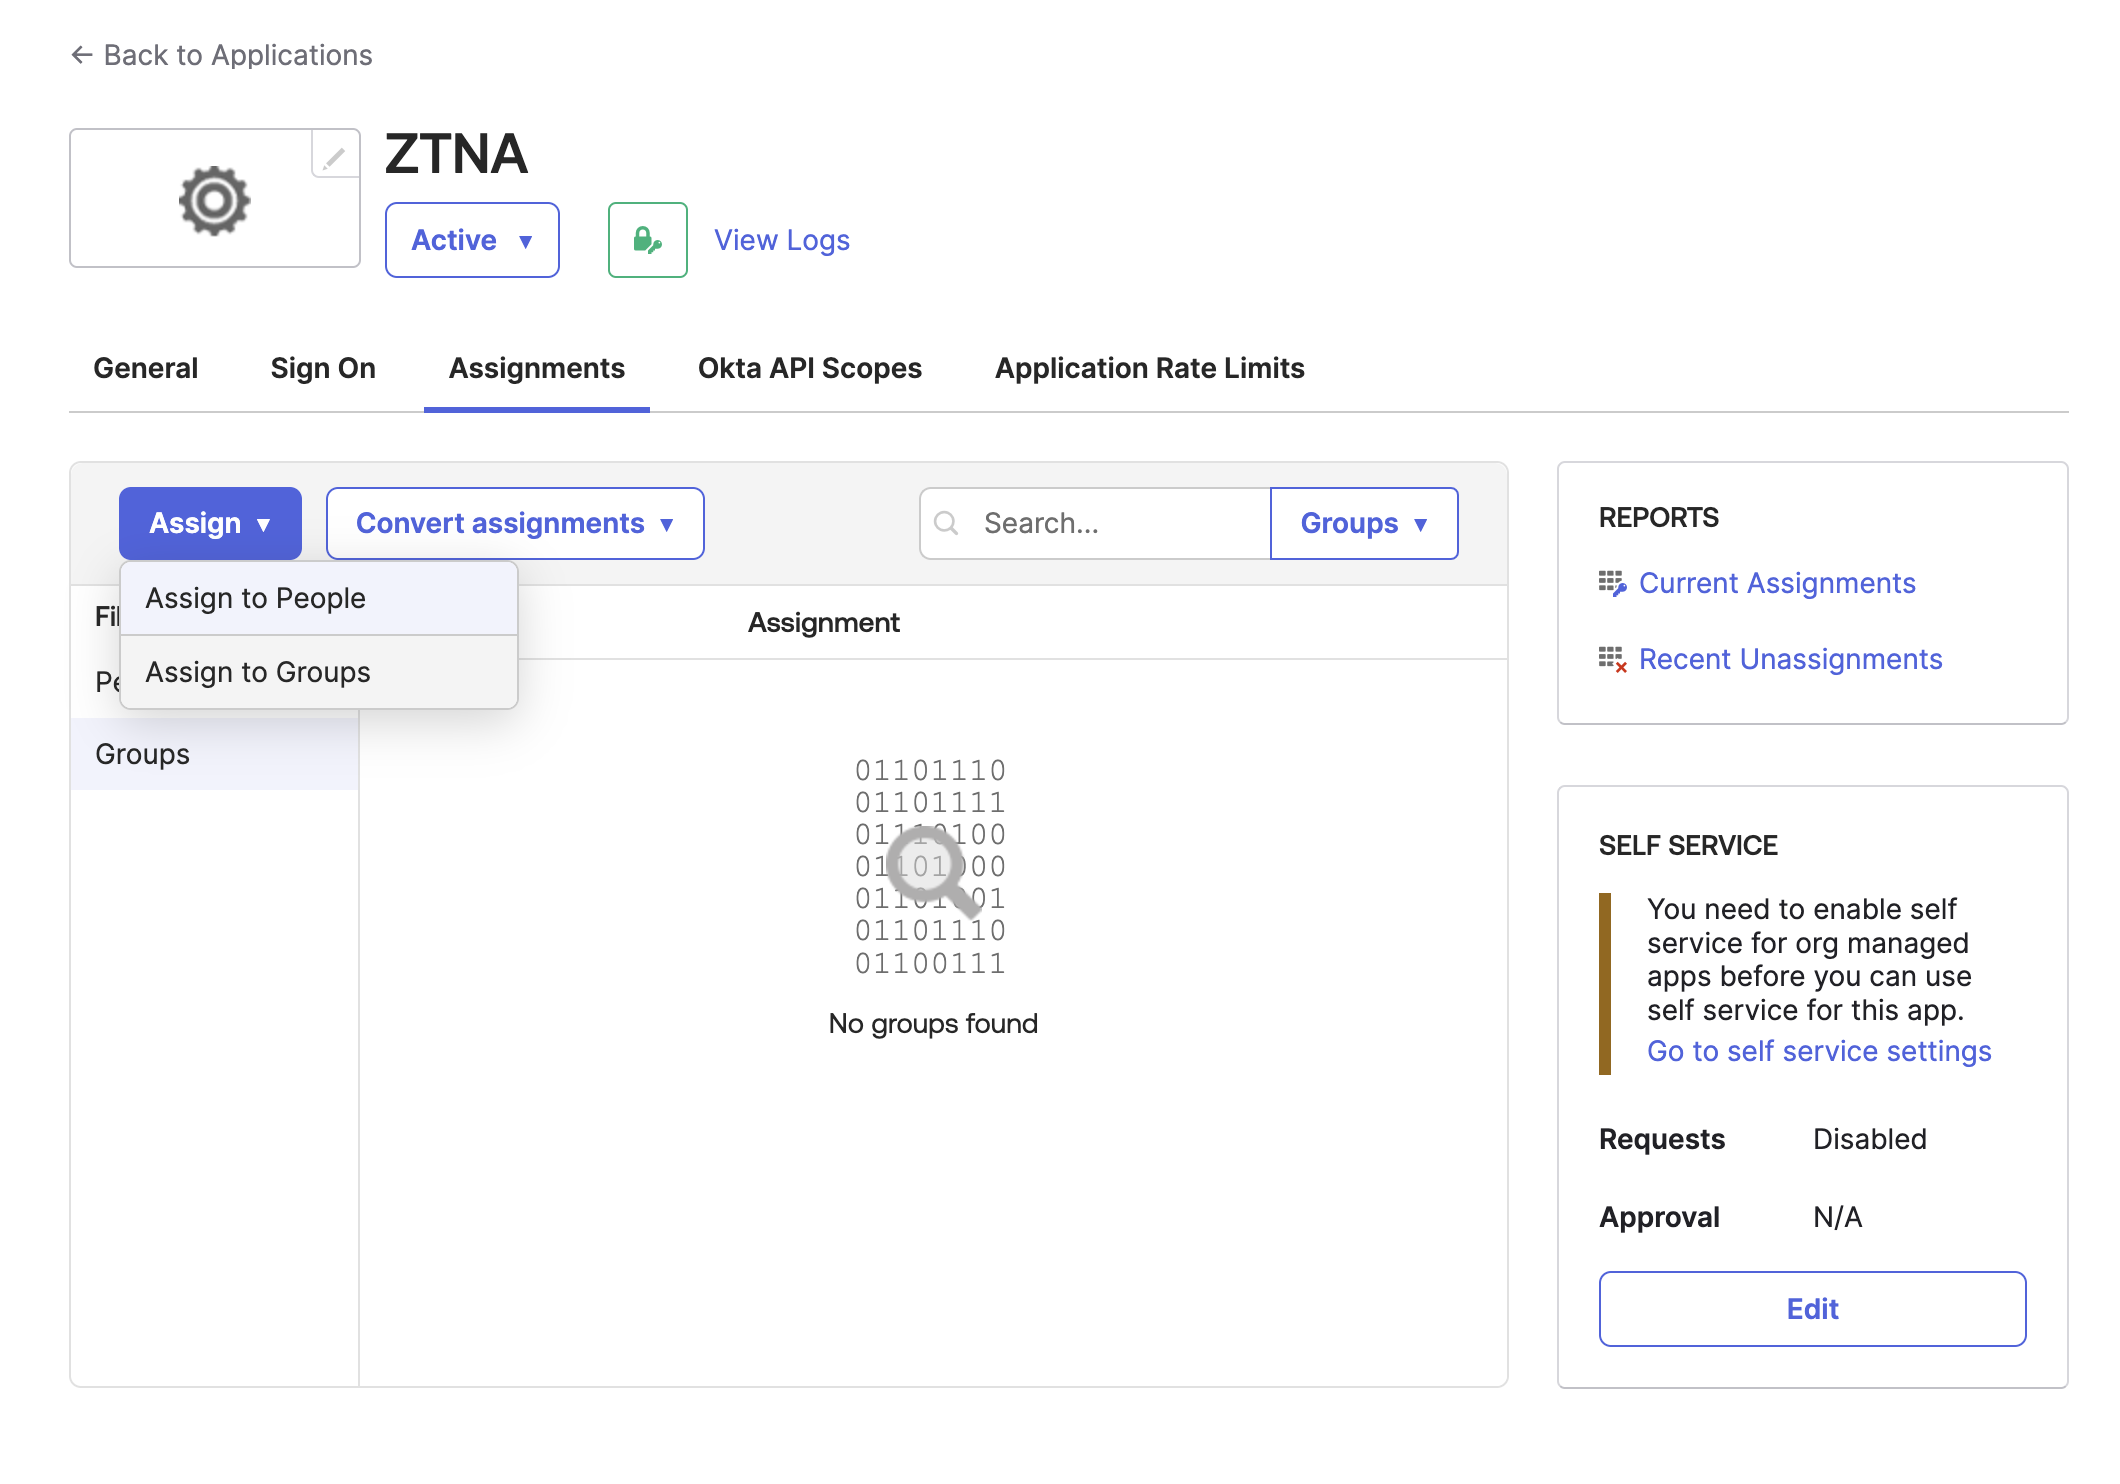
On the Assignments tab, click Assign > Assign to Groups. Select your existing group of users.
-
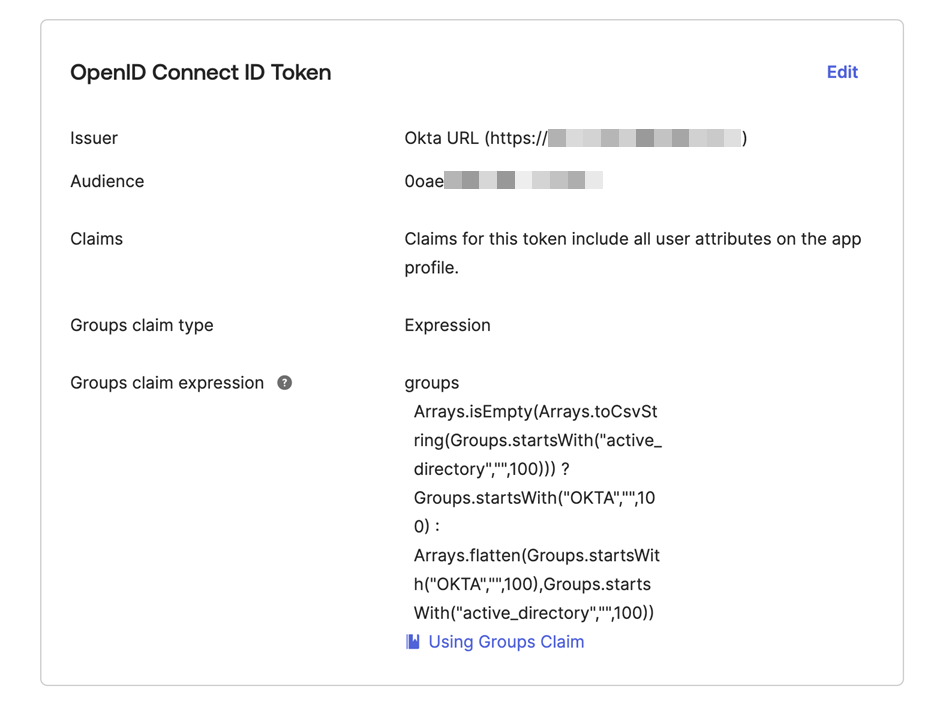
On the Sign On tab, go to OpenID Connect ID Token and do as follows:
- Click Edit.
-
Copy the following expression and paste it in Groups claim expression:
Arrays.isEmpty(Arrays.toCsvString(Groups.startsWith("active_directory","",100))) ?
Groups.startsWith("OKTA","",100) :
Arrays.flatten(Groups.startsWith("OKTA","",100),Groups.startsWith("active_directory","",100))
For more information, see Add a custom groups claim.
-
Click Save.
Add the identity provider to ZTNA
- Sign in to Sophos Central.
- Go to My Products > ZTNA > Identity Providers.
-
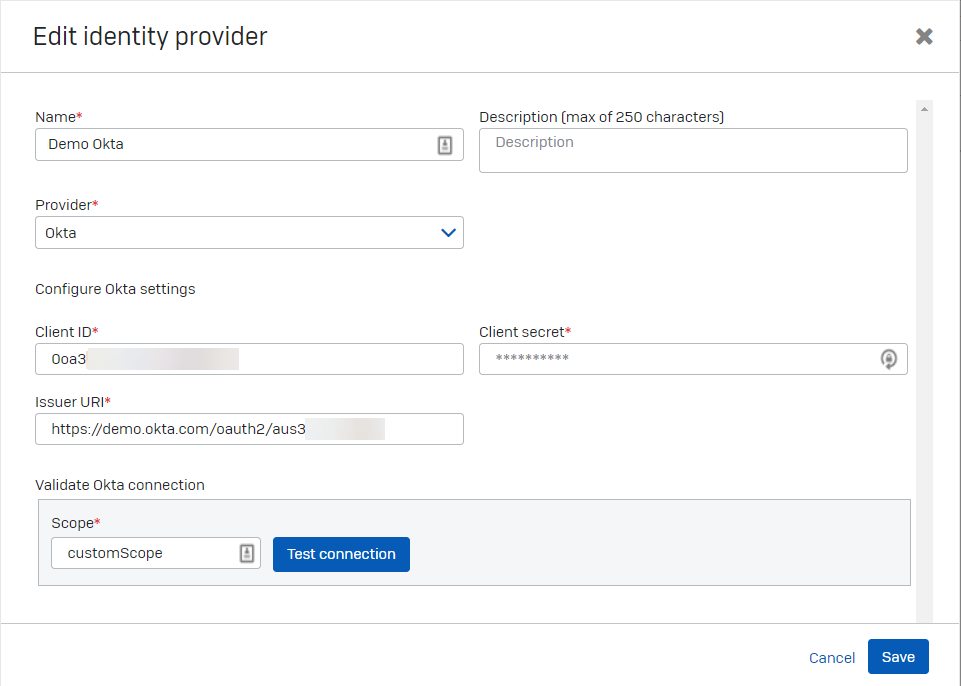
Click Add identity provider.
-
Enter your identity provider settings as follows:
- Enter a name and description.
- In Provider, select Okta.
-
Enter the Okta settings for Client ID, Client secret, and Issuer URI.
These are the Okta settings noted earlier.
-
Click Test Connection and make sure the connection is made.
- Click Save.
Next, you set up a gateway. See Add a gateway.