Manage quarantined messages
You can release, delete, and block quarantined messages from the message list or from Message Details.
Release or delete messages
You can release or delete messages from the message list or from Message Details.
Quarantined messages are deleted after 30 days. If you have a Sophos Email Plus license, they're deleted after 90 days.
Click the tab that matches the quarantine list you're viewing.
- Click Release to release messages from quarantine and deliver them to users.
-
Click Release and Allow to release messages and add the sender's email address to the Inbound Allow/Block list.
In the Release and Allow dialog, you can select Enforce Message Authentication. This requires messages from the allowed sender to pass at least one authentication check, such as DMARC, SPF, or DKIM, before they can bypass scanning. Enforcing authentication helps prevent sender spoofing.
Note
When a message is released from quarantine, Sophos Email rescans it before delivery.
If the message was clawed back from post-delivery quarantine, any associated internally forwarded or replied messages are also released.
-
Click Delete to delete quarantined messages.
- Click Delete and Block to delete messages and add the sender's email address to the Inbound Allow/Block list.
If you've turned on Allow/Block List for your users, you can also add IP addresses and domains to allow or block lists. See User Settings.
- Click Release to request Microsoft 365 to deliver the message.
- Click Delete to request Microsoft 365 to delete the message.
Scan attachments with Intelix
This feature is available only for email security quarantine messages that contain attachments.
You can use Intelix to scan attachments before releasing a quarantined message.
Scan from Message Details
On the Message Details page, click Scan with Intelix.
After you submit the request, Intelix scans the message attachments in the background.
Note
You don't need to wait for the scan to complete. You can return to the Quarantined Messages list and continue working. After the scan is complete, you can review the results in Intelix Threat Summary.
If you remain on the Message Details page until the scan is complete, the result depends on the Intelix verdict:
- If the Intelix verdict is clean or likely clean, you remain on the Message Details page. You can click View Intelix Report to review the scan results.
- If the Intelix verdict is malicious or suspicious, you're automatically redirected to the Intelix Threat Summary report.
Scan before releasing a message
When you click Release or Release and Allow in Message Details, you can choose to scan the attachments with Intelix before releasing the message.
Select the Intelix scan checkbox, and then click Ok.
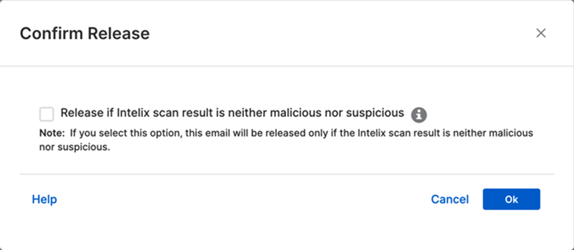
After you submit the request, Intelix scans the message attachments in the background.
Note
You don't need to wait for the scan to complete. You can return to the Quarantined Messages list and continue working. After the scan is complete, you can review the results in Intelix Threat Summary.
If you remain on the Message Details page until the scan is complete, the result depends on the Intelix verdict:
- If the Intelix verdict is clean or likely clean, the message is released. You remain on the Message Details page and can click View Intelix Report to review the scan results.
- If the Intelix verdict is malicious or suspicious, the message remains in quarantine and you're redirected to the Intelix Threat Summary report.
Note
If you selected Release and Allow, the sender is added to the allow list only when the Intelix verdict is clean or likely clean.
Return to quarantine
In the Intelix Threat Summary report, click the link in the banner to return to quarantine.
- For clean or likely clean verdicts, you return to the Quarantined Messages list.
- For malicious or suspicious verdicts, you return to the Message Details page.
Blocking
This feature doesn't apply to the M365 quarantine list.
In Quarantined Messages, click the subject of a message to open Message Details.
Under SMTP From, click Block, then select Block sender or Block sender domain to add the sender's email address or domain to your block list.
You can also click Block IP Address under IP Address to add the IP address to your block list. Alternatively, you can add email addresses and domains from the Inbound Allow/Block list.
Warning
Be careful when you block an IP address. You can accidentally block an entire service. For example, if you block an IP address used by Microsoft 365, you won't receive messages from Microsoft 365 users.
You can add descriptions when blocking a sender's email address, domain, or IP address to specify the reason for each block entry.
Example
Blocked due to spam.
You can view and edit these descriptions later on the Inbound Allow/Block list.
For more information, see Inbound Allow/Block.