Identity Settings
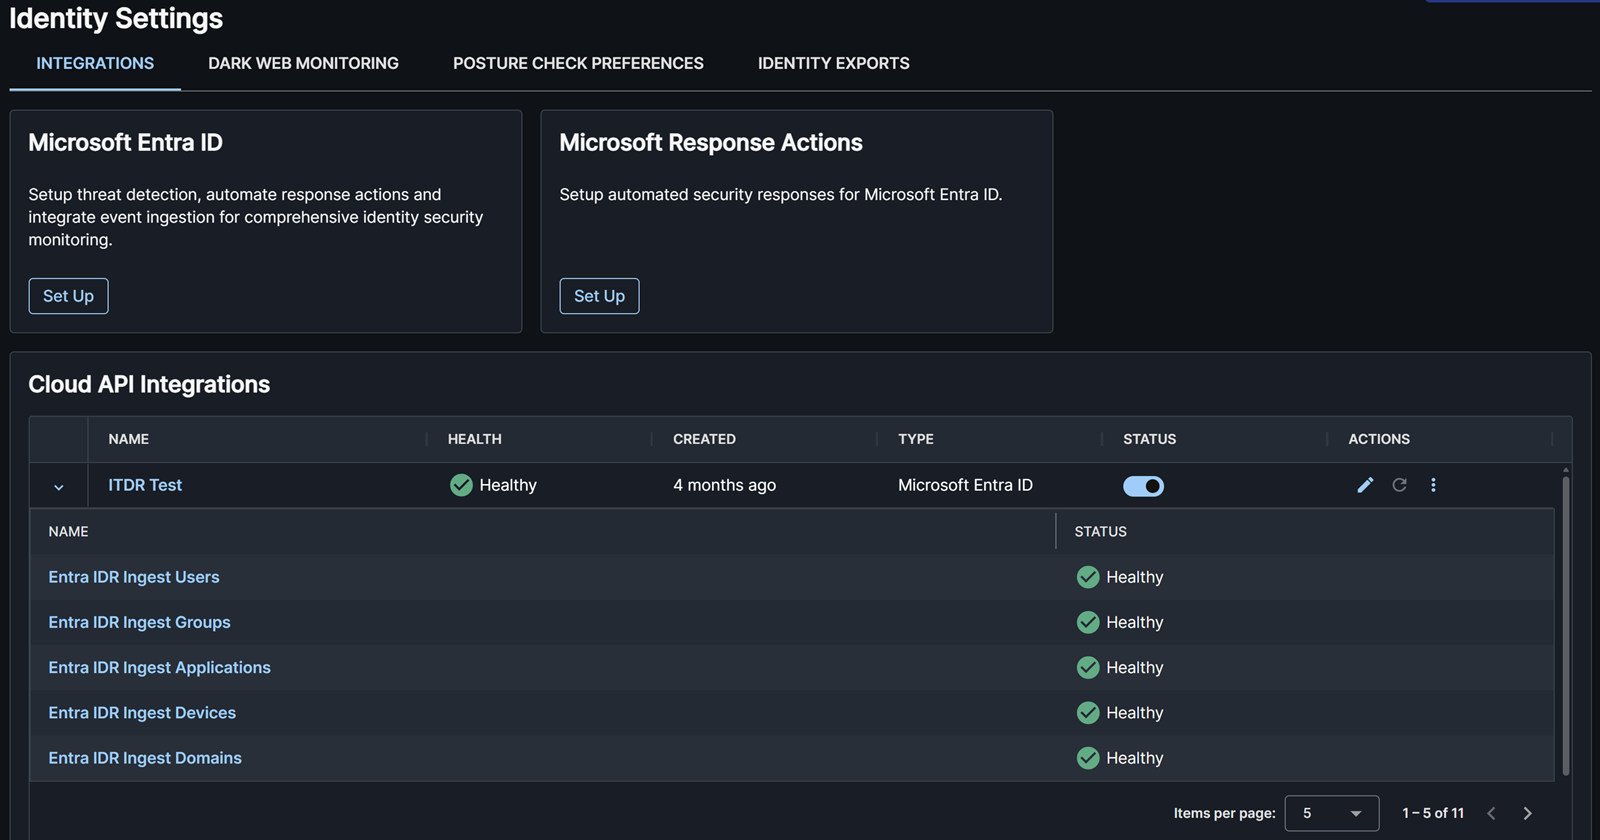
Identity Settings is where you configure your monitored domains, view the identity module integration health, and configure your posture check preferences.
Integrations tab
The Integrations section is where you set up your identity provider integrations for ITDR. For more information, see ITDR integration guide.
If you've already completed the setup, the Configured Integrations table shows the identity provider integrations used to collect data and run the security assessments against your Entra ID and on-premises Active Directory environment. Expand an Entra ID integration row to see the child integrations and their health status.
Note
The parent name will show the child with the most severe error condition.
Disable integration
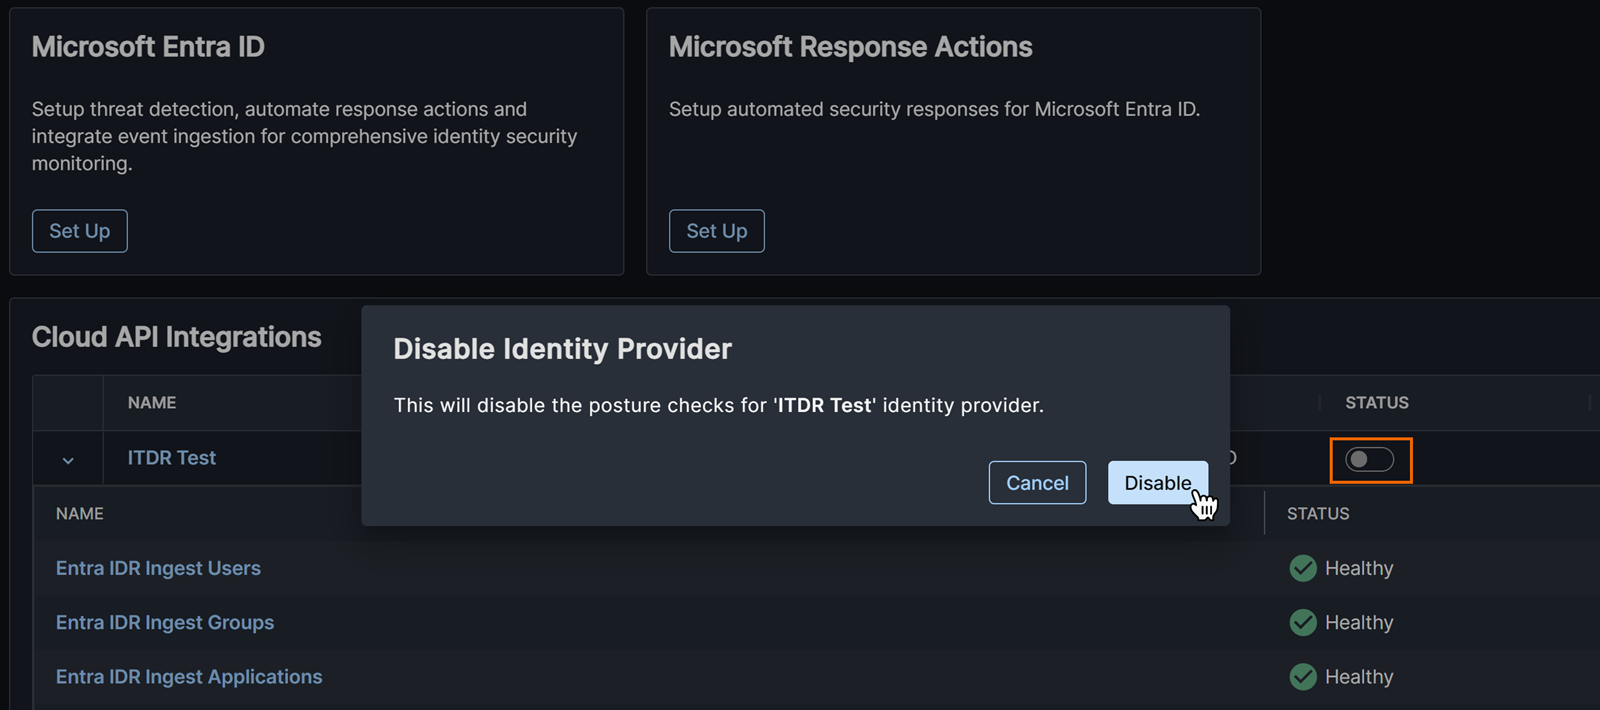
To disable the integration and posture checks for an identity provider, turn off the toggle in the Status column and confirm your action.
Edit integration
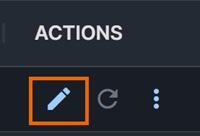
To edit the integration configuration, click the Edit icon in the Actions column.
Delete integration
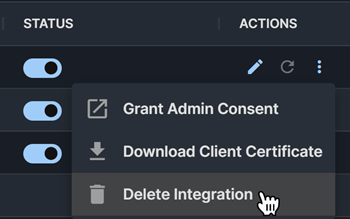
To delete the integration and remove the identity provider and all findings, click the three dots in the Actions column, click Delete Integration, and confirm your action.
Warning
This action can't be undone.
Dark Web Monitoring tab
In the Dark Web Monitoring tab, you can set which primary domains are monitored for credential leaks and configure users for VIP monitoring.
Domains
The Domains section lists every domain available for credential leak monitoring. A domain is added to this list in one of two ways:
- Automatically collected: Synced from your Microsoft Entra ID tenant. These domains sync every 24 hours and don't show in the Domains section immediately after initial ITDR setup.
- Manually added: Entered directly by an administrator. Because ownership of a manually-added domain isn't already established by a provider sync, it must be verified with a DNS TXT record before it can be monitored. This is currently the only way to add domains for an on-premises Active Directory environment.
See the following domain status meanings:
| Status | Meaning |
|---|---|
| Verified | Domain ownership is established, either automatically for synced domains, or after DNS TXT verification for manually-added domains. Monitoring can be turned on. |
| Pending | Domain has not been verified yet. Monitoring is unavailable and no leak data is collected for the domain until it's verified. |
Turn monitoring on or off
For a Verified domain, use the Monitored column to turn credential leak monitoring on or off for that domain.
Note
The Monitored is turned off for Pending domains. Verify the domain first by following the steps below.
Add and verify a domain
To manually add a domain that wasn't automatically collected from your identity provider sync, do as follows:
- Click Add domain.
- Enter the domain name and click Add.
- In the Domain verification setup panel, copy the Record Name and Value for the generated TXT record using the Copy icon next to each field.
-
Add the TXT record to your domain's DNS provider.
Note
It can take up to 24 hours for DNS changes to propagate.
-
When the record is live, click Verify.
If verification succeeds, the domain's status changes to Verified and monitoring becomes available for it. If verification fails, a message tells you to confirm the TXT record and wait for DNS propagation before trying again. Click the Retry icon in the domain's Actions column to reopen the verification panel and try again without re-entering the domain.
Delete a domain
To remove a manually-added domain, click the Delete icon in the Actions column and confirm. Deleting a domain that is currently monitored also stops monitoring for it.
Note
Automatically-collected domains don't have a delete action. They're managed by your identity provider sync.
Select users for VIP monitoring
The VIP Monitored Users section lets you select users that you consider very important. The users you select have a VIP tag throughout ITDR to signify their VIP status. VIP monitoring focuses on identifying business-related leaks, mentions, or campaigns against users that include personal email addresses, phone numbers, or social media accounts.
Configuring a user for VIP monitoring is also a profile factor for that identity's Risk Score. VIP-monitored identities are treated as higher-value targets and score higher accordingly. For details, see Identity Risk Score.
Note
VIP monitoring isn't a replacement for personal identity monitoring solutions. VIP monitoring focuses on identifying potential business-related leaks, mentions, or campaigns that target users' personal emails, phone numbers, and social media accounts, or that could enable bypass attacks.
To select a user for VIP monitoring, do as follows:
- Click Add User.
- In Configure VIP Monitoring, click the Name menu and select a user.
-
Define the attributes that you want to monitor as follows:
- Enter email addresses to be monitored, such as personal email addresses. Click the Plus icon next to Email to add a maximum of five addresses.
- Enter a primary and secondary phone number. Click the Plus icon to add a maximum of five numbers.
- Enter a zip code.
- Enter a social media username. Click the Plus icon to add a maximum of five usernames.
-
Click Configure.

When you configure a user, we monitor the dark web for the user's attributes along with company names and domains to identify potential business leaks or mentions within the past year.
To edit a VIP user's attributes or delete a user's VIP status, click the Pencil icon or Delete icon in the VIP Monitored Users section.
Posture Check Preferences tab
In the Posture Check Preferences section, you can turn posture checks used by ITDR on or off and view their details. All posture checks are turned on by default.
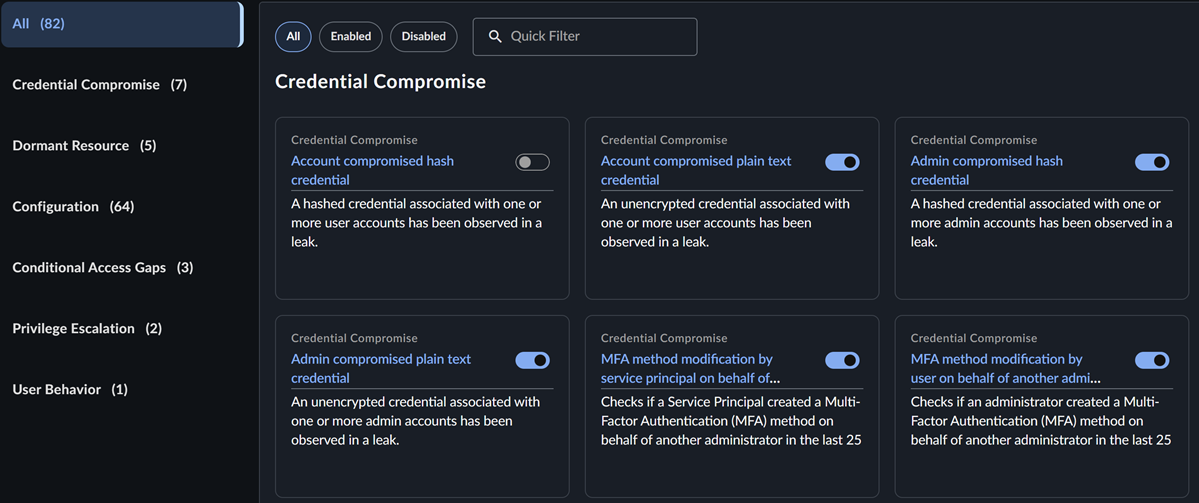
The table shows the following information:
- The title, category, provider type, tags, published date, last modified date, and status for each check.
- A New badge next to the title for checks published in the last seven days.
- Tags shown as chips. If a check has multiple tags, additional tags collapse into a +N chip. Hover over the +N chip to see all tags.
Find posture checks
Use the following actions to find specific checks:
- Search: Enter text in the search box to filter checks by title.
- Filter: Filter by Category, Tags, Status, Provider Type, Auto Resolution Disabled status, Published at date range, or Last modified date range. Some filters are expanded by default. Click the up or down arrow on the right of the filter name to expand or collapse the filter.
- Sort: Click the Title, Category, Published, or Last Modified column header to sort the table by that column.

The counter above the table shows how many checks match your current filters. Click the X on a filter chip to remove it, or click Clear All to reset the table.
View posture check details
Click a title in the table to open the details panel, which shows the check description, risk narrative, details, recommendations, and references. Use the previous and next arrows to move between checks.
Customize posture checks
Click the toggle in the Status column or the details panel to turn a posture check on or off. For disabled checks, the details panel shows who last turned it off and when.