Direct Delivery for M365 and Google
Direct Delivery bypasses email filtering rules and injects the campaign emails, including training enrollment and training reminder emails, directly into your recipients' inboxes using Microsoft's Graph APIs and Gmail's APIs. When turned on, it eliminates the need to add the Phish Threat domains and IP addresses to Microsoft's or Google's exception list and enhances the deliverability of the emails.
To turn on Direct Delivery for M365, see Turn on Direct Delivery for M365.
To turn on Direct Delivery for Google, see Turn on Google Direct Delivery.
Turn on Direct Delivery for M365
This video provides an overview of M365 Direct Delivery, including how to turn it on, add a new credential, and run a test.

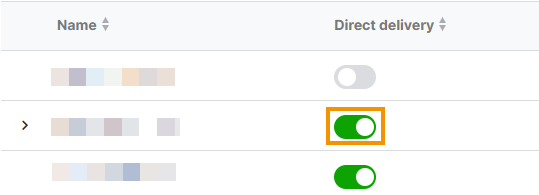
Your verified domains are listed on the Direct Delivery for M365/Google page.
Note
If you have multiple domains, you must turn on M365 Direct Delivery for each domain. If M365 Direct Delivery isn't turned on, the default, SMTP-based delivery will function.
To turn on M365 Direct Delivery, do as follows:
- Go to My Products > Phish Threat > Settings.
- Click Direct Delivery for M365/Google.
- In the Direct delivery column, turn on direct delivery for your domain.
- In the Configure Direct Delivery dialog, select Microsoft M365.
- Click Proceed.
-
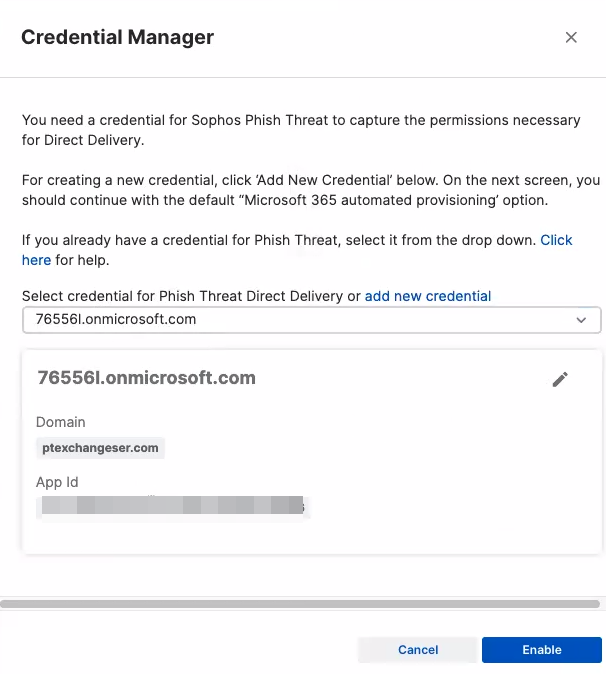
On the Credential Manager page, add a credential for Phish Threat that has the necessary M365 permissions.
-
If you have a credential configured for this domain, select an existing credential.
Note
You may see Disallowed credentials if you've created credentials in Sophos Central for other purposes without Phish Threat permissions. If you want to re-use an existing credential, you’ll need to modify it to add the necessary permissions for Phish Threat. See Integration Credential Manager.
-
If you turn on M365 Direct Delivery for the first time, you'll need to add a credential. See Add a credential.
-
Add a credential
To add a credential, do as follows:
-
On the Credential Manager page, click add new credential.
On the Add Microsoft Graph Credential page, you can do as follows:
-
Use Microsoft 365 automated provisioning
Tip
We recommend using Microsoft 365 automatic provisioning because this automatically creates the credential with the necessary permissions.
For details, see the following sections.
-
Use Microsoft 365 automated provisioning
- On the Add Microsoft Graph Credential page, click Use Microsoft 365 automated provisioning.
-
Enter a credential name and description.
You can enter your preferred unique credential name, for this only serves as an identifier.

-
Click Save and Continue to Provisioning.
-
On the Connect to Microsoft 365 page, click Continue.
You'll be redirected to the Microsoft sign in to your account page.
-
On the Microsoft sign in to your account page, select a Microsoft account.
-
Review the terms and click Accept.
This grants permission for the Master App.
-
Select a Microsoft account.
-
Review the terms and click Accept.
This grants permission for Sophos Central integration.
-
Click Close to close the Microsoft sign in to your account page.
The Credential Manager page shows the credential you created.
-
Click Enable.
M365 Direct Delivery is now turned on for your domain.
Enter authentication details manually
When you create a credential manually, make sure you have the Domain.Read.All and Mail.ReadWrite API permissions in Microsoft Azure.
- On the Add Microsoft Graph Credential page, click Enter authentication details manually.
-
Enter the needed information.
You can enter your preferred unique credential name, for this only serves as an identifier.
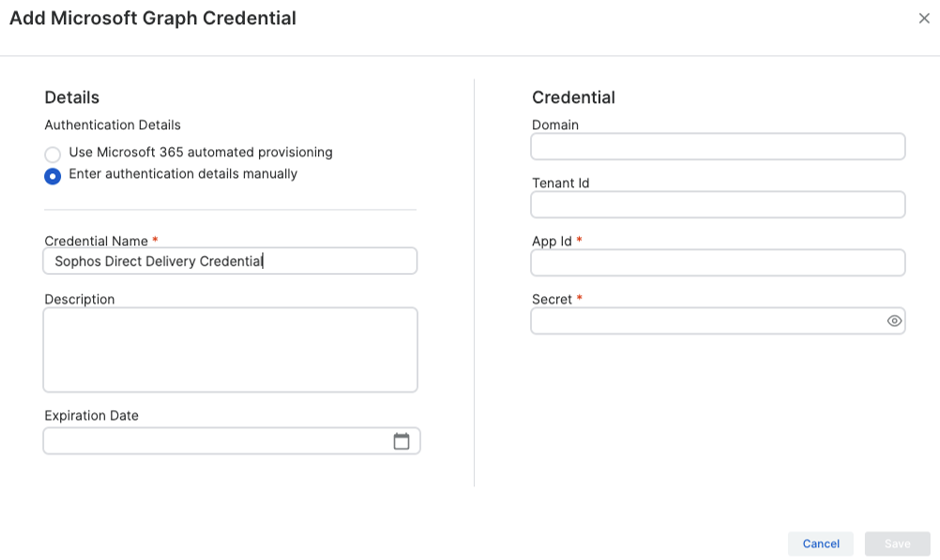
Note
You'll need to register an application to get your App ID and Secret details. To register an application, see Register an app with Microsoft Entra ID.
-
Click Save.
- On the Credential Manager page, click Update.
M365 Direct Delivery is now turned on for your domain.
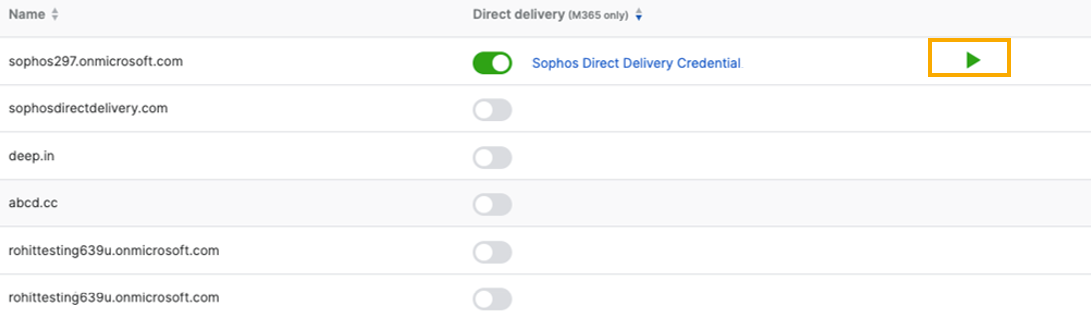
M365 direct delivery test
After turning on M365 Direct Delivery, you can run a quick test to verify if the setup was successful.
To run a quick test, do as follows:
-
Click the Test button next to the domain that has M365 Direct Delivery turned on.
-
On the Run a quick direct delivery test page, enter the recipient's email.
-
Click Proceed.
A page appears to confirm whether the test is successful or not.
-
Click Close.
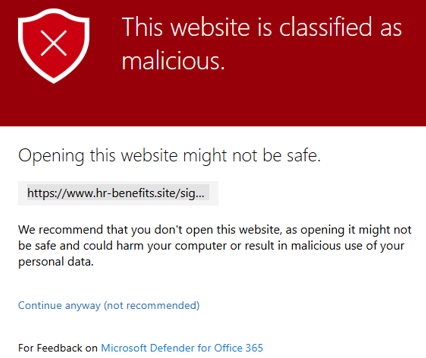
Blocked URLs from email campaigns
Safe Links protection may block URLs from simulated phishing email campaigns when users click them.
To resolve this issue, you must add the Phish Threat IP addresses and domain names to the allow list. See IP addresses and domains and M365 exclusions.
Note
Make sure to use the *.domainname/* format when adding your domains to the allow list. For example, *.hr-benefits.site/*. For more information, see "Do not rewrite the following URLs" lists in Safe Links policies.
Turn on Google Direct Delivery
When you set up Google Direct Delivery, you must give permission for Sophos applications to access your Google Workspace domains.
To do this, your browser must accept pop-ups during the setup process. You might have to turn off pop-up blockers or add exceptions for Google Workspace domains.
You must also be able to sign in to the correct domain. If your browser has stored sign-in credentials for a different domain, use an incognito or private browsing window.
Warning
By default, the service account key creation policy in Google Cloud is enabled for new Google Workspace accounts. If you don't disable this policy, connecting Google Workspace for direct delivery will fail.
To prevent the connection from failing, disable this policy in Google Cloud. For more information, see Disable service account key creation policy in Google Cloud.
To turn on Google Direct Delivery, do as follows:
- Go to My Products > Phish Threat > Settings.
- Click Direct Delivery for M365/Google.
- In the Direct delivery column, turn on direct delivery for your domain.
- In the Configure Direct Delivery dialog, select Google Workspace.
- Click Proceed.
- On the Sign in with Google dialog, select an account and enter your password.
- Review the privacy policy and Terms of Service and click Continue.
-
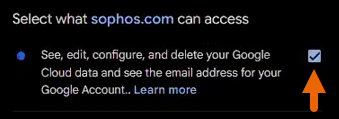
Select what Sophos can access and click Continue.
Sophos connects to your Google account. You must wait until the process reaches 100%.
-
When the Google connection is set up, click Close.
Authorize access
To authorize access, do as follows:
- On the Direct Delivery for M365/Google page, click the domain you turned on Google direct delivery for.
-
Copy the required values.
- Click Copy next to Google OAuth Client ID to copy its value. You'll need this value later.
- Click Copy next to the OAuth scope to copy its value. You'll need this value later.

-
Click Google Workspace Admin console. You'll be asked to enter your Google account password.

-
Click Next.
- On the Google Workspace Admin console, click Add new.
-
On the Add a new client ID dialog, do as follows:
- In Client ID, paste the client ID you copied earlier.
- In OAuth scopes (comma-delimited), paste the OAuth scopes you copied earlier.
- Click Authorise.
-
On the Direct Delivery for M365/Google page, click Verify and connect.
Note
Direct delivery authorization may take a few minutes to complete.
When the verify and connect is successful, your domain is fully authorized.
-
On the Verify Connection dialog, click Ok.
Test Google Direct Delivery
After turning on Google Direct Delivery, you can run a quick test to verify if the setup was successful.
To run a quick test, do as follows:
-
Click the Test button next to the domain that has Google Direct Delivery turned on.

-
On the Run a quick direct delivery test dialog, enter an email address. The phishing simulation email will be sent to this email address.
-
Click Proceed.
You'll see a confirmation message indicating whether the test is successful or not.
Turn off Google Direct Delivery for a domain
To turn off Google Direct Delivery, do as follows:
-
On the Direct Delivery for M365/Google page, under the Direct delivery column, turn off direct delivery for the domain.
Note
Each time you disconnect a domain from Google Direct Delivery, you must read and accept the terms and conditions of use.
-
Select the Google account you want to disconnect from.
Note
You must use a Google Workspace account with administrator privileges.
Google requires you to verify your administrator account to complete the disconnection.
If this is your first time signing in, enter your email address and password.
If you've signed in before, Google shows the permission request pop-ups immediately.
-
Review the Google sign-in confirmation and click Continue.
After selecting your account, Google shows a confirmation window indicating that
sophos.comis requesting access to your account information. -
Review the permission request pop-up and grant consent to Sophos.
In the permission pop-up, make sure the required access is selected.
-
After the permissions are granted, click Continue.
Disconnecting starts. This may take a few minutes.
-
When the disconnection is completed, click Close.
Your domain is now disconnected from Google Direct Delivery.