Create an SD-WAN connection group
Before you create a connection group, you need to know the following:
- You must select firewalls with a Central Orchestration license on SFOS 18.5 MR1 or later.
- You must choose at least two firewalls to create a connection group.
Note
If you create an SD-WAN connection group with shared resources and participating networks, the firewall creates two similar SD-WAN routes. One is for the shared resources and the other for the participating networks.
To create a connection group, do as follows:
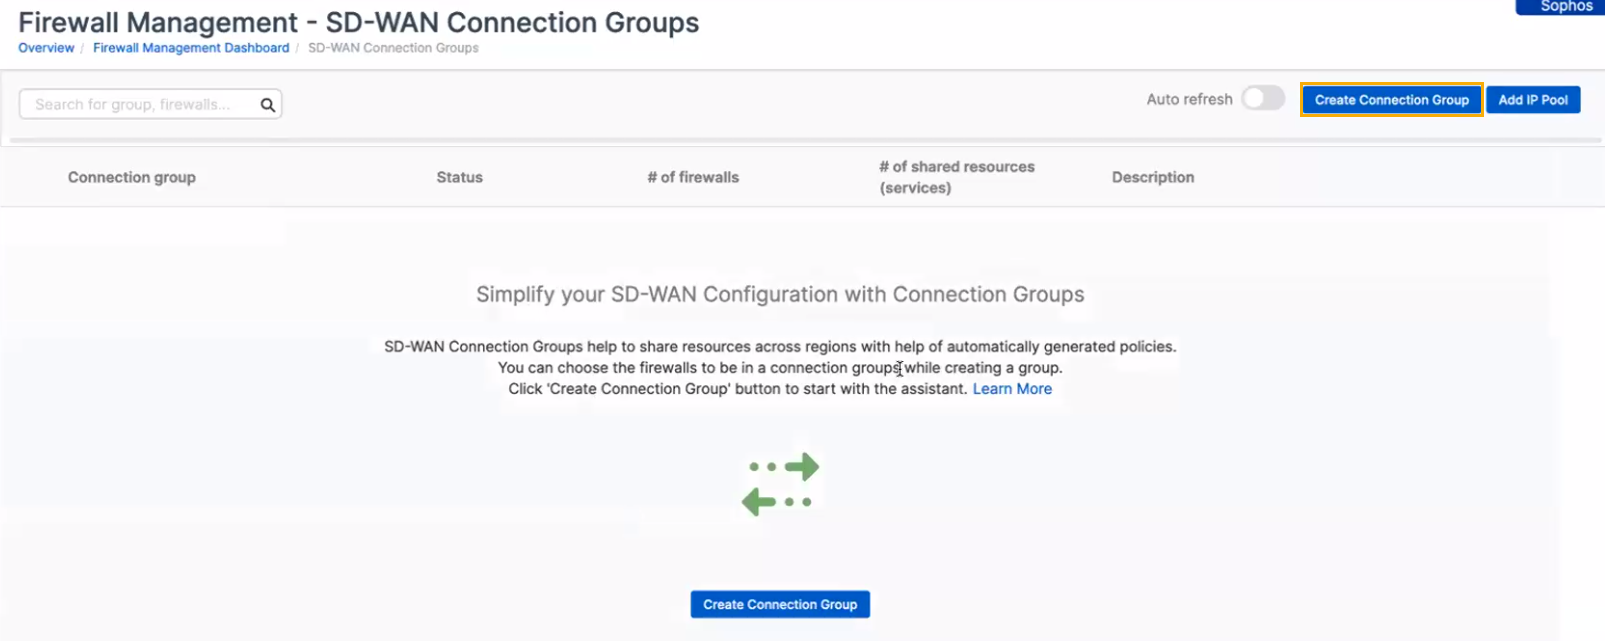
- Go to My Products > Firewall Management > SD-WAN Connection Groups.
-
Click Create Connection Group.
This opens the SD-WAN Connection Group creation assistant. The assistant takes you through creating a group.
-
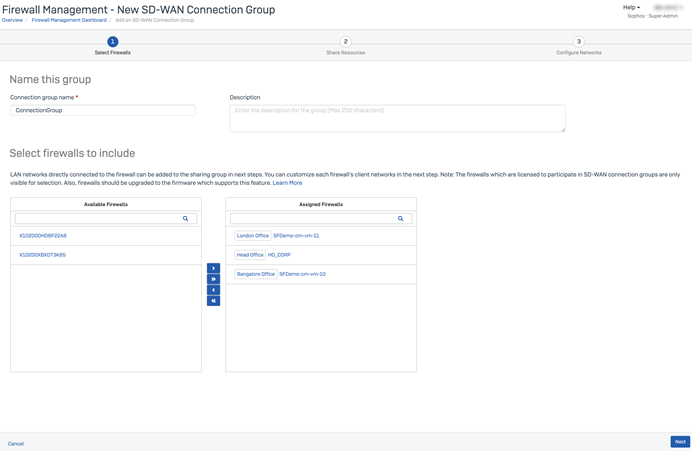
First, you select your firewalls. To do this, do as follows:
- Enter a name for the group.
- Optional: Enter a description.
-
Choose at least two firewalls.
Note
Before you add firewalls to an SD-WAN connection group, you must add them to a firewall group.
Here's an example:
-
Click Next.
-
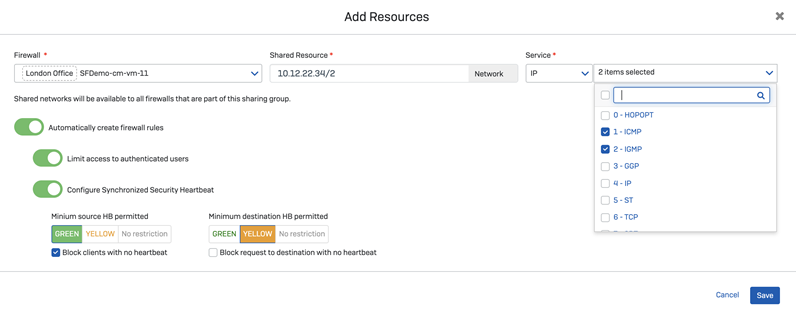
Add your resources. You can add multiple resources. You can also review any resources that you added earlier. To add resources, do as follows:
- Select the firewall with the resource that you want to share across the group.
- Enter the IP address or network range of the resource you want to share.
- Choose the service type and options.
- Turn on Automatically create firewall rules, if required.
- Turn on Limit access to authenticated users, if required.
-
Turn on Configure Synchronized Security Heartbeat and set your options.
For example, you can set Minimum Source HB permitted to GREEN and turn on Block clients with no heartbeat.
-
Click Save to add the resource.
Here's an example:
-
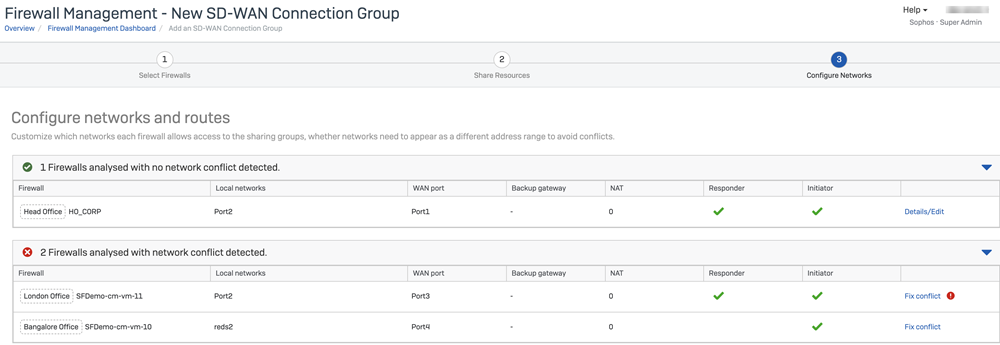
Click Next. We check your chosen configuration for any network conflicts. The table shows any network conflicts.
Here's an example:
-
You need to fix any conflicts. Click Fix Conflict and try one of the following methods:
- Turn the subnet on or off.
- Attach a new NAT address to an existing subnet.
- Attach a custom network to the firewall. Click Add Network to do this.
- Choose a WAN link.
- Choose a backup gateway.
- Override a gateway address.
For example, you can fix a name conflict by renaming the resources that show conflicts. Or you can fix subnet conflicts by choosing NAT. Or you can override the gateway address to fix a conflict, as shown in the following image.
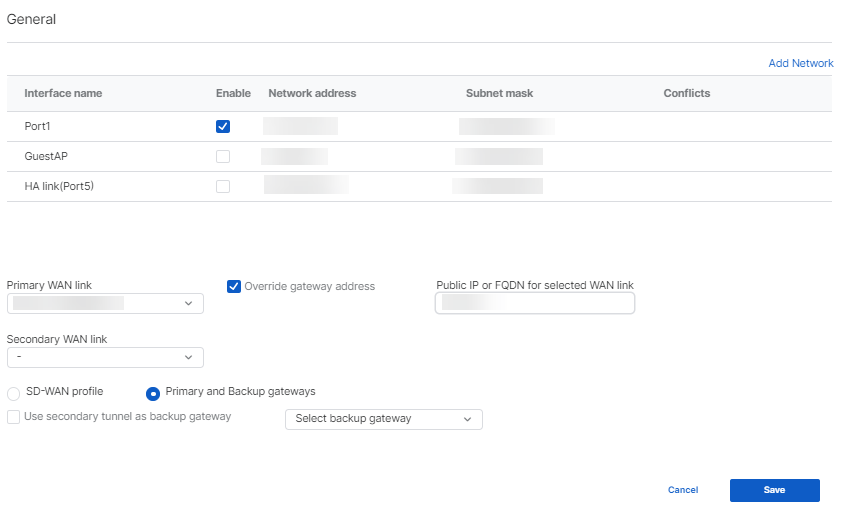
If you select Override a gateway address, you can enter a wildcard (
*) address in Public IP or FQDN for selected WAN link if the remote gateway is a responder firewall and runs SFOS 20.0 or later.Note
If there is a network conflict for a resource-sharing firewall, you may need to choose different configurations for your subnets. You do this in Sophos Firewall. Alternatively, in Sophos Central you can choose not to use the conflicting subnet in the group.
-
After you've resolved your conflicts, click Save.
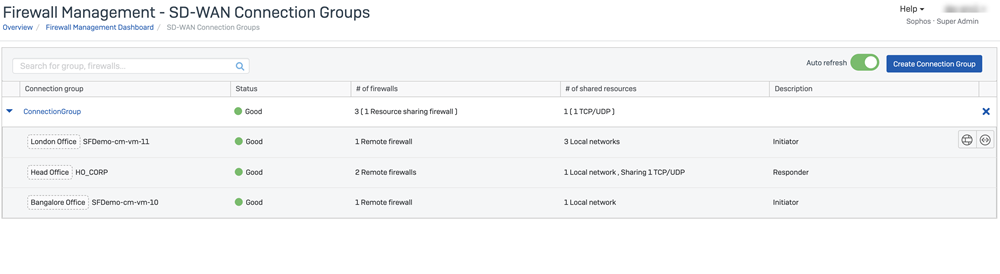
This creates your group with your chosen firewalls. You can also see their status. The following image shows an example of a connection group.