Managed Risk internal scans
You must add your authorized contacts and set up scans of external assets before you can set up scans of internal assets. See Managed Risk setup.
You can set up discovery and vulnerability scans of internal assets on your network.
You must configure and deploy a virtual vulnerability scanning appliance before you can create scans.
For details of the Sophos appliance requirements, see Managed Risk appliance requirements.
The key steps are as follows:
- Add a scanner.
- Deploy the appliance.
- Create a discovery scan.
- Create a vulnerability scan.
You can create multiple scanners and scans.
Add scanner
Create a virtual image of a scanner as follows:
-
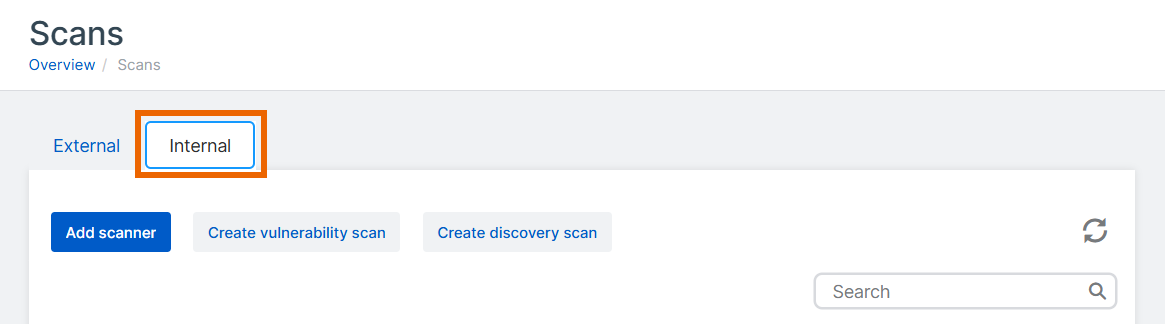
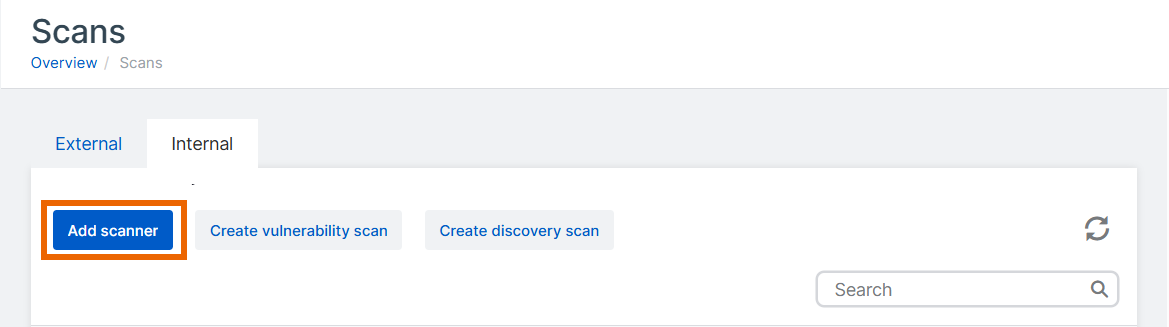
On the Scans page, select the Internal tab.
-
Click Add scanner.
-
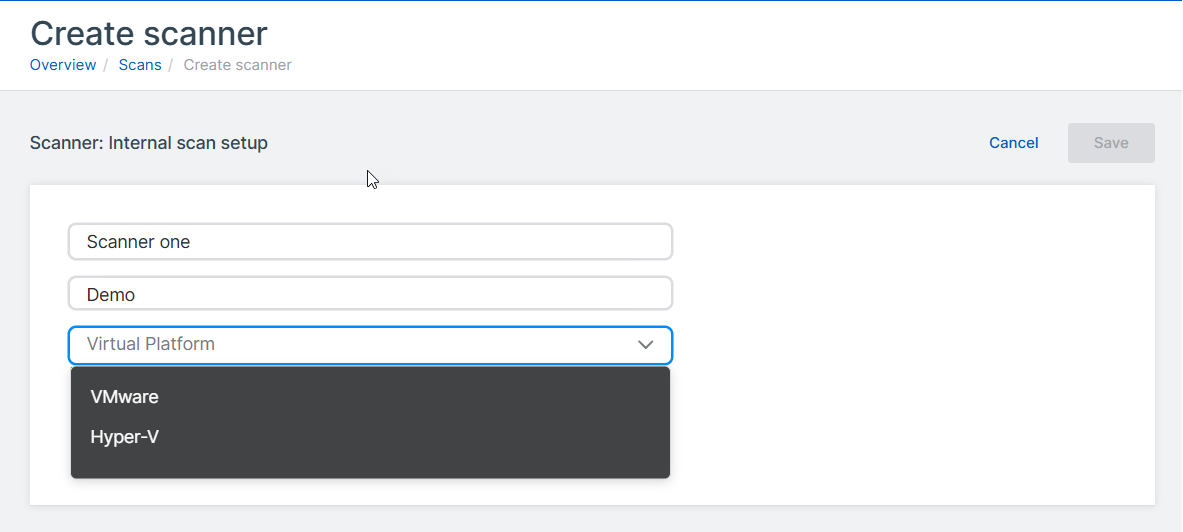
Enter the scanner name and description.
-
In Virtual Platform, select VMware or Hyper-V.
-
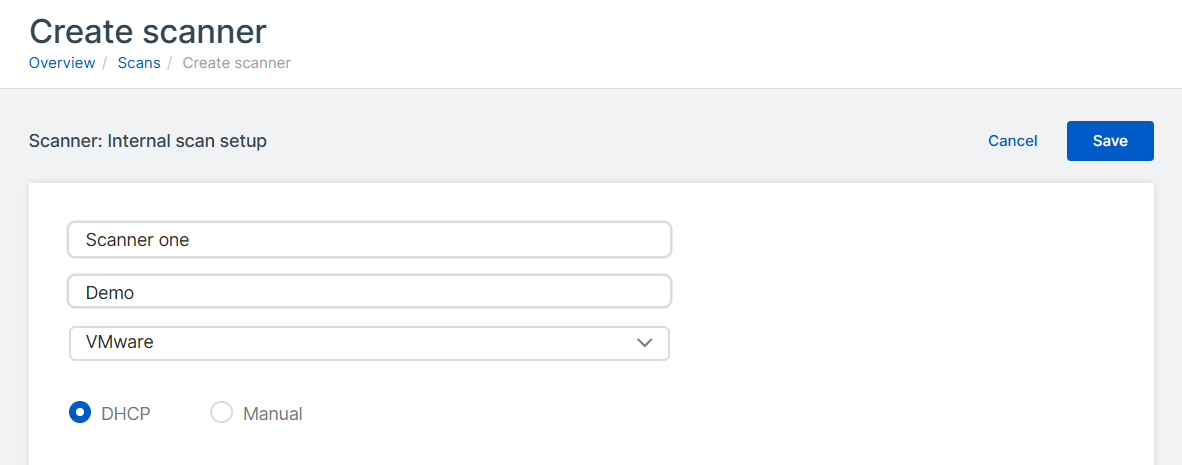
Specify the IP settings. This sets up the management interface for the appliance.
-
Select DHCP to assign the IP address automatically.
Note
If you select DHCP, you must reserve the IP address.
-
Select Manual to specify network settings.
-
-
Click Save.
-
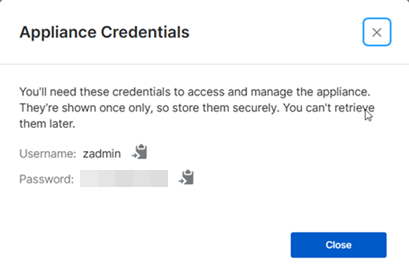
An appliance is created. A pop-up dialog shows the credentials you need to access and manage the appliance.
The credentials are shown only once. Copy them and keep them securely.
-
Click Close.
On the Scans page, your new scanner now shows in the list, with the status "Waiting for Deployment".

-
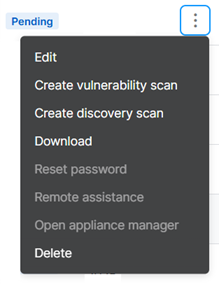
In the entry for your scanner, click the three dots in the Action column.
After the virtual image is created, the Download option is shown in the menu. If it takes more than a few minutes, click the refresh button in the top right of the page.
-
Click Download to download the virtual image.
Deploy the appliance
Now use the image you downloaded to deploy the appliance in your virtual infrastructure.
We currently support these platforms:
- VMware ESXi 6.7 Update 3 or later.
- Hyper-V version 6.0.6001.18016 (Windows Server 2016) or later.
For full details of appliance requirements, see Managed Risk appliance requirements.
Click the tab for your platform below to see the instructions.
Restriction
If you're using ESXi, the OVA file is verified with Sophos Central, so it can only be used once. If you have to deploy a new VM, you must create the OVA file again in Sophos Central.
On your ESXi host, do as follows:
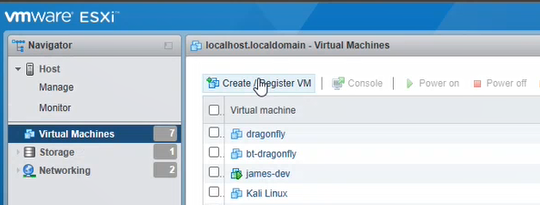
- Select Virtual Machines.
-
Click Create/Register VM.
-
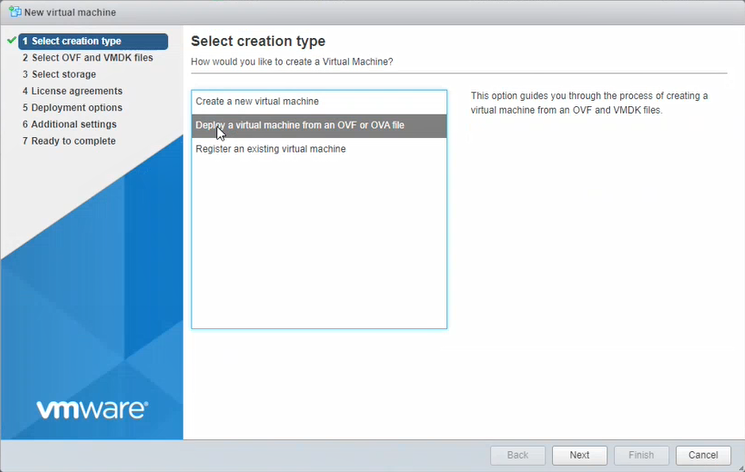
In Select creation type, select Deploy a virtual machine from an OVF or OVA file. Click Next.
-
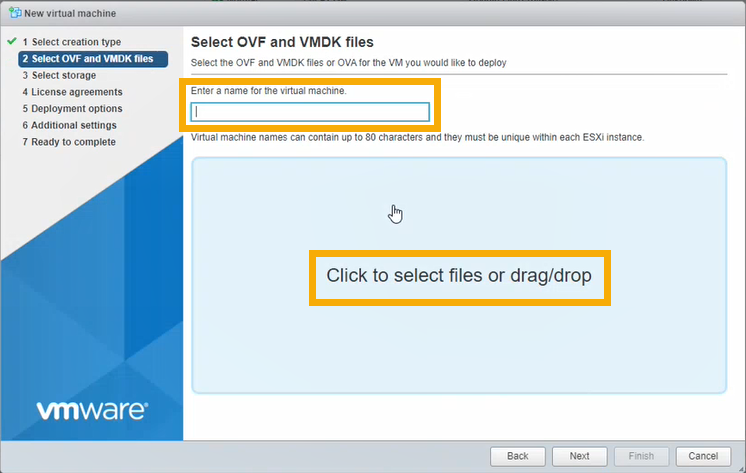
In Select OVF and VMDK files, do as follows:
- Enter the VM name.
- Click the page to select files. Select the OVA file you've downloaded.
- Click Next.
-
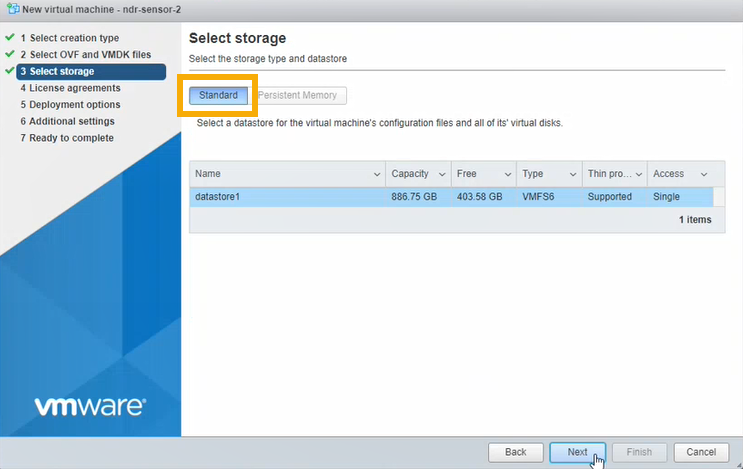
In Select storage, select Standard storage. Then select the datastore where you want to put your VM. Click Next.
-
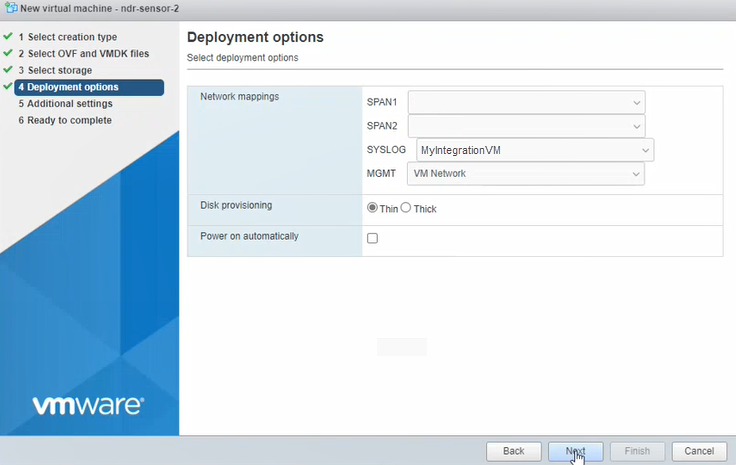
In Deployment options, enter settings as follows.
- SPAN1 and SPAN2. You don't need these for vulnerability scanning appliance. Select any port group as a placeholder and disconnect it in the VM settings later.
- SYSLOG. This interface isn't used for the vulnerability scanning appliance. We suggest you configure it to use the same adapter that will be used for the management interface below.
-
In MGMT, select the management interface for the appliance. This is the interface you configured in Sophos Central earlier. It will be used for performing vulnerability scans and will communicate with Sophos.
If you selected DHCP during setup, make sure the VM can get an IP address via DHCP.
-
In Disk Provisioning, make sure Thin is selected.
- Make sure Power on automatically is selected.
- Click Next.
-
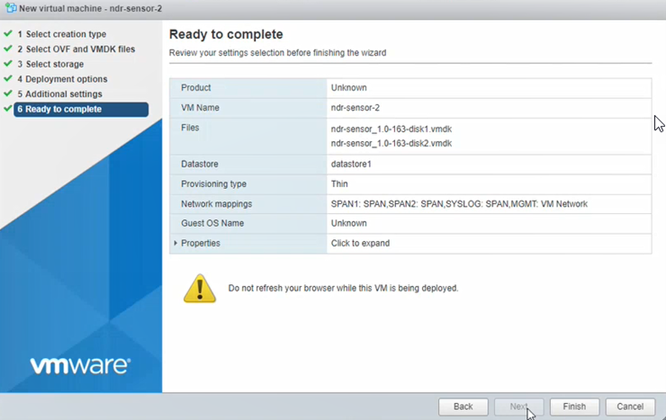
Skip the Additional settings step.
-
Click Finish. Wait for the new VM to appear in the VMs list. This can take a few minutes.
-
Power on the VM and wait for installation to complete.
The VM boots for the first time and checks that it can connect to the correct port groups and to the internet. Then it reboots. This can take up to 30 minutes.
-
In Sophos Central, go to My Products > Managed Risk > Scans.
- Make sure the Internal tab is selected.
-
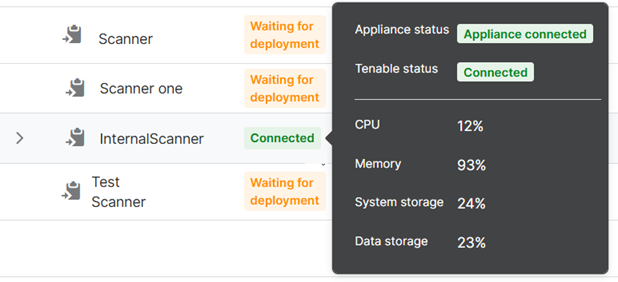
Go to your scanner in the list. Hover over its Status to see details. You'll see the appliance status change from Downloaded to Waiting for appliance, then to Loading plugins and finally to Connected.
The scanner status in the list is also "Connected".
You can now set up your discovery and vulnerability scans for internal assets.
The Zip file you downloaded in Sophos Central contains the files you need to deploy your VM: virtual drives, seed.iso, and a PowerShell script.
To deploy the VM, do as follows:
- Extract the Zip file to a folder on your hard drive.
- Go to the folder, right-click the
nessus-scannerfile, and select Run with PowerShell. -
If you see a Security Warning message, click Open to allow the file to run.
The script prompts you to answer a series of questions.
-
Enter a name for the VM.
- The script shows where the VM files will be stored. This is a new folder in your default installation location for virtual drives. Enter
Cto allow the script to create it. - Enter the number of processors (CPUs) to use for the VM.
- Enter the amount of memory to use in GB.
-
The script shows a numbered list of all your current vSwitches.
Select the vSwitch you want to attach the management interface to and enter its number. This is the interface you configured in Sophos Central earlier. This vSwitch is used for performing vulnerability scans and communicating with Sophos.
If you selected DHCP during setup, make sure the VM can get an IP address via DHCP.

-
Enter the vSwitch you want to attach to the syslog interface.
This interface is not used for the vulnerability scanning appliance. Enter the vSwitch that will be used for the management interface above.
-
You don't need to specify vSwitches for capturing network traffic. These settings are only relevant if you have Sophos NDR. Select any vSwitch as a placeholder and disconnect it in the VM settings later.
The PowerShell script sets up the VM in Hyper-V. You'll see an Installation Completed Successfully message.
-
Use any key to exit.
-
Open the Hyper-V Manager. You can now see the VM in the list of virtual machines. If you need to change any settings, you can. Then power it on.
The VM boots for the first time and checks that it can connect to the correct vSwitches and the internet. Then it reboots. This can take up to 30 minutes.
- In Sophos Central, go to My Products > Managed Risk > Scans.
- Make sure the Internal tab is selected.
-
Go to your scanner in the list. Hover over its Status to see details. You'll see the appliance status change from Downloaded to Waiting for appliance, then to Loading plugins and finally to Connected.
The scanner status in the list is also "Connected".
You can now set up your discovery and vulnerability scans for internal assets.
Create a discovery scan
A discovery scan reports your internal assets.
We recommend that you create a discovery scan and view the discovery scan report to ensure you see the assets you expect.
To set up a discovery scan, do as follows:
- Go to My Products > Managed Risk > Scans.
- On the Scans page, select the Internal tab.
-
Click Create discovery scan.
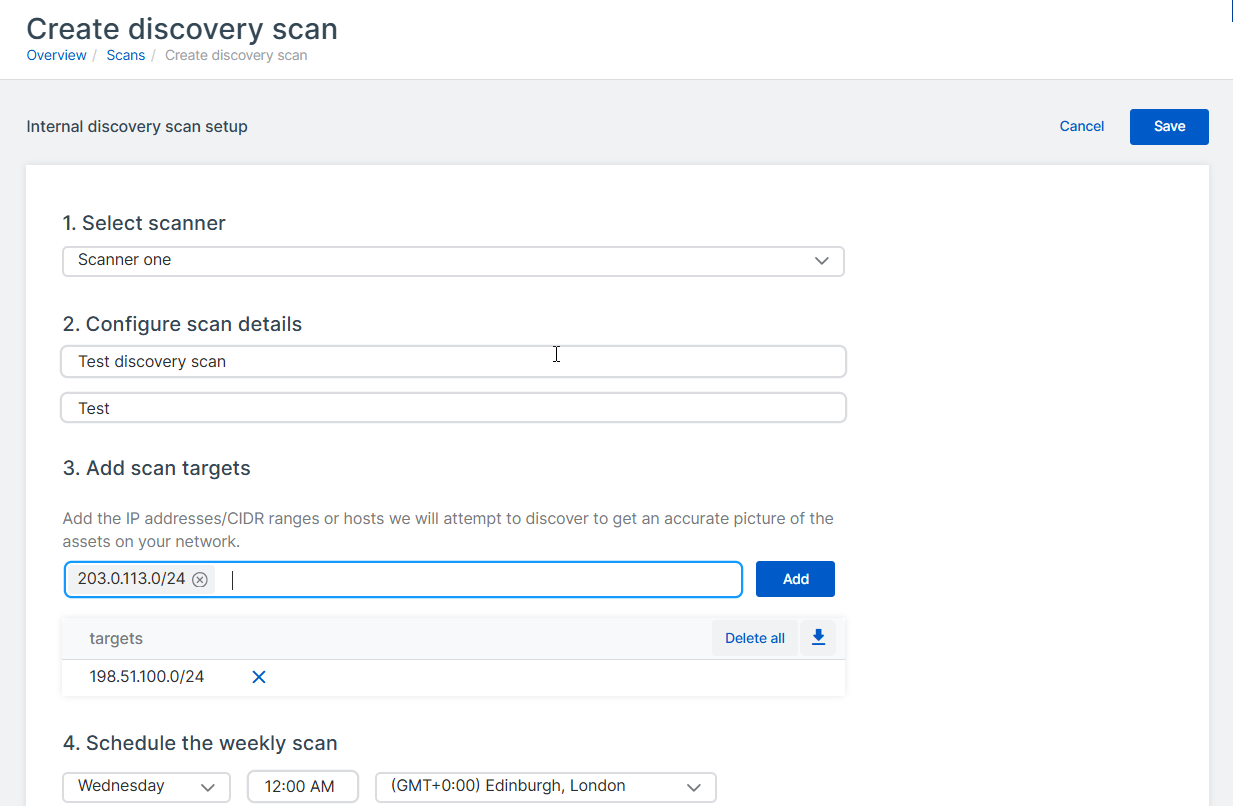
The Create Discovery Scan page opens.
-
In Select scanner, select your scanner from the list.
- In Configure scan details, enter a name and description for the scan.
-
In Add scan targets, specify the assets you want to scan and click Add.
You can enter IP addresses, CIDR IP ranges, and hostnames. If you enter items individually, press Enter after each item. You can also paste a comma-separated list of items into the target list.
-
In Schedule the weekly scan, select the day and time for the weekly internal scan to run.
By default, the scans will run at midnight in the selected time zone.
After your scan runs, a report will become available on the Managed Risk > Report History page.
Create a vulnerability scan
To make best use of internal vulnerability scans, see also Internal vulnerability scan guidelines.
Internal vulnerability scans are unauthenticated scans that don't use credentials to scan the target device and simulate an outside attacker trying to get access to a device.
To set up a vulnerability scan of internal assets, do as follows:
- Go to My Products > Managed Risk > Scans.
- On the Scans page, select the Internal tab.
-
Click Create vulnerability scan.
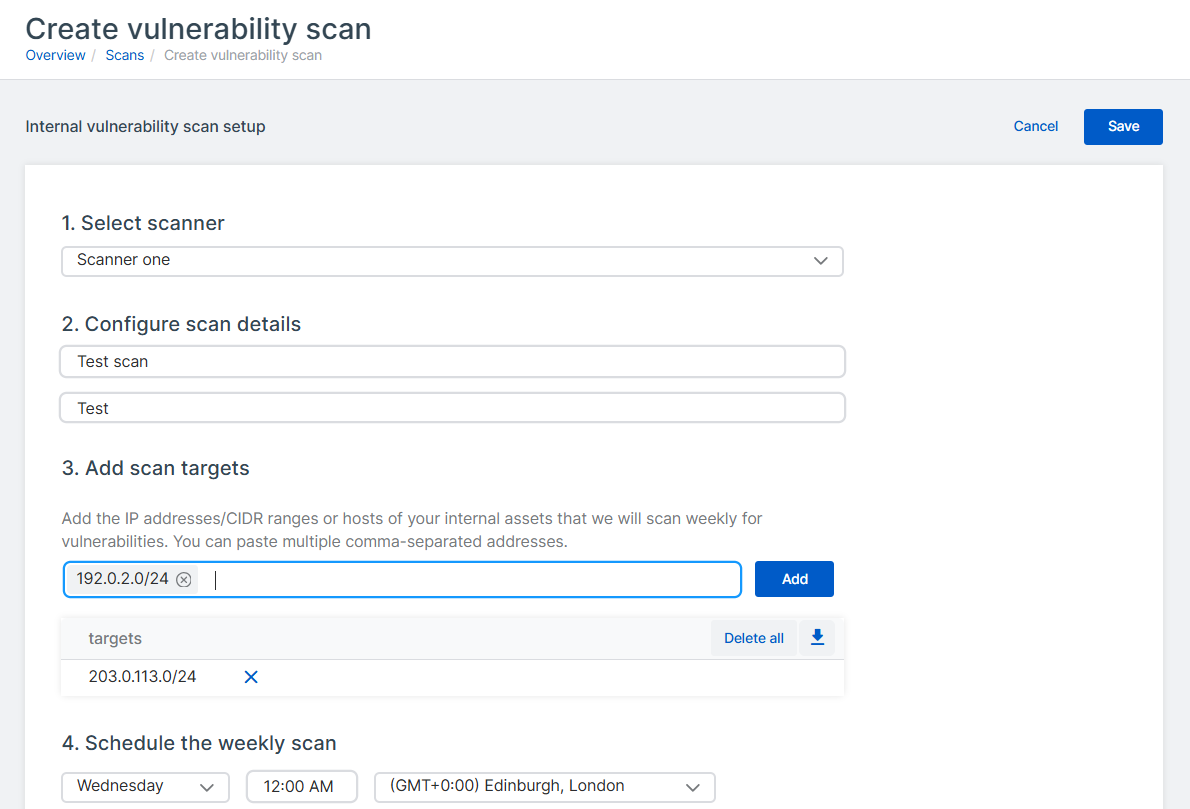
The Create Vulnerability Scan page opens.
-
In Select scanner, select your scanner from the list.
-
In Configure scan details, do as follows:
- Enter a name and description for the scan.
- Select the Scan type: Authenticated or Unauthenticated.
If you select Authenticated, you see the Select credentials menu.
-
In Select credentials, select the credentials you want to use. You can select up to ten credentials.
If you need to create credentials, click Create. For more information, see Managed Risk credentials.

-
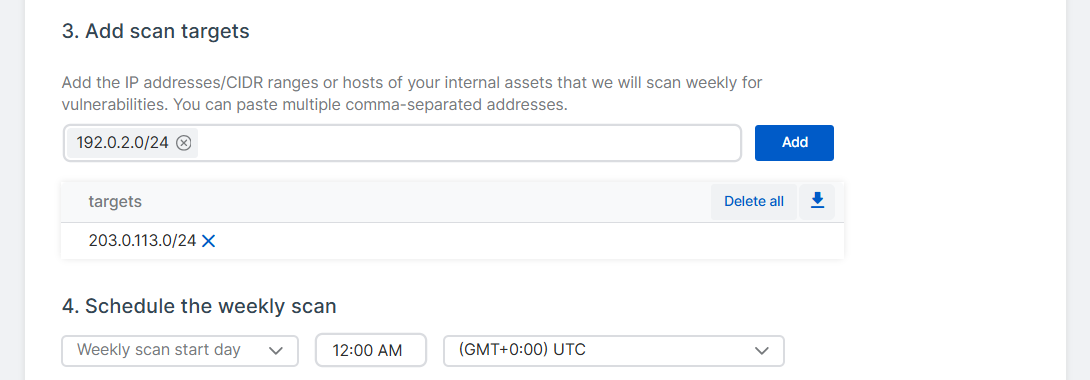
In Add scan targets, specify the assets you want to scan and click Add.
You can enter IP addresses, CIDR IP ranges, and hostnames. If you enter items individually, press Enter after each item. You can also paste a comma-separated list of items into the target list.
-
In Schedule the weekly scan, select the day and time for the weekly internal scan to run.
By default, the scans will run at midnight in the selected time zone.
-
Click Save in the top right corner of the page.
Your vulnerability scan is now set up and will run at the scheduled time.
After your weekly internal vulnerability scan runs, scan reports will become available on the Managed Risk > Report History page.
Internal vulnerability scan guidelines
For internal vulnerability scans, the maximum number of internal assets you're allowed to scan equals 120% of your Managed Risk license count.
You can configure vulnerability scans to scan assets on different VLANs in your physical network. However, we require that the scanning appliance has full bidirectional access to all ports and protocols on the other VLANs in the network.
Adding CIDR ranges with suffixes of /16 and lower may lead to scan timeouts due to the scanner attempting to scan large numbers of items. To avoid this, set up multiple scans to scan different network ranges on different days and at different times.
Remote assistance for appliances
In some cases, Sophos Support need to access the appliance remotely. You can give them access for up to seven days as follows.
The appliance must be online.
- Go to My Products > Managed Risk > Scans.
- On the Scans page, select the Internal tab.
-
Find the appliance. In the rightmost column, click the three dots
 and select Remote Assistance.
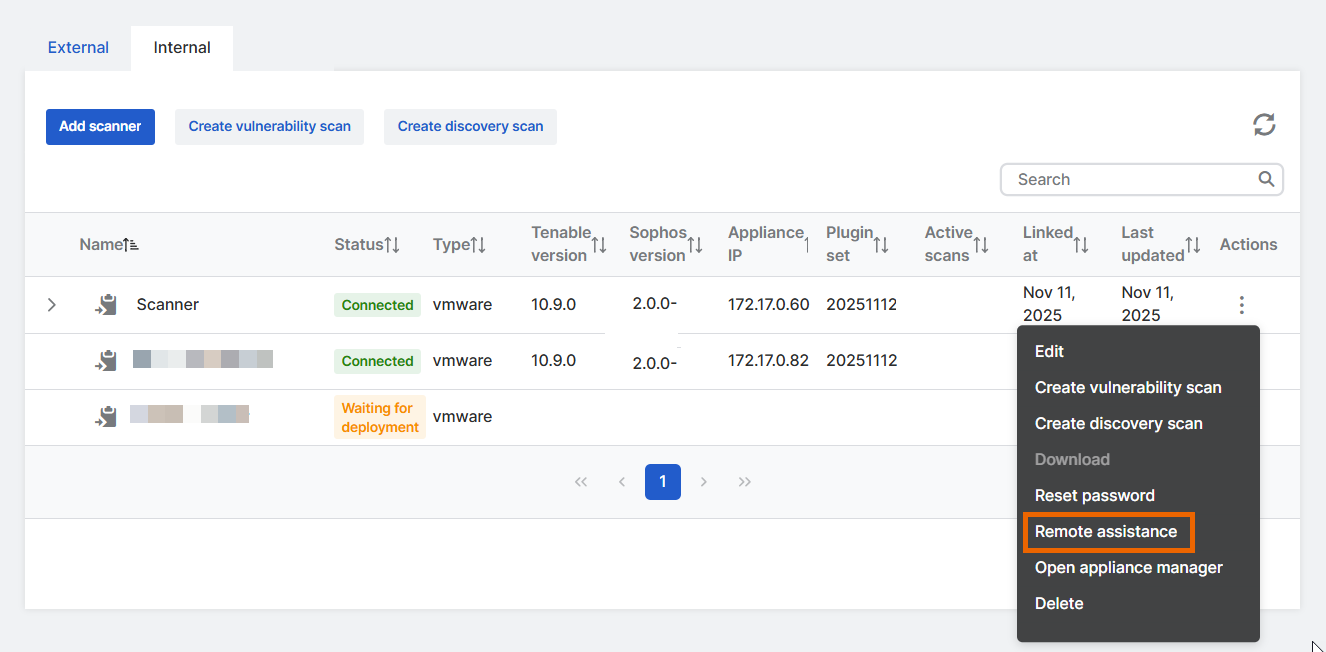
-
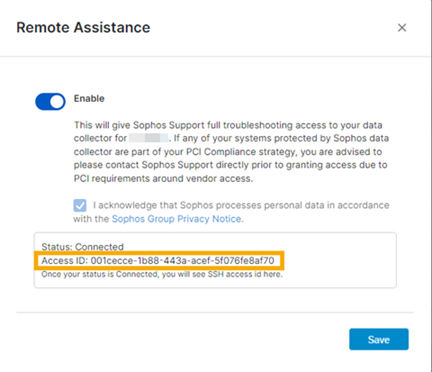
In the Remote Assistance dialog:
- Select Enable.
- Select the checkbox to acknowledge the Sophos Group Privacy Notice.
- Click Save.
Sophos Central requests an Access ID from the appliance. When it's available it's shown in the dialog.
-
Copy the Access ID and send it to Sophos Support. They use it to access your appliance.
Remote assistance turns off automatically after seven days. Alternatively, to turn it off manually, go back to the Remote assistance dialog and turn off Enable.