NDR Appliances
Sophos Network Detection and Response (NDR) integration appliances can receive data from Sophos NDR or third-party products via syslog exports, and forward it to the Sophos Data Lake for analysis.
To see your NDR appliances, go to My Products > NDR > Appliances. You're redirected to the Integration Appliances tab of the Configured Integrations page.
For help with NDR setup, including creating an NDR integration appliance, see Sophos integrations or Sophos NDR on AWS.
For Sophos appliance requirements, see Appliance requirements.
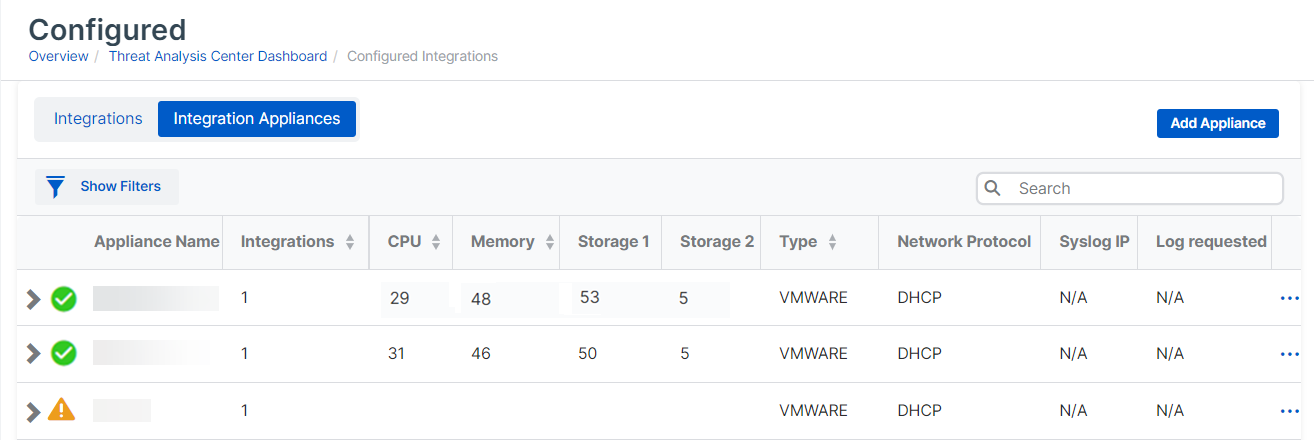
Integration appliances list
The list shows all your integration appliances. These can include appliances for NDR, third-party product integrations, or both.
The list shows the following details:
- Integrations: Number of NDR or third-party product integrations using the appliance.
- CPU: CPU usage.
- Memory: Memory usage.
- Storage 1: The main drive.
- Storage 2: The data drive.
- Type: Virtual platform.
- Network protocol: Internet-facing network settings. DHCP or Manual.
- Syslog IP
- Log requested: Indicates whether you've sent a Collect Logs request.
View the integrations
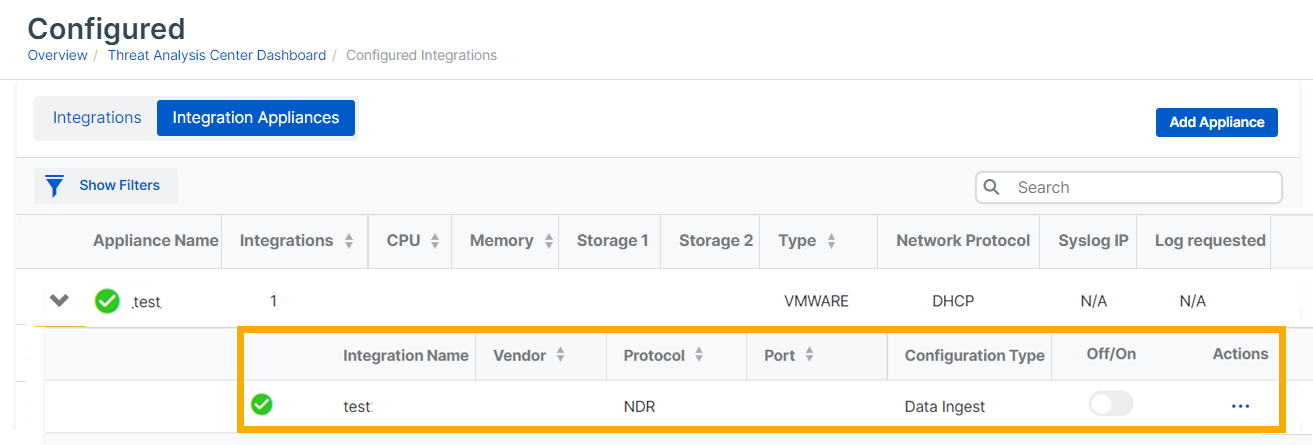
You can view the integrations hosted on each appliance.
In the integration appliances list, click the arrow next to an appliance name. The integrations hosted on that appliance are then listed with their details. The example below shows an NDR appliance.
- Integration name
- Vendor: Sophos or a third-party vendor.
- Protocol: NDR.
- Port
- Configuration Type: The integration type you configured. Data Ingest or Response Actions.
- Off/On
To edit or delete the integration, click the three dots in the rightmost column ![]() .
.
Add an appliance
You can add an integration appliance as part of setting up an NDR or third-party integration. For instructions for each product, see About MDR and XDR integrations.
Alternatively, you can add an appliance from the Integration Appliances tab. This creates an image you can deploy on your virtual network.
- Go to Threat Analysis Center > Integrations > Configured and select the Integration Appliances tab.
-
Click Add Appliance.
-
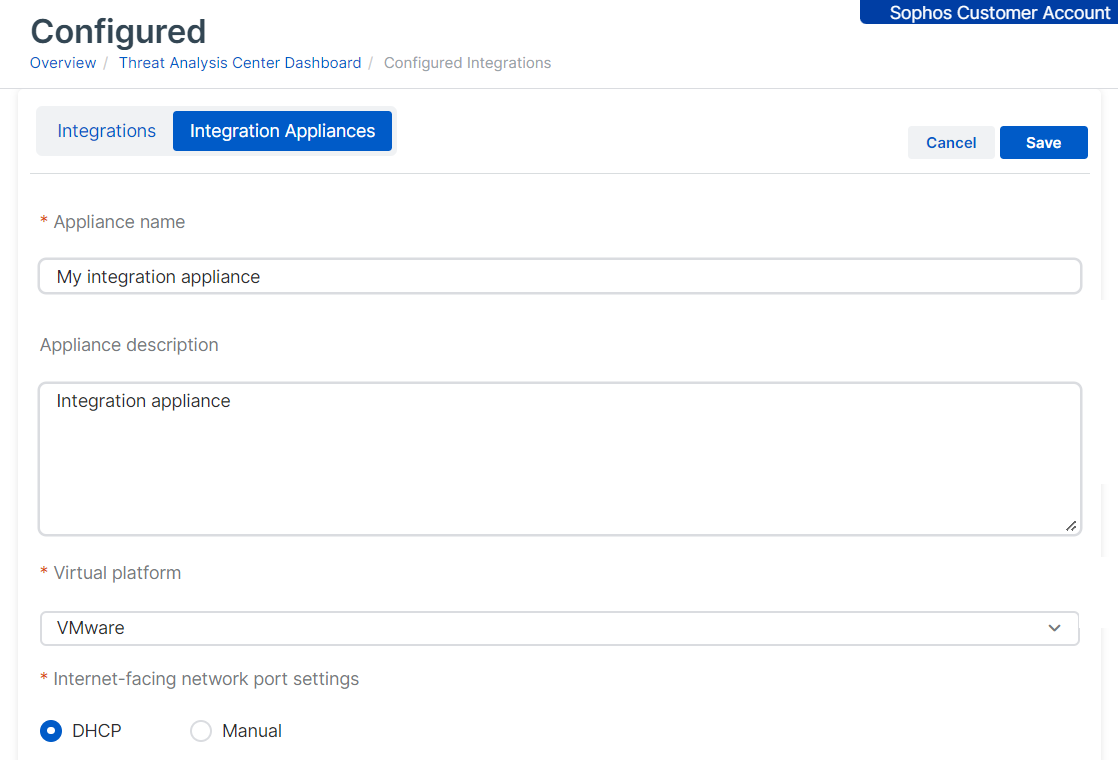
Configure the appliance as follows:
- Enter a Name and Description.
- Select the Virtual platform: VMware ESXi, Microsoft Hyper-V, or AWS.
-
Specify the Internet facing network port settings. This sets up the management interface.
-
Select DHCP to assign the IP address automatically.
Note
If you select DHCP, you must reserve the IP address.
-
Select Manual to specify network settings.
-
-
Click Save.
-
Find the new appliance in the list of appliances. If you hover over the name, you see "Waiting for deployment".
-
Wait for an image to be created. This can take five minutes.
-
In the rightmost column, click the three dots
 and select Download image.
Now you must deploy the image in your virtual environment. See Deploy appliances.
When you set up an integration later, you can select this appliance to host it.


