Configure a policy
Add a policy to control your users' web browsing activities, enforce security rules, and apply user and device conditions.
Key steps
The key steps to add a policy are as follows:
- Select the overall policy effect as Allow, Block, or Warn.
- Set matching criteria to apply the policy across user groups, device postures, and destinations.
- Set the actions for the selected matching criteria.
Requirements
You apply the policy to user groups and other policy objects. So, you must add them before you create a policy. Only the users and policy objects you've added appear in the lists under Conditions.
To add users, see Set up users and directories.
To add policy objects, see Policy objects.
Add a policy
To add a policy, do as follows:
- Go to My Products > Protected Browser > Web policy.
- In Policies, click Add Policy.
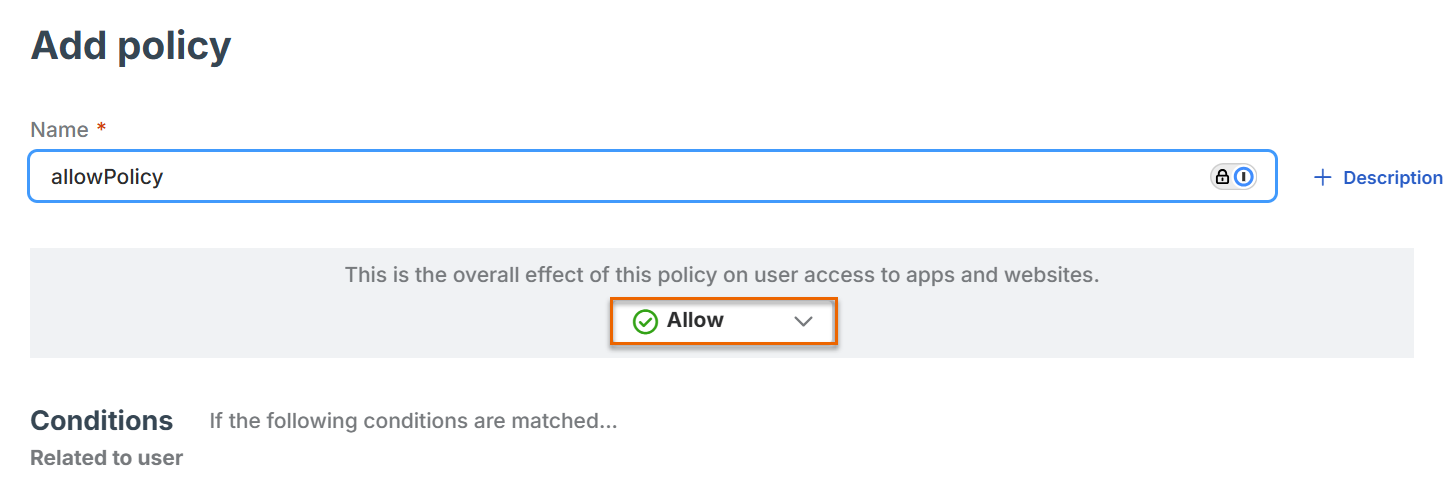
- Enter a name and description for the policy.
-
Select an overall policy effect from the following options:
- Allow: Allows selected user groups and device postures to access the selected destinations.
- Block: Blocks selected user groups and device postures from accessing the selected destinations.
- Warn: Allows selected user groups and device postures to access the selected destinations, but shows a warning message.
-
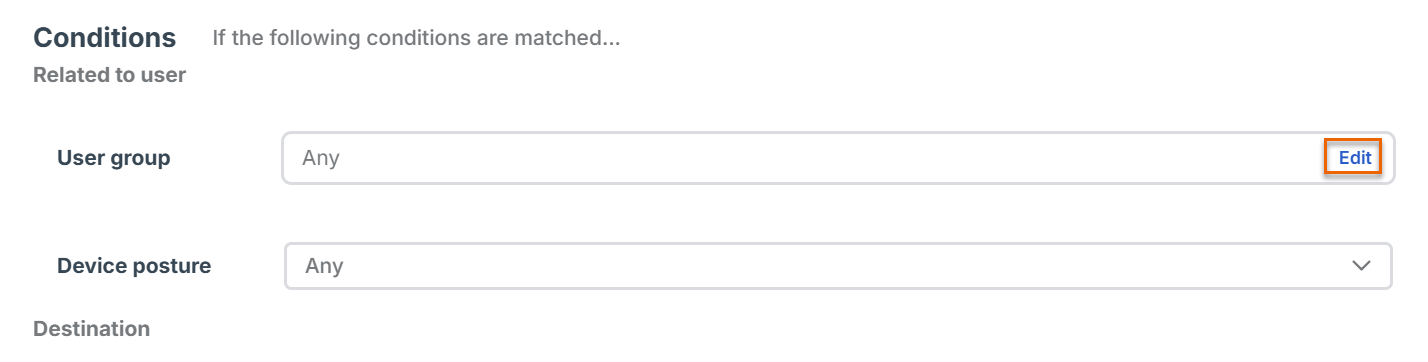
Under Conditions, set the following matching criteria:
-
User groups: Select the user groups, as follows:
-
In User group, click Edit.
-
In Edit user groups, under Available, select the user groups and move them to Assigned.
Warning
An assigned user group can't be empty. Make sure at least one user is added to each group.
-
Click Save.
-
-
Device posture: Select one or more device postures. To add a new one, see Add a device posture.
- Application group: Select one or more application groups. To add a new one, see Add an application group.
- Site list: Select one or more site lists. To add a new one, see Add a site list.
- Web category: Select one or more web categories. To add a new one, see Add a web category.
Tip
Select Any if your condition isn't specific to a user group or policy object.
-
-
Under Actions, specify additional controls if the overall policy effect is Allow or Warn:
- Download protection: Select an action profile for file downloads. See Download protection.
- Upload protection: Select an action profile for file uploads. See Upload protection.
- Data boundaries: Select an action profile for data boundaries. See Data boundaries.
Note
These actions don't apply if you've set the overall policy effect to Block.
-
Turn on Enforce use of full browser to restrict access to the policy's resources to the full Protected Browser. When users access these websites or resources, they are automatically opened in the full Protected Browser.
-
Turn on Enable Phishing Protection to prevent users from entering corporate email addresses and credentials on selected apps and websites, regardless of their risk level.
Select one of the following actions:
- Warn: Show a warning and allow the user to decide whether to continue.
- Block: Prevent the user from entering the monitored email address.
Note
You can turn Phishing Protection on in the policy only if you have turned it on globally in My Products > Protected Browser > Settings > Phishing Protection and specified the email domains or addresses you want to protect.
-
Click Save.