Deploy appliances
When you integrate some third-party products with Sophos Central, you need an appliance that collects data from them and forwards it to Sophos. The appliance is hosted on a VM.
Currently Sophos supports VMware ESXi 6.7 Update 3 or later, Microsoft Hyper-V 6.0.6001.18016 (Windows Server 2016) or later, and Amazon Web Services (AWS).
Note
Syslog data sent to the appliance isn't secure. If your appliance is hosted in the cloud, don't send the data via the public internet.
This page is for ESXi and Hyper-V appliances. It assumes that you've configured and downloaded an image for the integration appliance. Now you deploy it as described below.
Note
If you want to use an appliance on AWS for your third-party integration, see Add integrations on AWS.
Click the tab for your platform below to see the instructions.
Restriction
If you're using ESXi, the OVA file is verified with Sophos Central, so it can only be used once. If you have to deploy a new VM, you must create the OVA file again in Sophos Central.
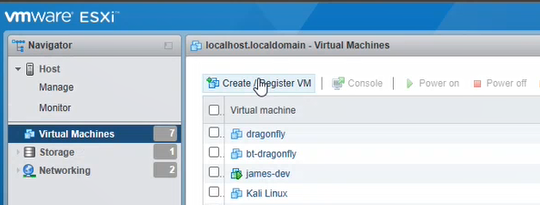
On your ESXi host, do as follows:
- Select Virtual Machines.
-
Click Create/Register VM.
-
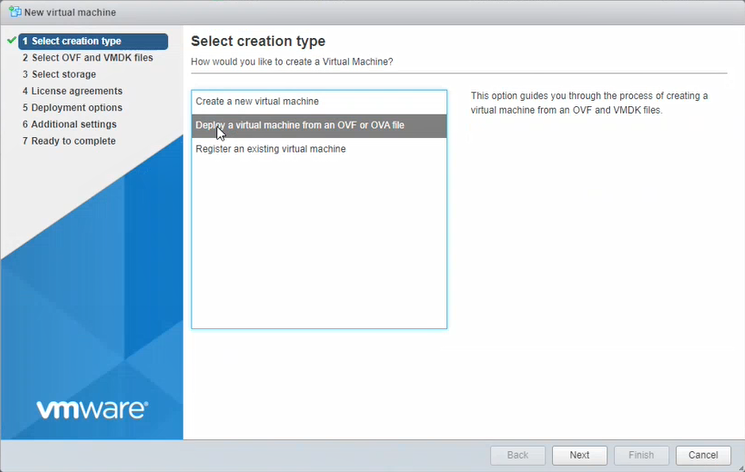
In Select creation type, select Deploy a virtual machine from an OVF or OVA file. Click Next.
-
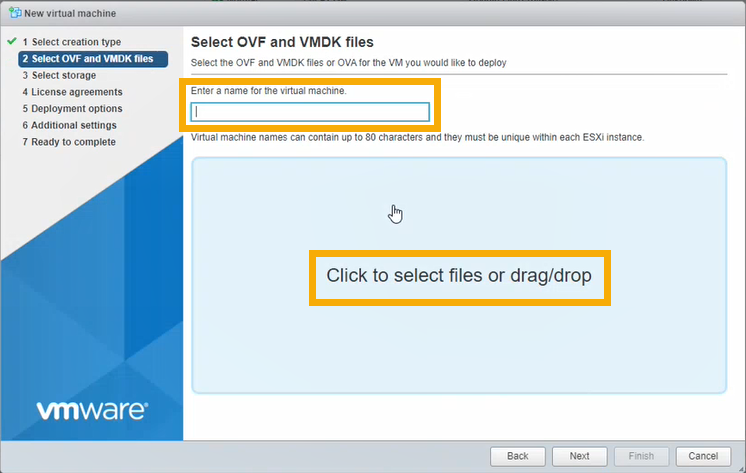
In Select OVF and VMDK files, do as follows:
- Enter the VM name.
- Click the page to select files. Select the OVA file you've downloaded.
- Click Next.
-
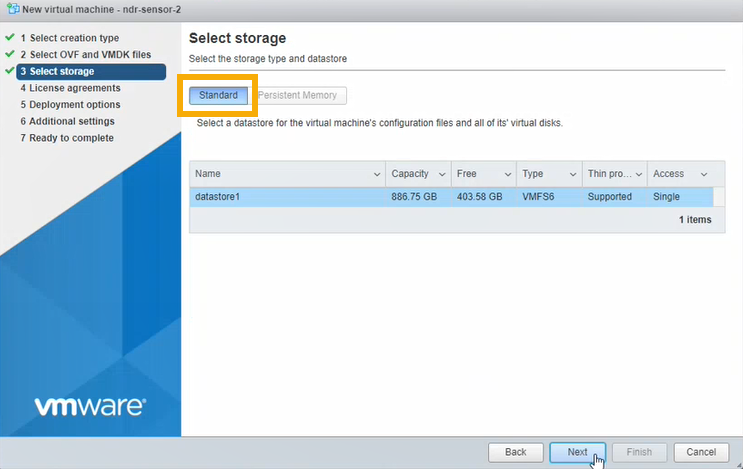
In Select storage, select Standard storage. Then select the datastore where you want to put your VM. Click Next.
-
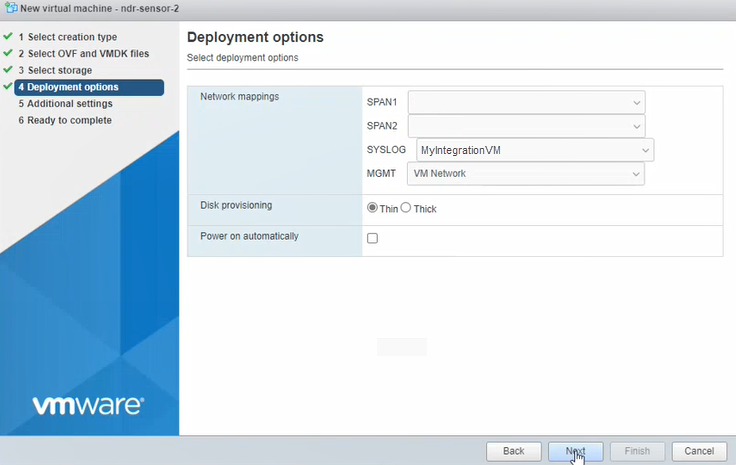
In Deployment options, enter settings as follows.
- SPAN1 and SPAN2. You don't need these for integrations. Select any port group as a placeholder and disconnect it in the VM settings later.
- In SYSLOG, select the port that will receive syslog data from your third-party product.
-
In MGMT, select the management interface for the appliance. This interface lets the appliance send data to the Sophos Data Lake.
You set up this interface earlier in Sophos Central in Internet-facing network port settings.
If you selected DHCP during setup, make sure the VM can get an IP address via DHCP.
-
In Disk Provisioning, make sure Thin is selected.
- Make sure Power on automatically is selected.
- Click Next.
-
Skip the Additional settings step.
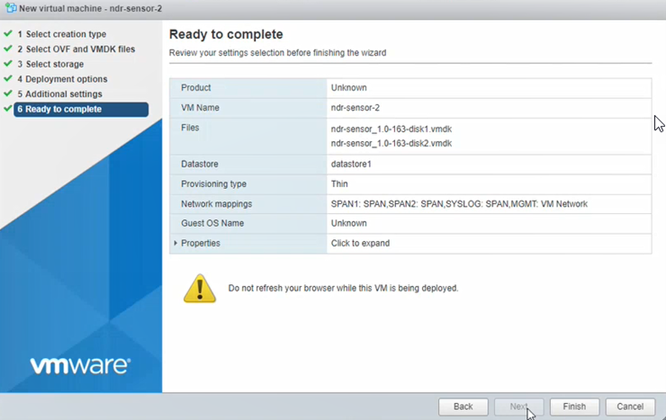
-
Click Finish. Wait for the new VM to appear in the VMs list. This can take a few minutes.
-
Power on the VM and wait for installation to complete.
The VM boots for the first time and checks that it can connect to the correct port groups and to the internet. Then it reboots. This can take up to 10 minutes.
-
In Sophos Central, go to Threat Analysis Center > Integrations > Configured.
-
Select the Integration Appliances tab and find the appliance on the VM you just deployed. The status icon shows Connected.

Now configure your third-party product to send data to the appliance. Go back to the integration instructions for that product to see how.
The Zip file you downloaded in Sophos Central contains the files you need to deploy your VM: virtual drives, seed.iso, and a Powershell script.
To deploy the VM, do as follows:
- Extract the Zip file to a folder on your hard drive.
- Go to the folder, right-click the
ndr-sensor.ps1file, and select Run with PowerShell. -
If you see a Security Warning message, click Open to allow the file to run.
You're prompted to answer a series of questions.
-
Give the VM a name.
- The script shows the folder where the VM files will be stored. This is a new folder in your default installation location for virtual drives. Enter
Cto allow the script to create it. - Enter the number of processors (CPUs) to use for the VM.
- Enter the amount of memory to use in GB.
-
The script shows a numbered list of all your current vSwitches.
Select the vSwitch you want to attach the management interface to and enter its number. This interface lets the appliance send data to the Sophos Data Lake.
You set up this interface earlier in Sophos Central in Internet-facing network port settings.
If you selected DHCP during setup, make sure the VM can get an IP address via DHCP.

-
Enter the vSwitch you want to attach to the syslog interface.
This is the vSwitch that will receive syslog data from your third-party product.
-
You don't need to specify vSwitches for capturing network traffic. These settings are only relevant if you have Sophos NDR. Select any vSwitch as a placeholder and disconnect it in the VM settings later.
The PowerShell script sets up the VM in Hyper-V. You'll see an Installation Completed Successfully message.
-
Use any key to exit.
-
Open the Hyper-V Manager to see the VM added to the list of virtual machines. If you need to change any settings, you can. Then power it on.
The VM boots for the first time and checks that it can connect to the correct vSwitches and the internet. Then it reboots. This can take up to 10 minutes.
-
In Sophos Central, go to Threat Analysis Center > Integrations > Configured.
-
Select the Integration Appliances tab and find the appliance on the VM you just deployed. The status icon shows Connected.
Now configure your third-party product to send data to the appliance. Go back to the integration instructions for that product to see how.
Upload image files
To upload the disk image files and seed ISO to the Nutanix system, do as follows:
- From a web browser, sign in to the Nutanix web console on port 9440.
-
Go to Home > Settings.
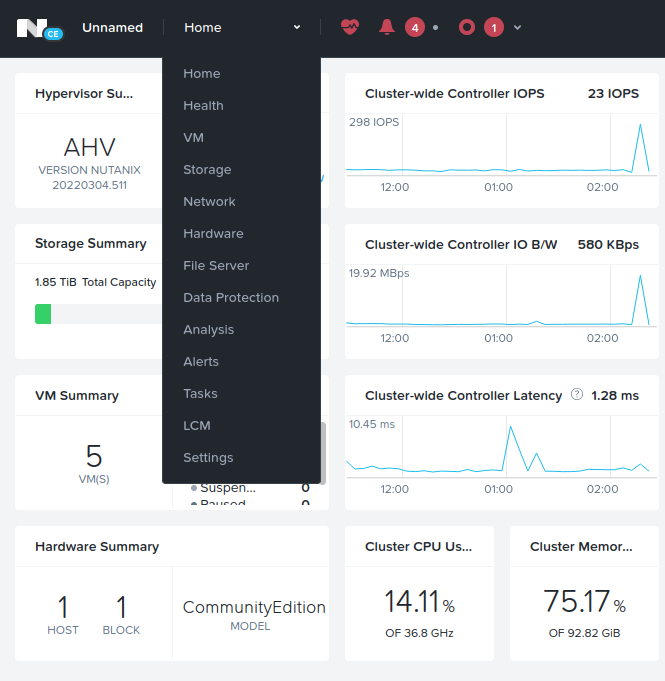
-
Select Image Configuration.

Upload root image file
- Click Upload Image
- Enter a name. We recommend that you include the word "root" in the name.
- (Optional) Add an Annotation.
-
Select Upload a file, click Browse, and select your file.
When you select your file, Image type is automatically selected.
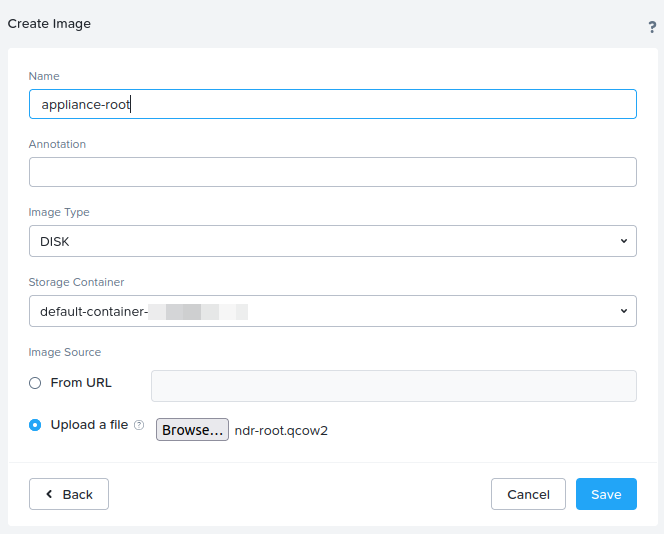
-
Click Save.
The file upload starts. Wait for the upload to finish before you continue the setup.
Upload seed ISO image file
- Click Upload Image.
- Enter a name. We recommend that you include the word "ISO" in the name.
- (Optional) Add an Annotation.
-
Select Upload a file, click Browse, and select your file.
When you select your file, Image type is automatically selected.
-
Click Save.
The file upload starts. Wait for the upload to finish before you continue the setup.
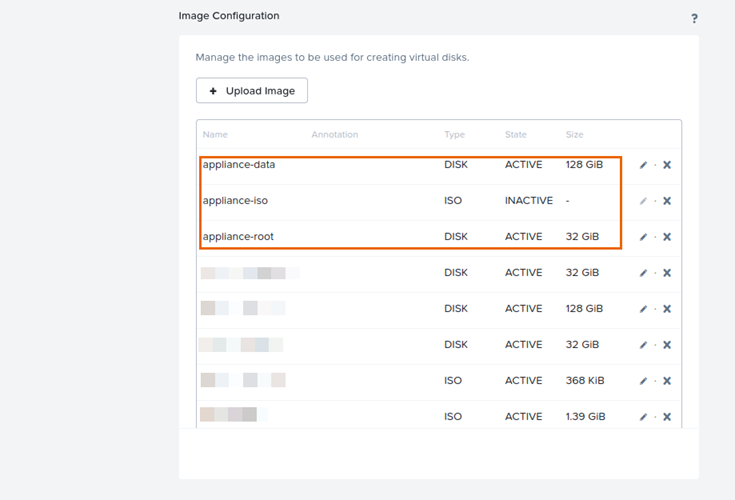
The three uploaded files will appear in the Image Configuration page.
Upload the installation script
A script named ndr-sensor.sh is also included in the zip file. To upload to the Nutanix AHV VM controller, use secure file transfer protocol (SCP), as follows:
- For Windows, open a command prompt, or on MacOS or Linux, open a terminal.
- Change to the directory where the unzipped files are located.
-
Run the following command:
scp ndr-sensor.sh admin@<ip-address>:~/.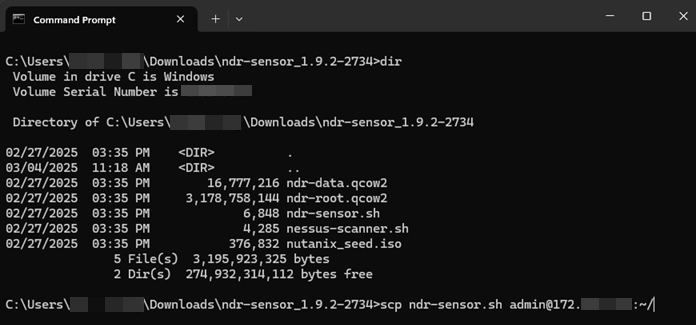
-
Enter the admin password.
Run the installation script
- Open the Nutanix AHV VM.
- Use the following command to sign in and connect via SSH:
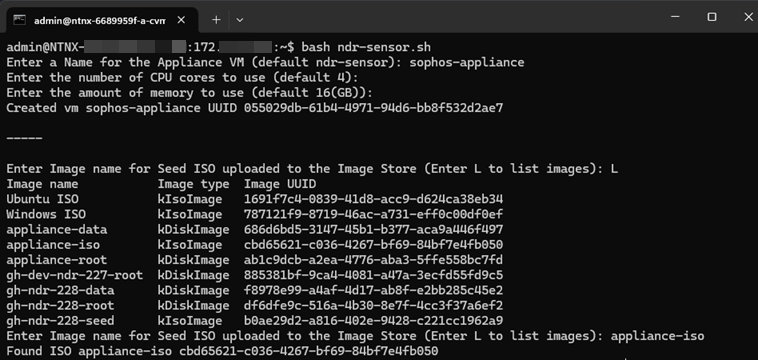
ssh admin@<ip-address>. - To run the installation script, run the following command:
bash ndr-sensor.sh. -
Enter a name for the appliance VM. The default name is
ndr-sensor.
Note
For items that list a default value, you can press Enter to accept the default value.
-
Enter the number of CPU cores to assign to the VM. The default is
4. - Enter the amount of memory to assign to the VM. The default is
16(GB).
You'll see the following message: Created vm <name> UUID <UUID>.
Select the VM disk image files
Note
For all the disk selection steps, you can enter 'L' to list the images stored on the system.
To select the VM disk image files, do as follows:
-
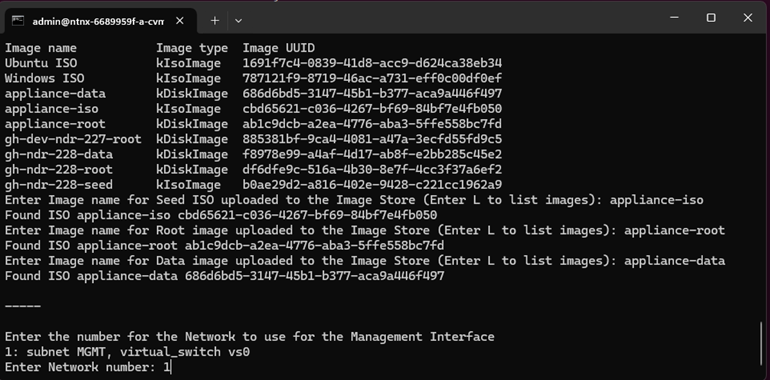
Enter the image name for the seed ISO you uploaded.
-
Enter the image name for the root disk image file you uploaded.
- Enter the image name for the data disk image file you uploaded.
Network Configuration
The script creates the following network interfaces for the VM:
- Management network
- Syslog network
- ERSPAN for tunneled capture data
- SPAN for mirrored network to receive capture data from other VM on this VM server
The script will list the available virtual subnets that can be used by the management, syslog, and tunneled Remote Switched Port Analyzer (RSPAN) capture data.
A single subnet can be used for all three networks.
To assign subnets to the networks, do as follows:
-
Enter the number corresponding to the subnet to use for the management network.
-
Enter the number corresponding to the virtual subnet to use for the syslog reception network.
- The configuration for the SPAN network is automatically created using the configuration parameters. It's set as
type=kSpanDestinationNic. - Enter the number corresponding to the virtual subnet to use for the tunneled RSPAN capture network.
When the script has completed, it provides some example acli commands to enable a Nutanix SPAN session. The MAC address listed in the example commands is the MAC address of the SPAN interface created by the script.
The example commands can be used for the following types of SPAN session:
- SPAN data from all VMs on the VM host.
- SPAN data from a single VM on the VM host.
For more information, see Traffic Mirroring on AHV Hosts.
Start the VM
After completing the script, return to the Nutanix web console and go to the VM page, then power your VM on.
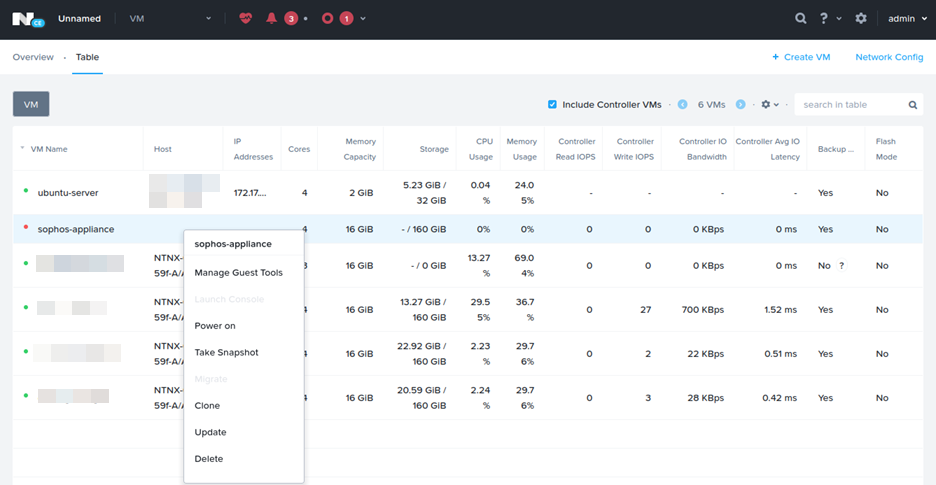
Note
When you power the VM on, it goes through its first boot process, which can take up to ten minutes.
In Sophos Central, go to the Integrations page for the product you're integrating and refresh it. The VM's status is now Connected.