Sophos NDR on OnLogic hardware
Sophos NDR now supports installation on OnLogic systems that we've tested and certified.
Note
Sophos NDR is supported only when deployed on certified hardware. Always refer to the certified hardware specifications for NDR. To download the hardware specifications, click Certified hardware specifications for NDR.
Create an NDR appliance image
Sophos NDR uses an appliance to collect data and forward it to the Sophos Data Lake for analysis.
Before you set up your hardware, you must create and download an NDR appliance installation image. You’ll deploy this ISO image as your NDR appliance later.
- In Sophos Central, go to Threat Analysis Center > Integrations.
- Find and click Sophos Network Detection and Response (NDR).
-
On the NDR page, in Data Ingest (Security Alerts), click Add Configuration.
Integration setup steps appears.
-
In Step 1 enter a name and description for the integration.
- In Step 2, click Create new appliance.
-
To create the new appliance, do as follows:
- Enter the appliance name and description. You must enter a unique name.
- In Virtual platform., select Hardware.
-
In Step 3, exclude specific domains and protocols from checking. For example, you might do this if you have a domain that causes false positives.
You can set up your exclusions later, but you must enter an exclusion list name now.
- Enter Exclusion list name.
- To exclude a domain, click Domain exclusions. Enter the domain name, for example
sophos.com, and click Add. -
To exclude a protocol, click Protocol exclusions. You can enter information in either or both of the fields:
- In the first field, enter a master protocol. For example,
TCPorUDP. - In the second field, enter a sub-protocol (website). For example,
facebook.
We don't recommend excluding a master protocol completely. Only do this if a high-traffic protocol that isn't usually risky, like a routing protocol, generates too much data.
Note
You can export your exclusions as a JSON file. You can also upload exclusions to the list from a JSON file you've exported previously.
- In the first field, enter a master protocol. For example,
-
Click Add.
-
Click Save.
A pop-up shows you the Sophos Appliance Manager credentials. Make a note of them. You'll need Appliance Manager to access and troubleshoot appliances.
Your new integration now shows in the Configured NDR integrations list.
-
To download the image, click the three dots in the Actions column and select Download image. You may have to wait for the image to become available for download.
Create USB installation media
You must copy the ISO image to a USB drive. The instructions below describe how to do this using a third-party tool called balenaEtcher.
Tip
You can also use another third-party tool called Rufus to copy the ISO image to a USB drive.
Do as follows:
- Click the following link to download balenaEtcher using the appropriate installer for your operating system: Download. Go through the installation process.
-
Insert a USB stick into your computer or laptop.
Note
Make sure that the USB drive does not contain data you want saved.
-
Start the balenaEtcher application, as follows:
- Click on Flash from file
- Using the file selection dialog, select the NDR appliance ISO image you downloaded from Sophos Central.
- If you see a warning regarding a missing partition table, click Continue.
- Click Select target
-
Select the USB drive on which to install the ISO image.
Note
Use caution when selecting the USB device because this will erase all data currently on the drive.
-
Click Select 1.
- Click Flash.
- Accept any User Access Control messages.
Flashing progress will be displayed on the left panel.
Once the process is complete, you can exit balenaEtcher.
Install and connect system
- Unbox the OnLogic hardware.
-
Connect the following cables and peripherals to the OnLogic device:
- Power cables to the power supplies.
- HDMI Monitor: A VGA connection can be used via USB-C to VGA adapter (not included)
- USB Keyboard.
- Management Network cable to the top network interface port.
- Capture Network cable to the bottom network interface port.
Begin installation
- Insert the installation USB drive you created earlier into any available USB port of the OnLogic device.
- Power on the OnLogic device, or press
Ctrl+Alt+Deleteto reboot the OnLogic device. - Repeatedly press F2 to enter the BIOS.
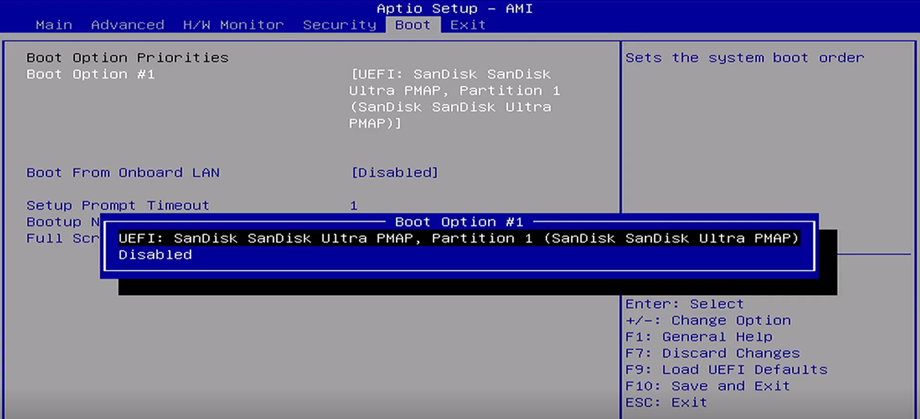
- Go to the Boot tab.
-
In the boot menu, if there's more than one boot option, use the arrow keys to select Boot Option #1, then press Enter.
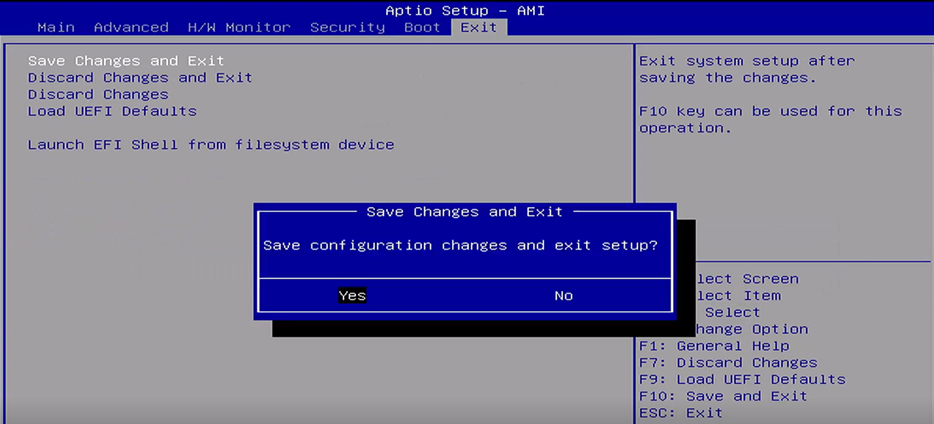
-
Go to the Exit tab, select the Save Changes and Exit option, then press Enter.
The system will take some time to boot. You must wait for the installer to finish loading.
-
Select Run live NDR ISO installer, and press Enter.
After some time, the installer will appear.
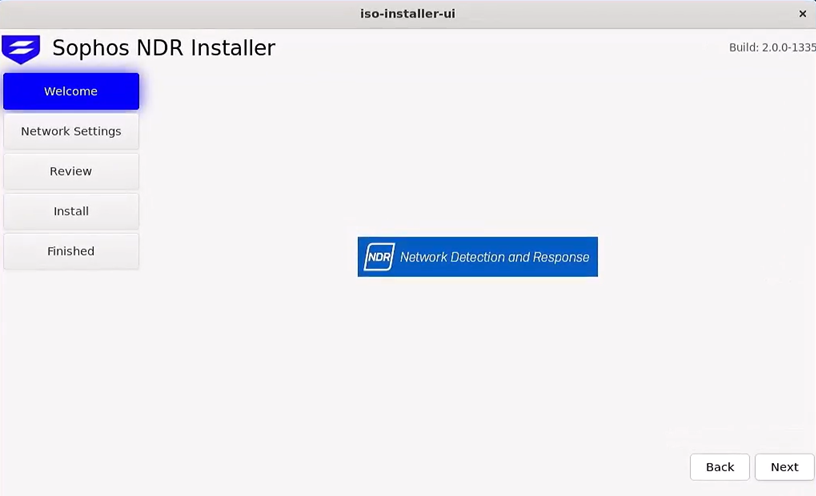
-
Click Next.
Configure network settings
Set up the interface information, roles, addresses, and proxy settings for your appliance.
Interface info
On the Interface Info tab, you can see the interface details, including the interface name, IP address, whether the link is up, the speed (in GB per second), and the maximum link mode (in GB per second).
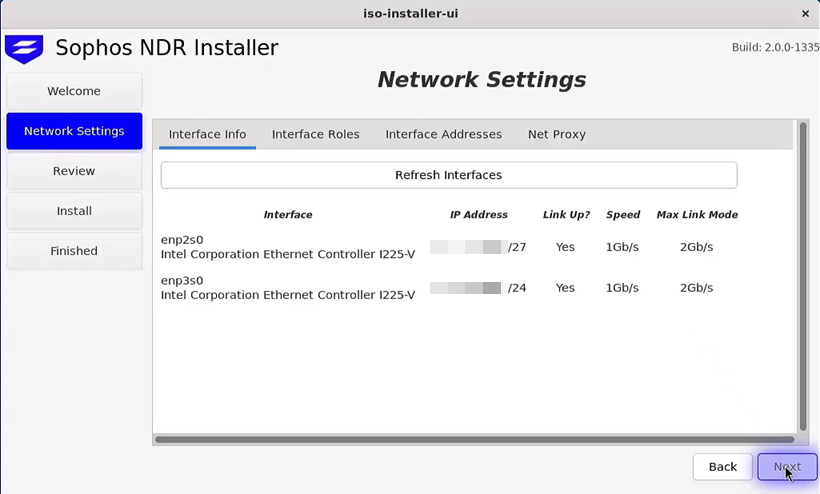
If you add a new interface, click Refresh Interfaces.
Click Next to continue.
Interface Roles
On the Interface Roles tab, you can select which roles to assign to your interfaces. The options are Management, span, and unused.
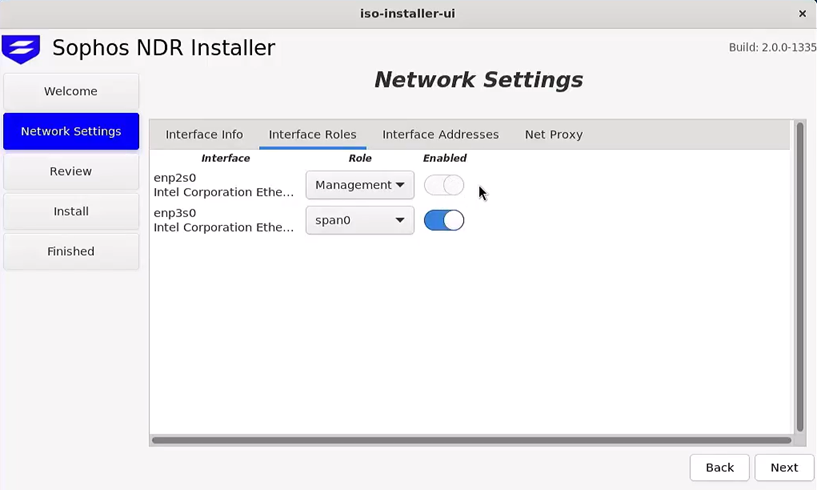
The management interface is used for the management network and connection to Sophos Central.
SPAN interfaces are used to collect mirrored network traffic from a source switch. You can do this using regular SPAN or ERSPAN (Encapsulated Remote SPAN) traffic.
When you select Management, it's automatically turned on, and you can't turn it off. When you select unused, it's automatically turned off, and you can't turn it on. When you select any of the SPAN ports, you can turn them on or off.
Click Next to continue.
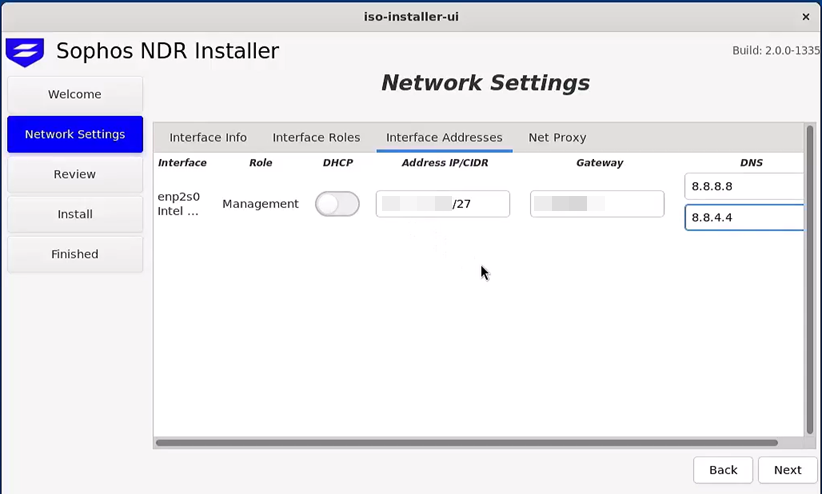
Interface Addresses
We recommend that you configure the management interface with an IP address, default gateway, and DNS address. You can use DHCP, but we don't recommend this because the appliance's IP address may change after a restart.
Do as follows:
- Turn DHCP off.
- Enter the IP address and subnet for the interface (in CIDR notation).
- Enter the default gateway.
- Enter the DNS server or servers.
- Click Next to continue.
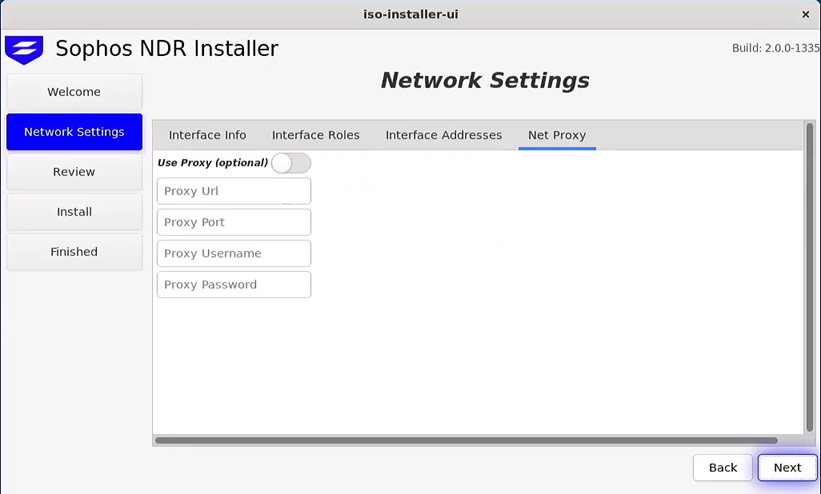
Net Proxy
If you use a proxy, turn on Use Proxy, and enter the URL, port, username, and password. Click Next to continue.
Configuration review
On the Configuration Review screen, you can review your server and interface configuration.
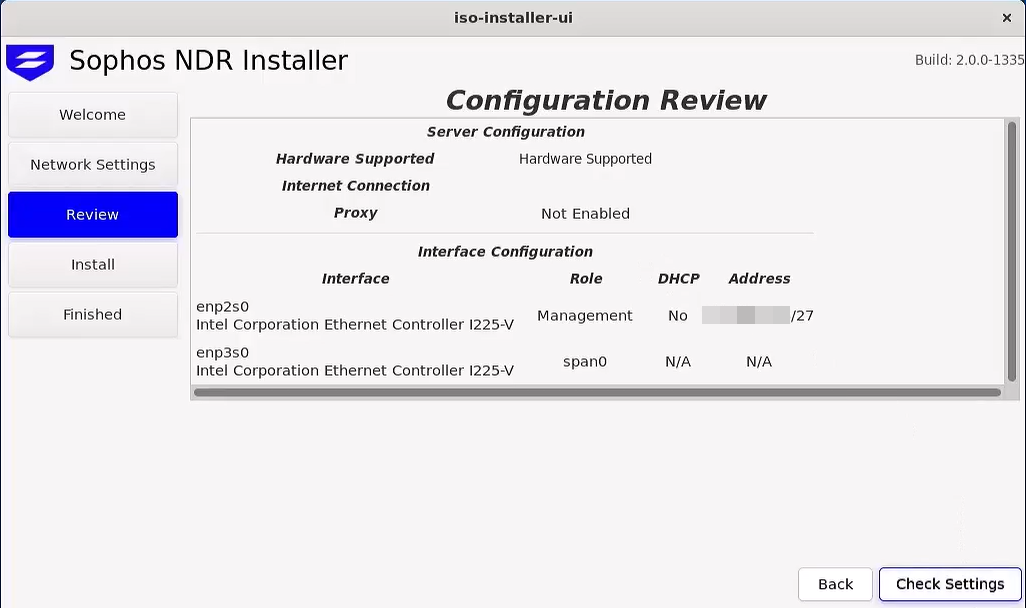
If you need to change your configuration, click Back. Otherwise click Check Settings.
Your network settings are checked to make sure traffic is allowed through your firewall. When the check is complete, you'll see a confirmation message. Click OK to acknowledge the message, then click Apply to apply your network settings. You'll see another message confirming that your network settings have been applied. Click OK to proceed to the Install section.
Installation process
The system is now ready to partition disks and begin the installation process.
Click Install. You'll see a message warning you that the installation will format the disks, and you can't return to this screen, or any previous screens, when the installation starts.
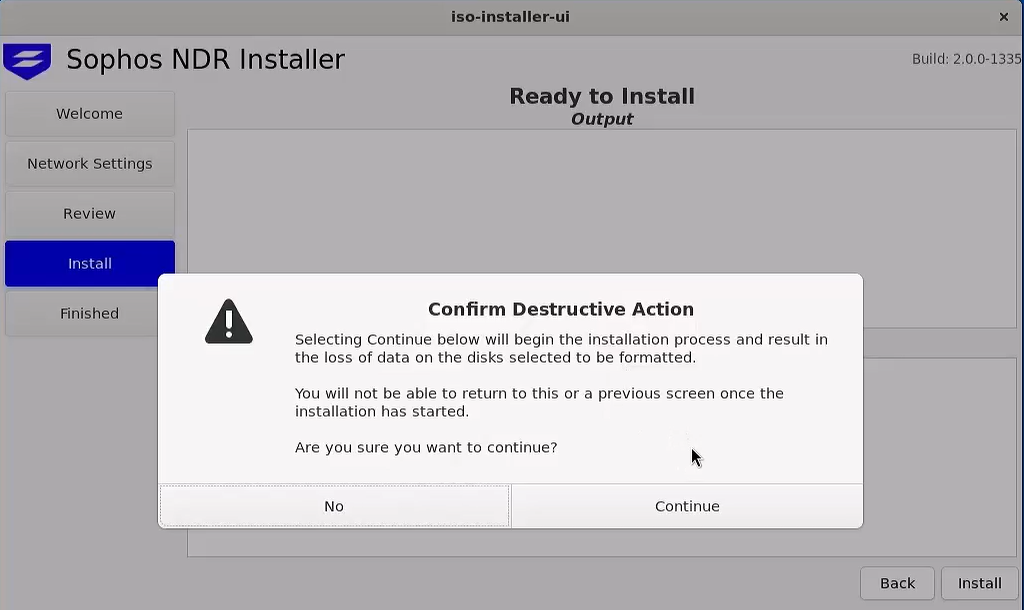
Click Continue. This confirms the disk partitioning and installation.
When the installation is complete, you'll see Installation Complete at the top of the screen.
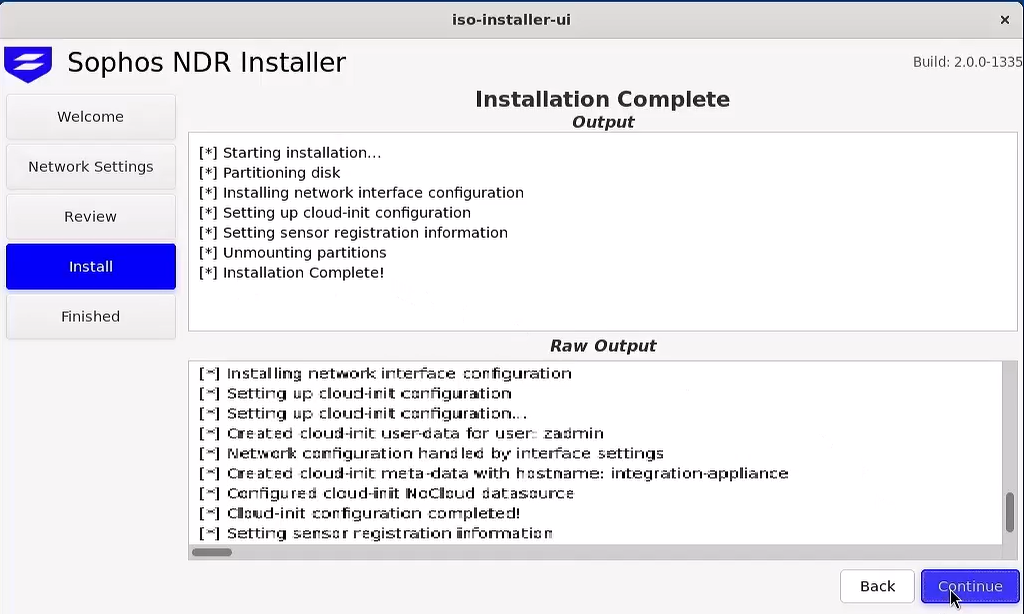
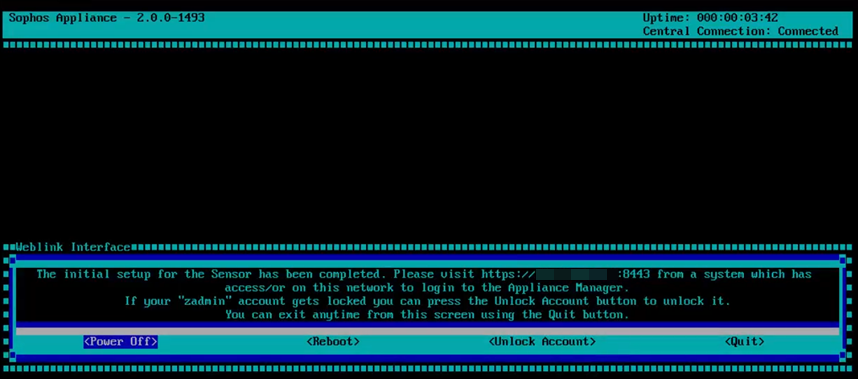
Complete installation
Click Reboot, then click Yes.
When prompted, remove the installation USB drive, and press Enter to continue the exit and reboot process.
You'll see the screen below when the installation is complete.