Set up synchronization with Microsoft Entra ID
You can synchronize users and groups from Microsoft Entra ID to Sophos Central. You can synchronize from multiple Microsoft Entra ID domains.
Warning
You can't synchronize Sophos Central with Microsoft Entra ID if you're using an Office 365 GCC High plan.
These instructions tell you how to set up a Microsoft Entra ID directory source. For help on managing your directory sources see Manage your sources.
You can preview the information you're synchronizing. You must finish the setup process first.
You must read the following sections and complete any necessary tasks before you set up synchronization with Microsoft Entra ID:
- Requirements
- Restrictions
If you've already done this, go to Add Microsoft Entra ID.
Requirements
Before you start, you need to check the following requirements:
-
Check you have the correct admin role. You must be a Sophos Central admin to set up directory sources.
-
Check you have the correct Microsoft Azure setup and permissions. You need the following details:
- A Microsoft Azure subscription and Microsoft Entra ID.
- The
directory.readallpermission in Microsoft Azure. - An Azure Application and the information we need to communicate with your Microsoft Entra ID. See Check that you have the correct Microsoft Azure information.
-
Make sure any existing users or groups in Sophos Central have a Microsoft Entra ID match.
If any users or groups don't have a match, you need to manage them manually in Sophos Central.
-
Make sure all your Microsoft Entra ID users have an email address.
You need an email address for your users to protect them when using many Sophos Central workflows.
For example, if you're using Sophos Email to protect your users, email going to an email address not associated with a user isn't delivered.
Warning
Users may be duplicated under some circumstances. This is because the UPN identifiers synchronized from Microsoft Entra ID and the endpoint user login don’t match. For more information, see Why are some of my Microsoft Entra ID sync'd users not linked to an Endpoint login user?.
For more information on synchronizing with Microsoft Entra ID, see Join your work device to your organization's network.
Restrictions
Before you set up synchronization, you need to know the following:
- You can't synchronize multiple Microsoft Entra ID sources from the same domain.
- You can't synchronize users or email addresses to multiple Sophos Central Admin accounts. Users and email addresses must be unique in each Sophos Central Admin account.
- You can't synchronize users from the same domain using Active Directory (AD) and Microsoft Entra ID.
- You can't synchronize the delegation details for users, groups, and shared mailboxes.
- You can't add or remove devices using Microsoft Entra ID and then synchronize the changes.
Check that you have the correct Microsoft Azure information
To synchronize with Microsoft Entra ID, you need some Microsoft Azure information.
To get this information, you need to set up an Azure Application. If you have one set up, check that you have the information listed in this section.
To set up an Azure Application, follow the instructions in Set up an Azure Application.
Warning
You must follow these instructions exactly.
If you've set up your Azure Application using only the Microsoft Entra ID Graph Directory.Read.All permission and you want to make changes to your Microsoft Entra ID synchronization settings, you must add the Microsoft Graph Directory.Read.All permission. For more information on setting up your Azure Application, see Set up an Azure Application.
-
Make sure you have a note of the following information.
- Tenant domain
- Application ID
- Client secret. You need the value for your client secret.
- Client secret expiration
-
If you're missing any of the information, you can use the instructions in “Set up an Azure Application” to get it.
You're now ready to configure your Microsoft Entra ID settings.

Add Microsoft Entra ID
To add a Microsoft Entra ID directory source, do as follows:
- Click the General Settings icon
 .
. - Under Administration, click Directory service.
- Click Add Microsoft Entra ID.
- Enter a Name for the source.
- Enter a description.
- Enter the Domain for the source.
- Click Next.
You can now add your Azure application information.
Configure Microsoft Entra ID sync settings
To configure Microsoft Entra ID sync settings, do as follows:
-
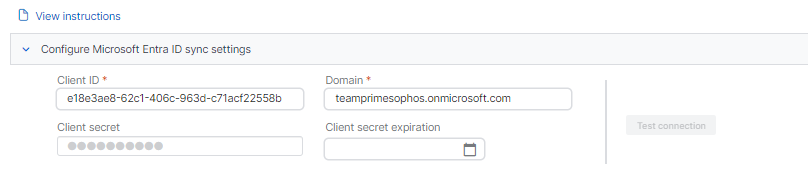
In Configure Azure Sync Settings, enter the following information:
- Client ID: This is the Application ID for your Azure Application.
- Domain: This is the primary domain assigned to your Microsoft Entra ID instance.
- Client secret: This is the value for the client secret for your Azure Application. You can get your client secret value from the Value field when creating a client secret. See Set up an Azure Application.
- Client secret expiration: This is the expiration date for your client secret.
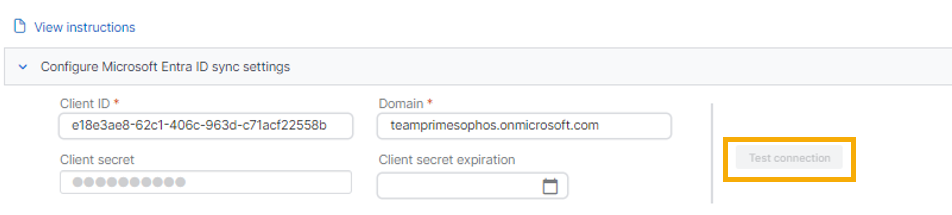
-
Click Test connection to validate your settings.
- Click Save to save the settings.
-
Click Test connection to validate the saved credentials.
You can now choose the users and groups you want to synchronize.
If the connection test fails and you get the "Verification failed due to invalid client ID" error, it might be because you're using an incorrect Application ID, or user sign-in is disabled in the Microsoft Entra ID admin center. For help, see Verification failed due to invalid client ID error when setting up synchronization with Microsoft Entra ID.
Select users and groups to synchronize
You can filter the users and groups you synchronize.
If you switch filters, you change the users and groups you're synchronizing. Any users and groups not included in the new filter are removed from Sophos Central.
If you have existing users and groups in Sophos Central and you're synchronizing with Microsoft Entra ID for the first time, we recommend that you select all users and groups. This gives the largest set of users and groups for the synchronization service to match.
If you have a complex hierarchy of groups and users in Microsoft Entra ID, we recommend that you add users and groups after filtering them. You can use either Add users by group filter or Add users by user filter.
To select your users and groups, do as follows:
-
In Select users and groups to include in the synchronization, choose which users and groups you want to synchronize with Microsoft Entra ID. Using filters allows you to synchronize specific users and groups from Microsoft Entra ID.
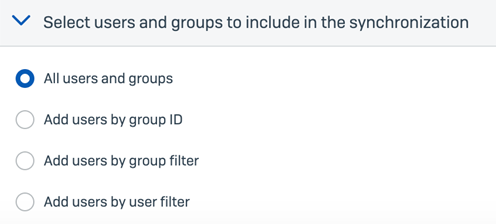
For more information using these filters, see Filter users and groups.
-
Click Save.
You can now set up your synchronization schedule.
Set up your synchronization schedule
You can choose the frequency at which the synchronization of users and groups should happen.
To set up a schedule, do as follows:
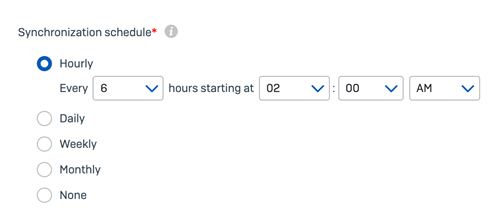
- Go to Synchronization schedule.
-
Select your schedule from the following:
- Hourly: We synchronize your data based on the hour multiple and your chosen local start time. For example, every 6 hours starting at 02:00 AM.
- Daily: We synchronize your data daily at your selected local time.
- Weekly: We synchronize your data on your selected days at your selected local time.
- Monthly: We synchronize your data on your chosen dates. You can choose up to two dates. Click Add another day to add a second date.
- None: Chose this option when you want to synchronize manually every time.
-
Click Save.
You can now synchronize with Microsoft Entra ID.
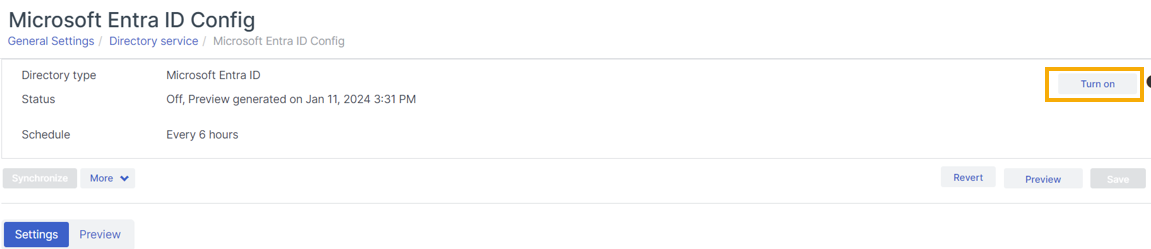
Synchronize with Microsoft Entra ID
You can preview the information you're synchronizing. See Synchronization preview
To synchronize with Microsoft Entra ID, do as follows:
- Click Turn on.
-
Click Synchronize.
Your synchronization status updates.
-
Click Users to review the changes to your users.
- Click Groups to review the changes to your groups.
Synchronization preview
You can preview the information you're synchronizing.
If you've already set up synchronization, you must turn it off before you can generate a preview. Preview results are valid for seven days, or until the next synchronization.
To generate a preview, do as follows:
- Click the General Settings icon .
- Under Administration, click Directory service.
- Select the Microsoft Entra ID source you want to preview.
-
If the source is turned on, click Turn Off.
Wait for the status to change.
You see a Preview button, and a Preview tab.
-
Click the Preview button to generate the preview.
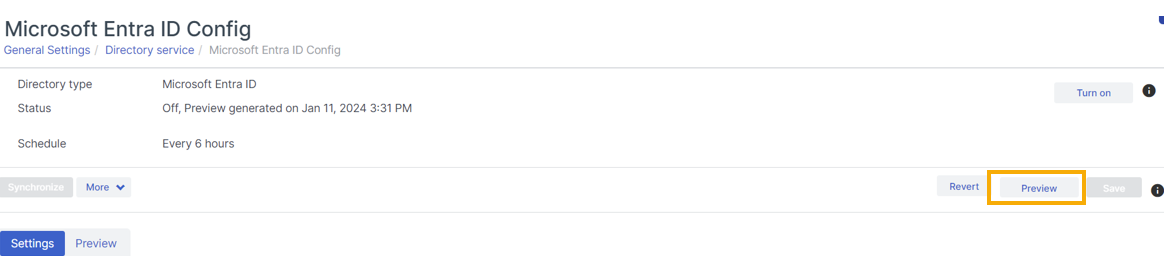
A banner appears while the preview is generated. Wait until it disappears.
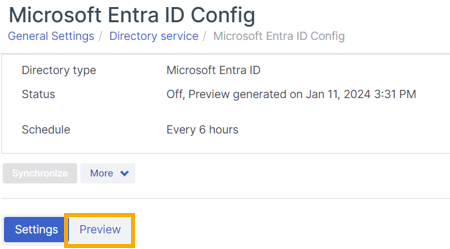
-
Click the Preview tab to see the results.
You can export the preview results in JSON.
If the preview results contain more than 20,000 records, we can't show it in the Preview tab. You need to export them.