Work cases
You can add information, collaborate with other users, reassign cases, perform response actions, and close or archive completed cases. For MDR cases, the available actions also depend on who manages the case.
The following factors affect how you can work on a case:
- Cases with any Closed status are read-only, except for the Status field and the Archive action. See Case status and verdict for details.
- Archived cases are read-only, except for the Unarchive action. See Archive cases for details.
Set who manages an MDR case
Managed By determines whether your organization or Sophos MDR controls the case workflow. For details, see Cases in Sophos MDR.
To set Managed By, do as follows:
- Click a case name in the Cases table to open the summary view, then click the New Tab icon to open the case details page.
-
In Manage Case, select Managed By.
Warning
After you set Managed By, it can't be changed. Make sure you choose the correct option before continuing.
-
Choose one of the following:
- Self: Your organization manages the case.
- Sophos MDR: Sophos MDR manages the case.
This option is only available for Investigation and Other case types. Other types can only be Sophos-managed. See Cases in Sophos MDR.
-
Confirm your selection.
Add comments to a case
Use comments to communicate with your team during your investigation. If you're a Sophos MDR customer, you can communicate directly with the MDR team by adding @sophos to your comment, which notifies the MDR team and includes them in your discussion.
To see, add, and respond to comments in a case, do as follows:
- Click a case name in the Cases table to open the summary view, and then click the New Tab icon to open the case details page.
- Click the Comment icon in the right sidebar to open the Comments slide-out.
- Enter your message in the Comment field.
- Click Save.
Drag the handle to adjust the width of the Comments slide-out. Case comments support HTML tags and emoji.
Tip
You can also see comments in the summary slide-out view when you click a case in the Cases table, but can only add comments on the full case details page.
Explore a case in detail with Entity Graph
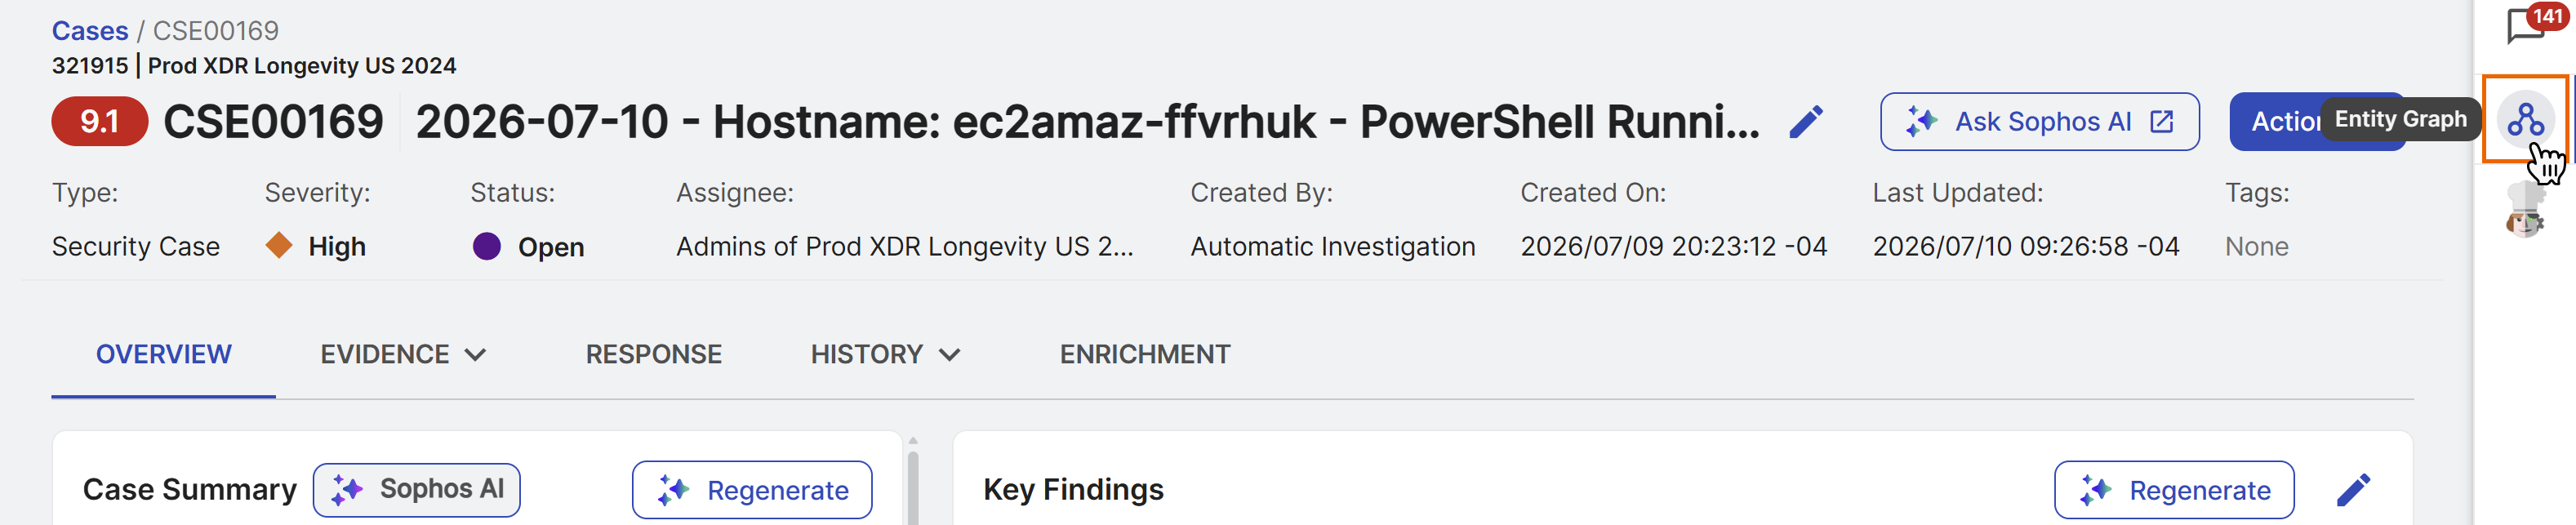
To examine the case's associated entities and explore their relationships and details, click the Entity Graph icon in the sidebar of the case details. For details, see Entity Graph.
Reassign cases
The assignee is the user or group responsible for the next action on a case. Each case has one assignee at a time.
For Sophos MDR customers, the assignee is different from Managed By. Managed By determines whether Sophos MDR or your organization manages the case. After Managed By is set, changing the assignee doesn't change who manages the case.
There are two ways to reassign a case to a specific user: by choosing an assignee or by changing the case status to Awaiting Action.
Choose an assignee
To reassign a case by choosing a new assignee, do as follows:
- Click a case name in the Cases table to open the summary view, and then click the New Tab icon to open the case details page.
-
In the Manage Case section, click the Assignee menu and choose the new assignee. Start typing in the Search field to narrow down the list by name or email address.
The assignee can be yourself, the entire tenant, or a specific user.
For Sophos MDR cases, the assignee options and status changes available to you depend on whether the case is Sophos-managed or customer-managed. For details, see Cases in Sophos MDR.
Change case status to Awaiting Action
To reassign a case by changing the status, do as follows:
- Click a case name in the Cases table to open the summary view, and then click the New Tab icon to open the case details page.
- In the Manage Case section, click the Status menu and choose Awaiting Action.
- In Awaiting Action, select a user whose action you're waiting for and click Assign Case.
- The case's status changes to Awaiting Action.
Attach files to a case
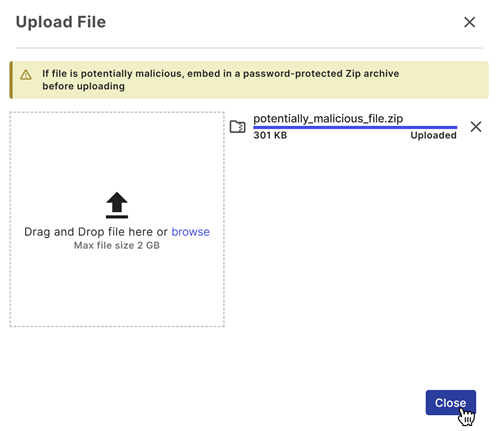
Share files relevant to a case by attaching them in the Evidence tab of the case. The maximum individual file size is 2 GB.
If you upload a potentially malicious file, put it in a password-protected ZIP archive and use infected as the password.
- Click a case name in the Cases table to open the summary view, and then click the New Tab icon to open the case details page.
- Go to the Evidence tab and select the Attachments sub-tab.
- Click Upload File.
-
Drag and drop files or click Browse to select the desired files.
-
Click Close.
Add saved searches to a case
Add saved searches to a case to provide context and make collaboration easier. When you do this, the case includes a link to the original search query.
Adding saved search queries doesn't create a copy of the search results or the original detection or event data.
- Go to Security Operations > Data Lake Search.
- Click Saved Queries.
-
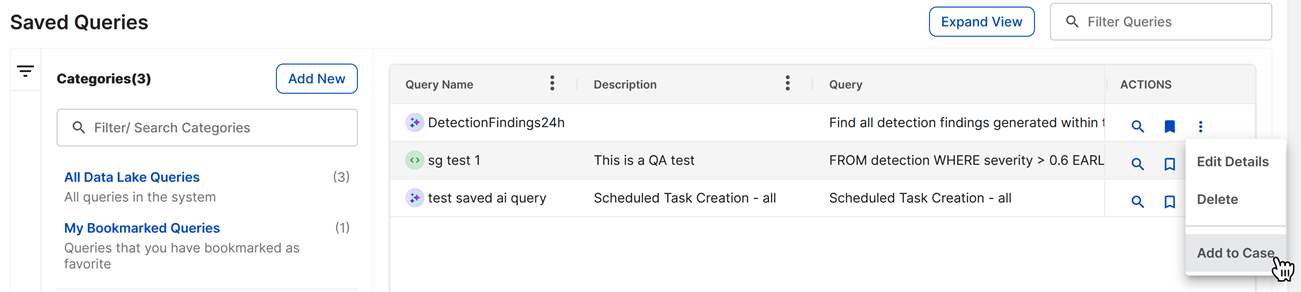
In Saved Queries, click the three dots to the right of the saved search and choose Add to Case.
-
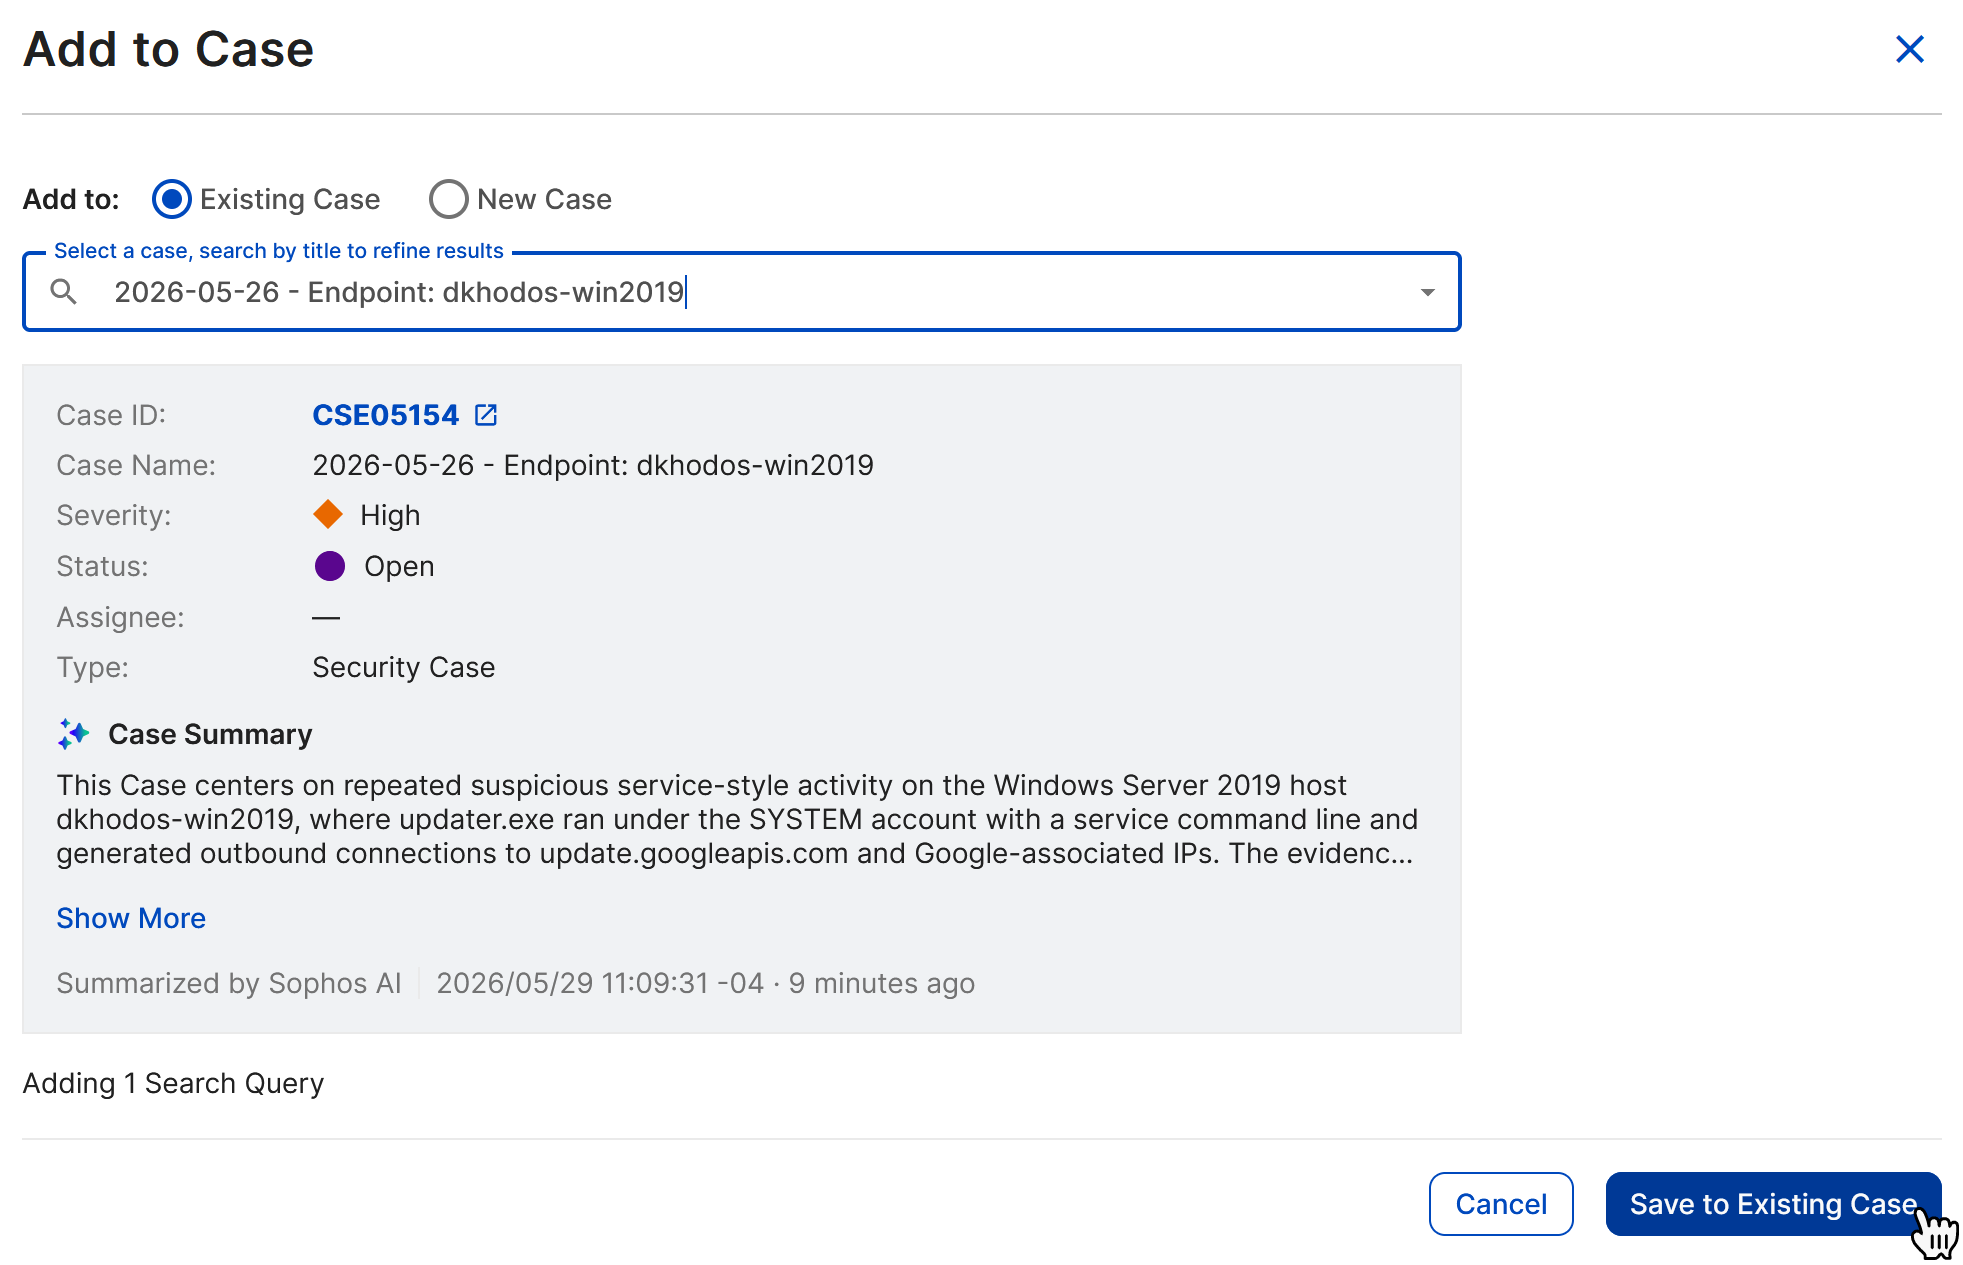
In Add to Case, choose either Existing Case or New Case.
- If adding to an existing case, click the menu to search for and select the desired case, and then click Save to Existing Case.
- If adding to a new case, choose a Case Type, enter a case title, and choose a Case Severity and Case Status. Click Create New Case.
Tip
You can add the same search query to multiple cases.
The Searches sub-tab of a case shows all linked search queries. Select the name of the query to open and run it in Data Lake Search.
Perform response actions
You can perform response actions on the case itself or on entities associated with the case if you've configured any applicable actions. For details, see Configuring actions.
- Find actions that run on the case itself by clicking the three dots in a case's summary slide-out view or the Actions menu on the full case details page.
- Find actions that run on entities associated with the case in the case's Response tab. For details, see Response tab.
Close cases
When you complete work on a case, we recommend that you close it using one of the available verdicts. For details on verdicts, see Case status and verdict.
Sophos MDR
MDR customers have a different set of verdicts. For details, see Close a case.
When a case is closed, its related detections are resolved and labeled according to the verdict. The verdicts and their corresponding detection labels are as follows:
| Close case verdict | Corresponding detection label |
|---|---|
| Authorized Activity | True Positive: Benign |
| Threat Mitigated | True Positive: Benign |
| Not Vulnerable | True Positive: Benign |
| False Positive | False Positive |
| Inconclusive | Not Actionable |
| Informational | Not Actionable |
| Confirmed Security Incident | True Positive: Malicious |
Note
Detection labels are one way Sophos XDR can learn what activity is valuable to your organization based on data contained within the detections. It's important to choose the most relevant label based on the outcome of the case.
To close a case, do as follows:
- Click a case name in the Cases table to open the summary view, and then click the New Tab icon to open the case details page.
- In the Manage Case section of the Overview tab, click the Status menu and choose Closed.
-
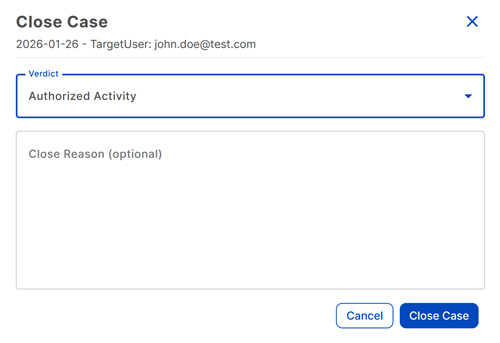
In Close Case, select the appropriate verdict and enter an optional reason for closing the case.
-
Click Close Case to confirm.
Archive cases
You can archive cases that are no longer relevant or that may have been created by mistake. Cases must first be closed to be archived. See Close cases for details.
Archive cases in one of the following two ways:
-
On the Cases page, do as follows:
- Select the checkbox for one or more cases in the table.
- Click Actions > Archive Selected Cases.
-
On a case details page, click Actions and choose Archive.
See archived cases
On the Cases page, click the Show Archived filter to show only archived cases.
Restore archived cases
You can restore archived cases in one of the following two ways:
-
On the Cases page, do as follows:
- Click Show Archived.
- Select the checkbox for one or more cases in the table.
- Click Actions > Unarchive Selected Cases.
-
On a case details page, click Actions > Unarchive.