Custom detection rules
You can create custom detection rules that create detections from normalized events in Sophos XDR based on a Data Lake Search query.
To see and create custom rules, go to Security Operations > Rules.
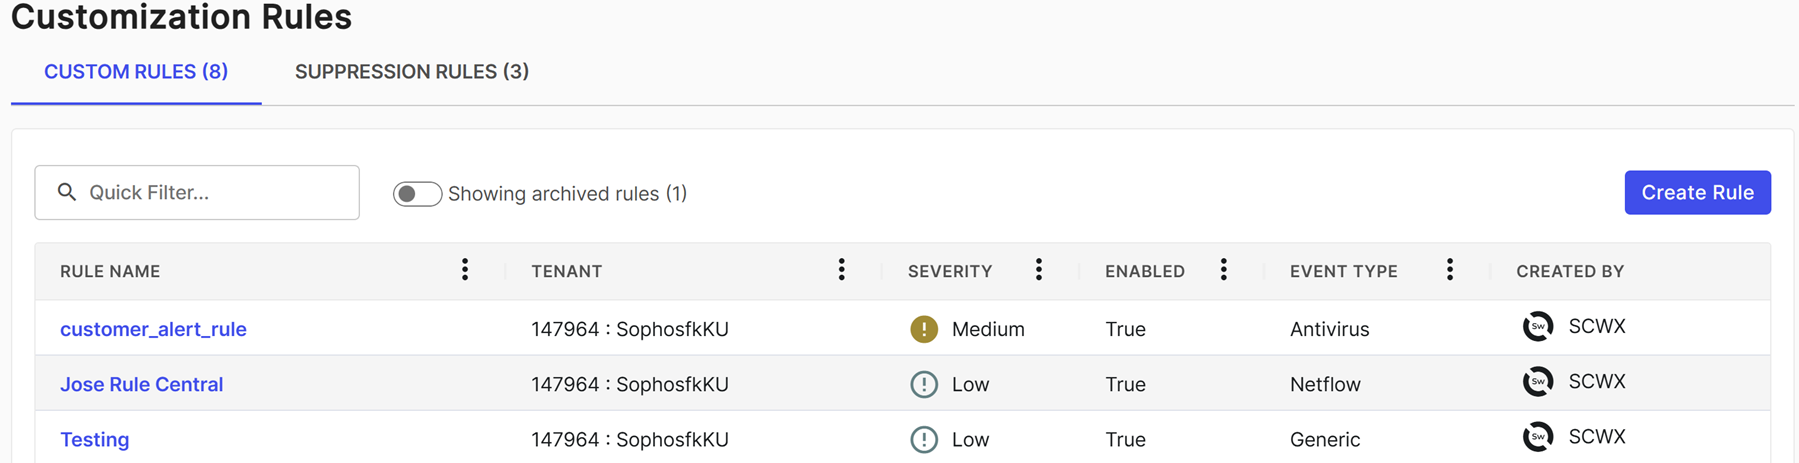
Custom rule characteristics and constraints
Custom rules use a different regex engine than Data Lake Search. The following are key differences to remember when you form an advanced search for use in a custom rule:
- IPv4 CIDR notation is supported on IP fields with operators
=andmatches. - Glob patterns aren't supported.
- Custom rules run queries against streaming data, and primitive fields don't automatically get default values, which differs from data stored in the data lake and queried by Data Lake Search. In custom rules, you can use the
NULLoperators to check whether these primitive fields are set.
Regex limitations
Custom rules don't support the following regex constructs:
- Backreferences and capturing sub-expressions
- Arbitrary zero-width assertions
- Subroutine references and recursive patterns
- Conditional patterns
- Backtracking control verbs
- The \C single-byte directive, which breaks UTF-8 sequences
- The \R newline match
- The \K start of match reset directive
- Callouts and embedded code
- Atomic grouping and possessive quantifiers
Special characters
The following characters have special meaning in regular expressions:
. ^ $ * + - ? ( ) [ ] { } \ | /
For IP addresses, domain names, and other instances with these characters, you must escape the characters with a backslash, like the following example:
1\.1\.1\.1
To escape long strings that contain multiple characters, enclose the whole string between \Q and \E so that the string isn't evaluated for regex characters. Escaping the full string in the following first example is equivalent to escaping the individual characters in the second example:
\Q${jndi:ldap://log4shell-smb-21yg3cbuy21gbcy21gc321uc${lower:ten}.w.nessus.org/nessus}\E
\$\{jndi:ldap:\/\/log4shell\-smb\-21yg3cbuy21gbcy21gc321uc\$\{lower:ten\}\.w\.nessus\.org\/nessus\}
Logical types
You can use logical types to match against data types represented across multiple fields in a schema. Rules can only match against a single schema type, but the logical type will expand to the fields available within the individual schema. For more information on logical types, see Logical types.
The following example uses the @user logical type within the auth schema:
FROM auth WHERE @user='gcostanza' and win_event_id='4624'
Available schema fields
Most event fields are available, except for the following fields that are added to the event after the detection engine processes it.
-
For
auth,netflow, anddns_queryschemas, the following objects and fields aren't available for custom detection rules to match:dest_ipgeo_summarysrc_ipgeo_summarysrc_ipblacklist_hitsdest_ipblacklist_hits
-
For all schemas, the
hostnamefield isn't available for custom detection rules to match. - For the
dns_queryschema, thewhoisobject isn't available for custom detection rules to match.
Create custom rules
Custom detection rules are based on a Data Lake Search query that targets the events you want to create detections for. Use Advanced Search query language first to create a query that targets the events you want before creating the custom rule. For details, see Advanced Search query language.
Custom rules are limited to creating a maximum of 5,000 detections an hour or 100,000 in 24 hours. If that limit is exceeded, the circuit breaker turns off the rule and we email the rule author to inform them the rule exceeded the limits. If this happens, update the rule to decrease the number of detections.
To create a custom detection rule, do as follows:
- Go to Security Operations > Data Lake Search and create your search using query language.
- When you're satisfied with the results, copy the query to paste into the rule builder.
- Go to Security Operations > Rules.
- Click Create Rule above the Custom Rules table.
-
In Create Custom Rule, paste the advanced search query that targets the desired events in the Rule Criteria field.
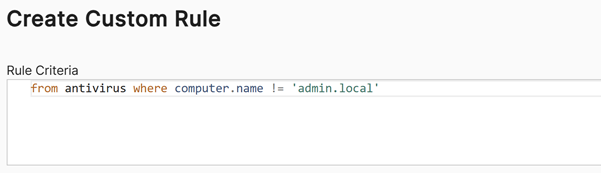
-
Enter a Name, choose Mitre Attack Categories, and enter a Description. These are added to the detections the rule creates.
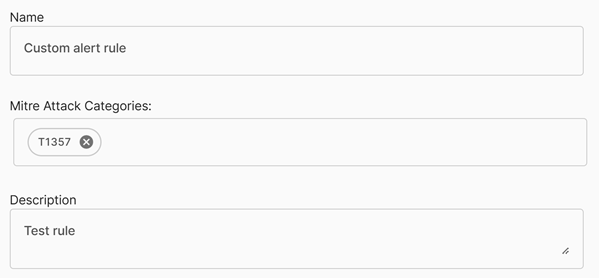
-
Select the severity for detections that the rule creates.
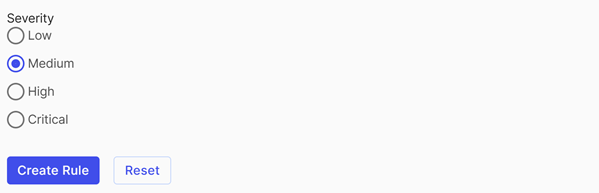
-
Click Create Rule.
The custom rule is turned on and added to the Custom Rules table.
See custom rule details
Click a rule name in the Custom Rules table to open its details.
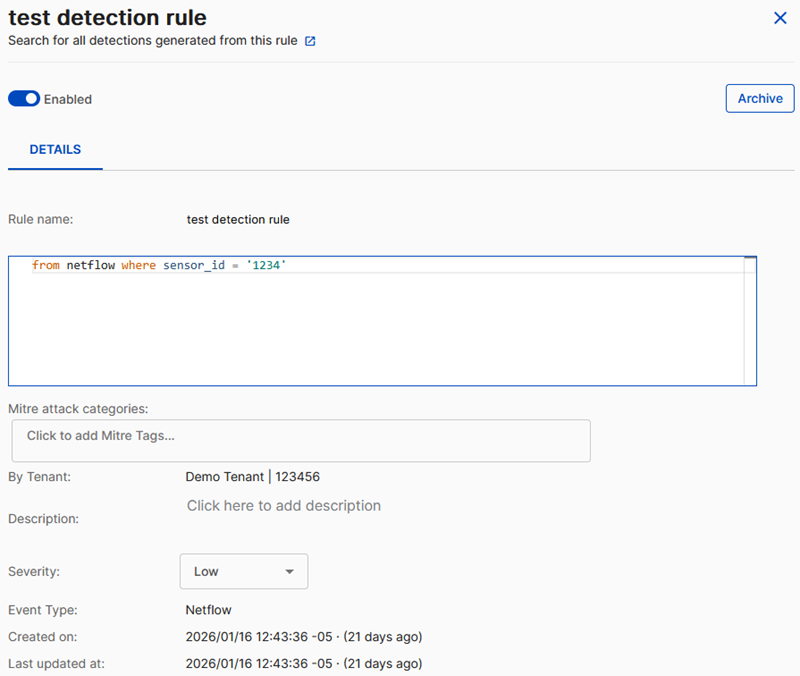
The Details tab of the custom rule shows overview information and the criteria the rule matches. If the rule has created detections in the last seven days, the following shows:
- Number of hits in the last seven days
- Last hit date
- A line chart that shows the number of hits over the last seven days
If there hasn't been any activity in the last seven days, this section doesn't show.
Turn custom rules on or off
Custom rules are turned on by default when you create them. When viewing a custom rule's details, click Enabled to turn the rule on or off.
Archive and restore custom rules
When viewing a custom rule's details, you can archive the rule by clicking Archive and confirming the action. Doing so turns off the rule if it was on, marks it as archived, and removes it from the default view of the Custom Rules table.
To view archived rules, click Showing Archived Rules above the Custom Rules table.
When viewing an archived custom rule's details, you can restore the rule by clicking Restore. Doing so restores the rule in a disabled state and returns it to the default view of the Custom Rules table.
See custom detections
You can see the detections created by a specific rule. To do so, open the rule's details and click the New Tab icon to open and run an advanced search for detections created by the rule.
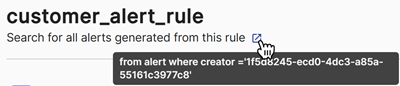
You can see custom detections on the Detections page. Turn on the Custom Detections filter to include custom detections in the table.