Enable Microsoft 365 response actions
If you previously configured Microsoft 365 response actions in the Threat Analysis Center (TAC), you must reconfigure those actions in the new Sophos XDR and MDR. This critical step ensures you and Sophos can continuing performing actions in your environment without interruption.
Tip
This video gives you an overview of enabling Microsoft 365 response actions in Security Operations:

Prerequisites
Before you begin, ensure the following:
- You must be a Sophos Fusion Admin or Super Admin.
- You must be a Microsoft 365 administrator.
Add connection
To recreate the connection needed for the response actions, do as follows:
- Sign in to Sophos Fusion as an Admin or Super Admin.
- Go to Security Operations > Integrations > Marketplace.
- Click the Microsoft Graph API actions card.
-
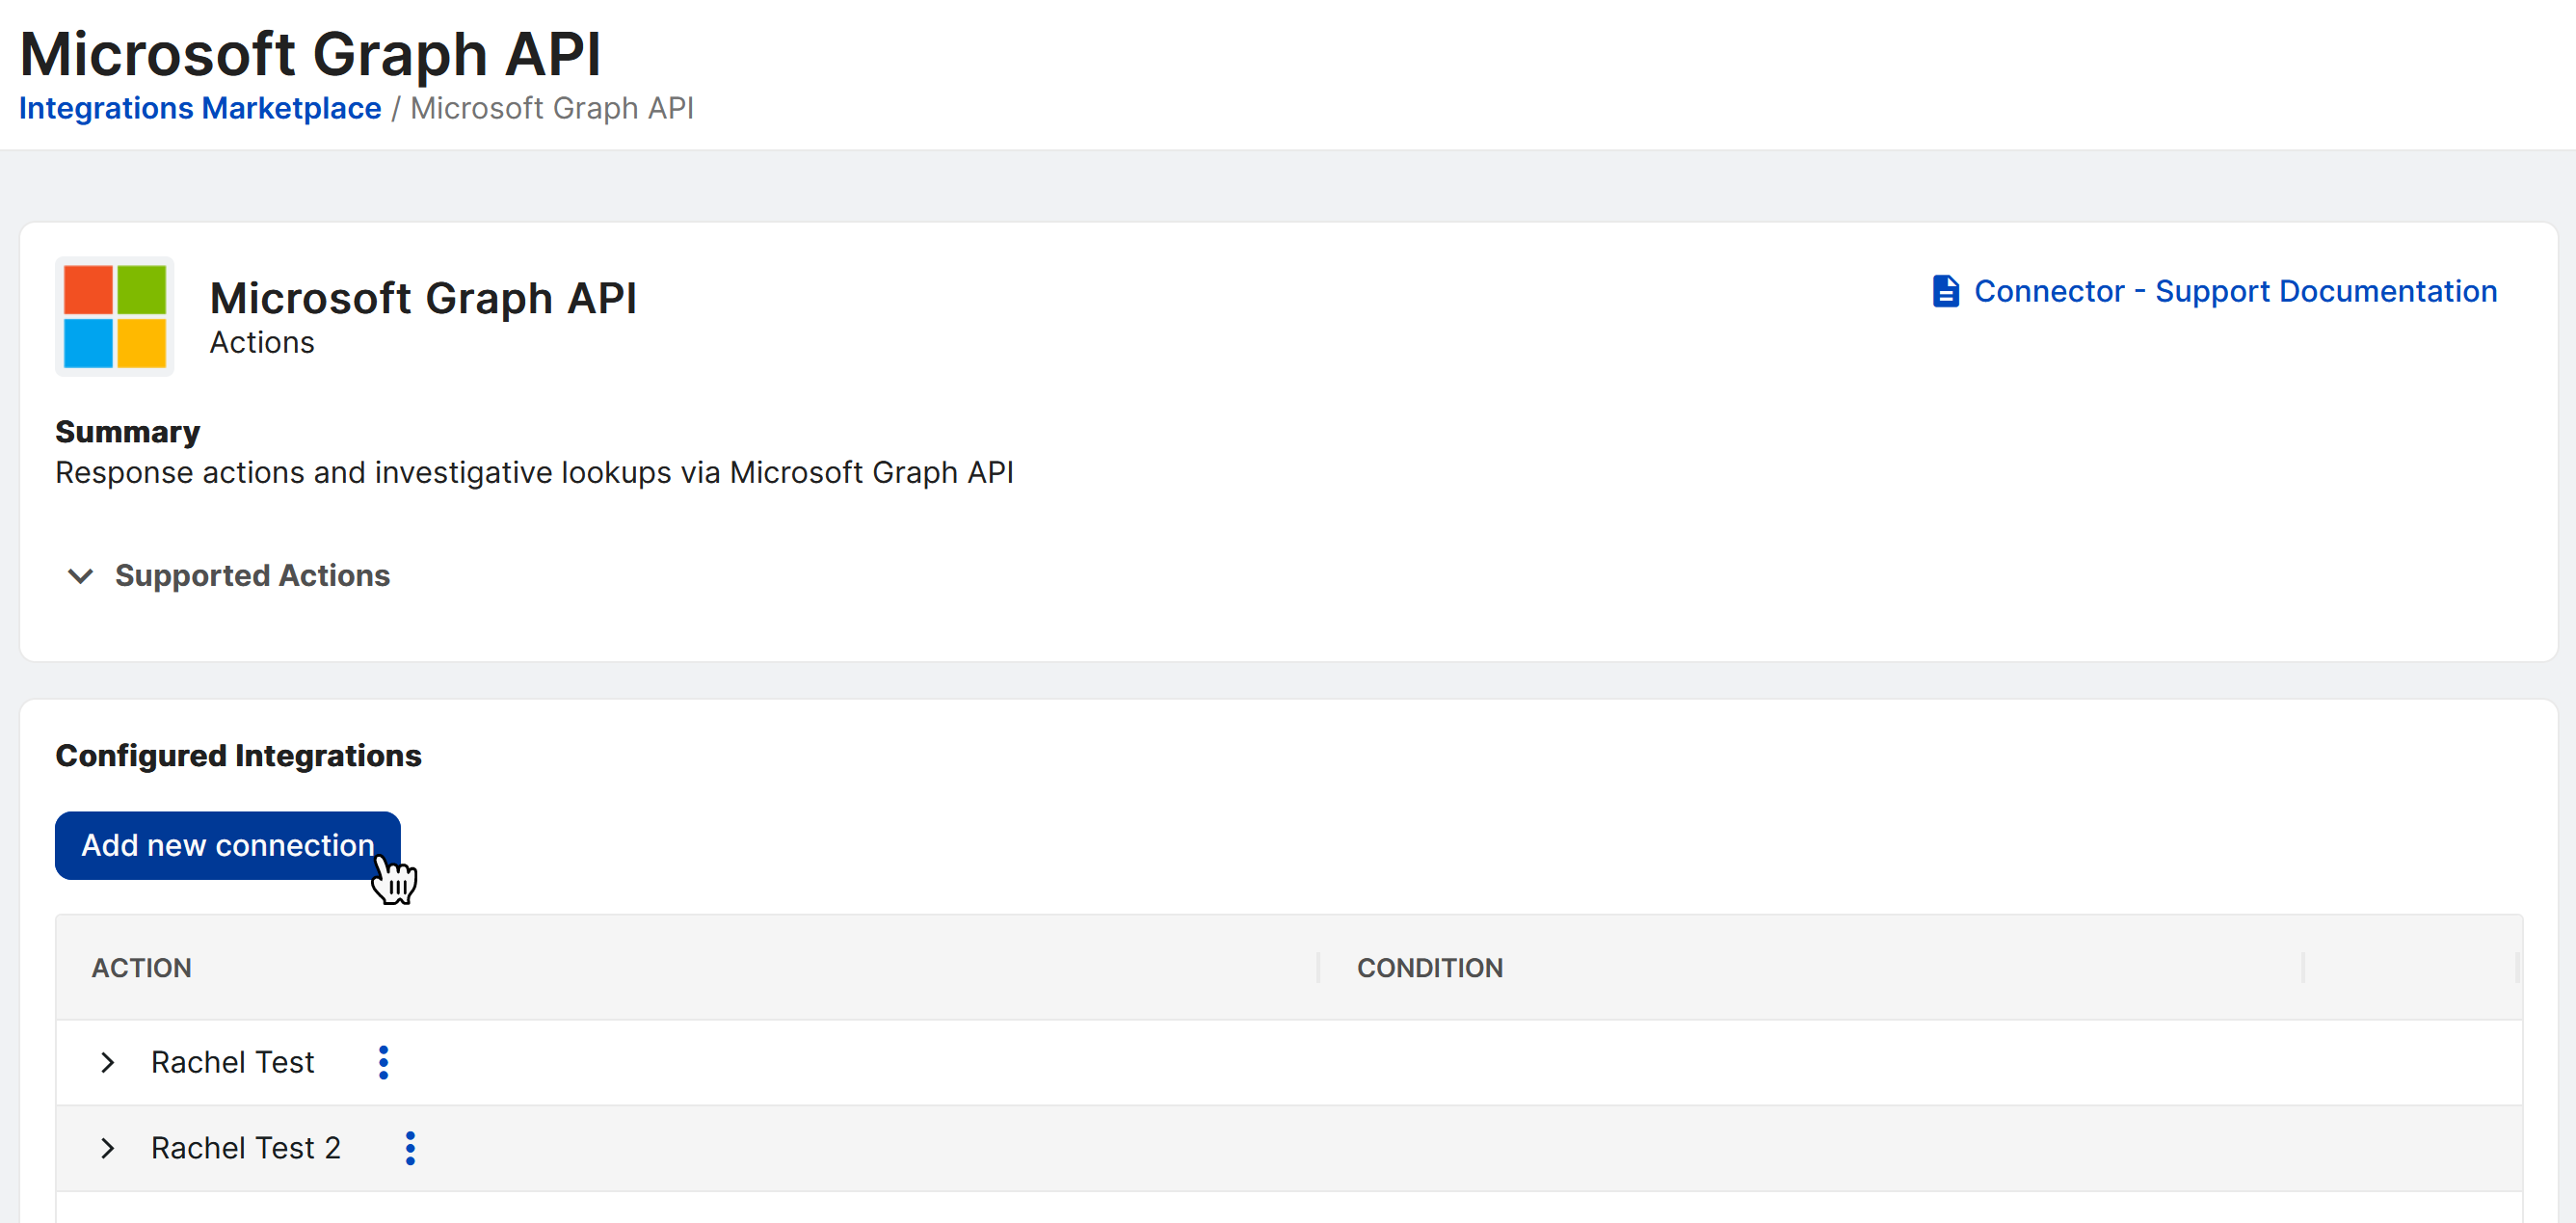
On the Microsoft Graph API page, click Add new connection.
Tip
Click Supported Actions to see supported response and enrichment actions and click Connector Support Documentation to view technical details of the connection.
-
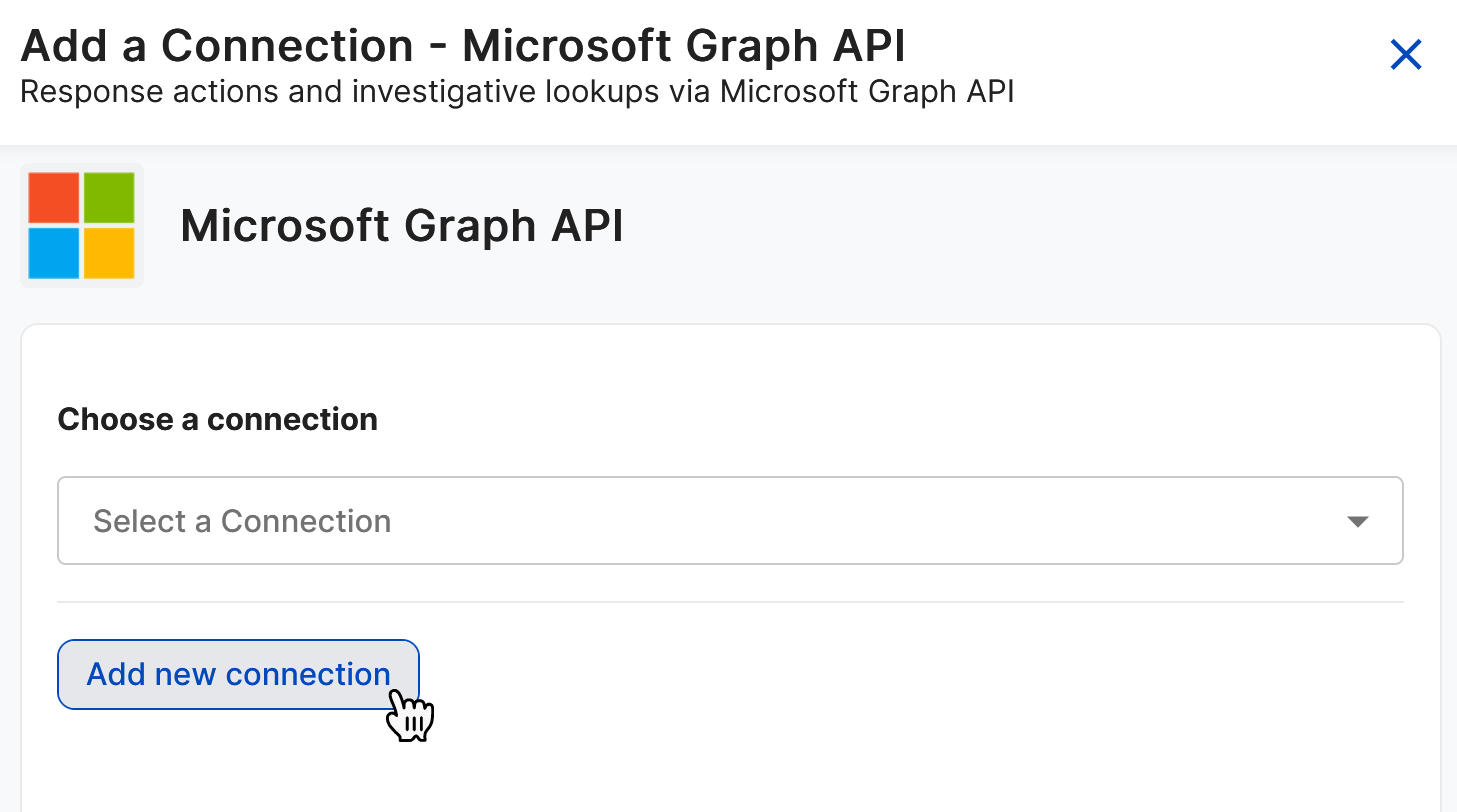
In Add a Connection, click Add new connection.
-
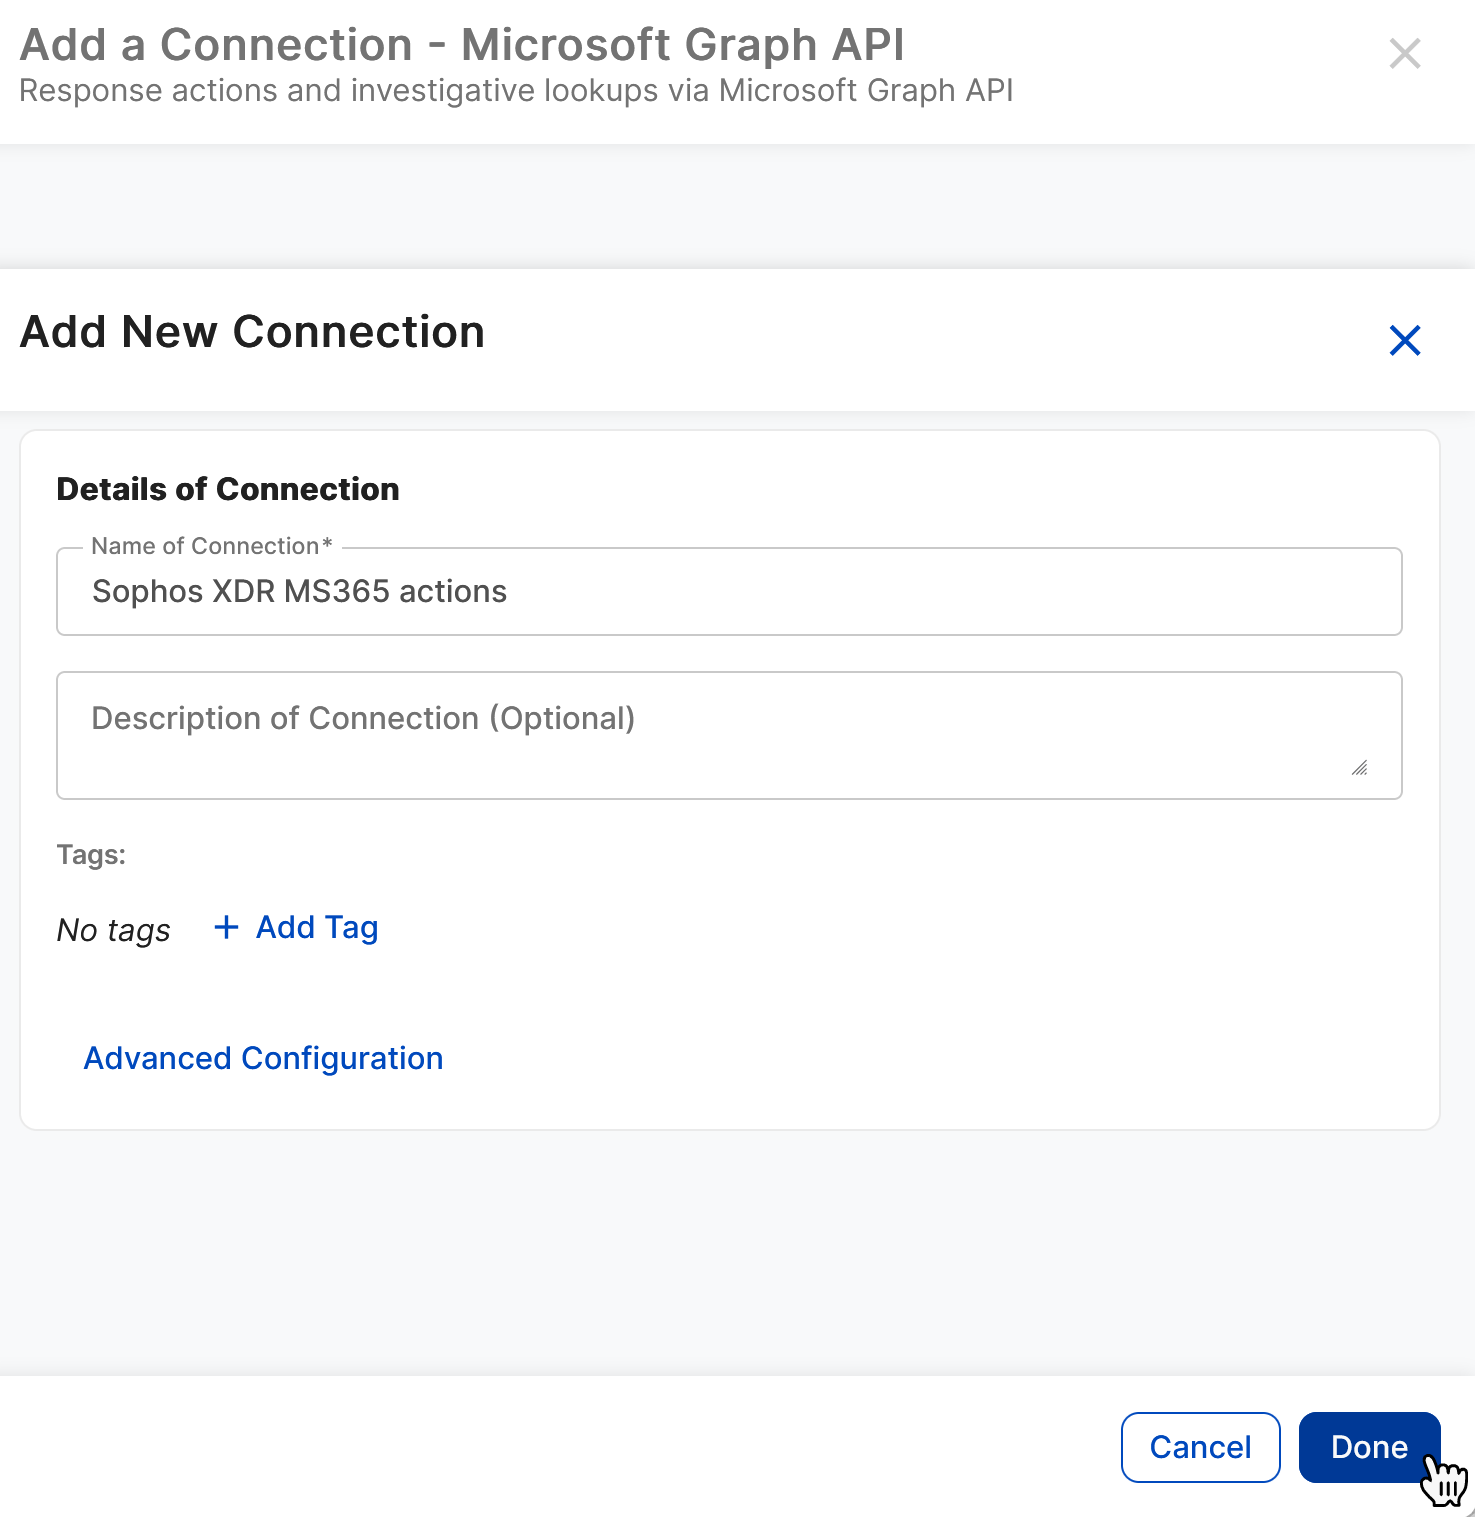
Enter a Name for the connection and an optional Description and Tags, then click Done.
Tip
If you prefer manual setup or have custom requirements, click Advanced Configuration to manually enter credentials, API endpoints, and other configuration values instead of using the guided authorization flow.
-
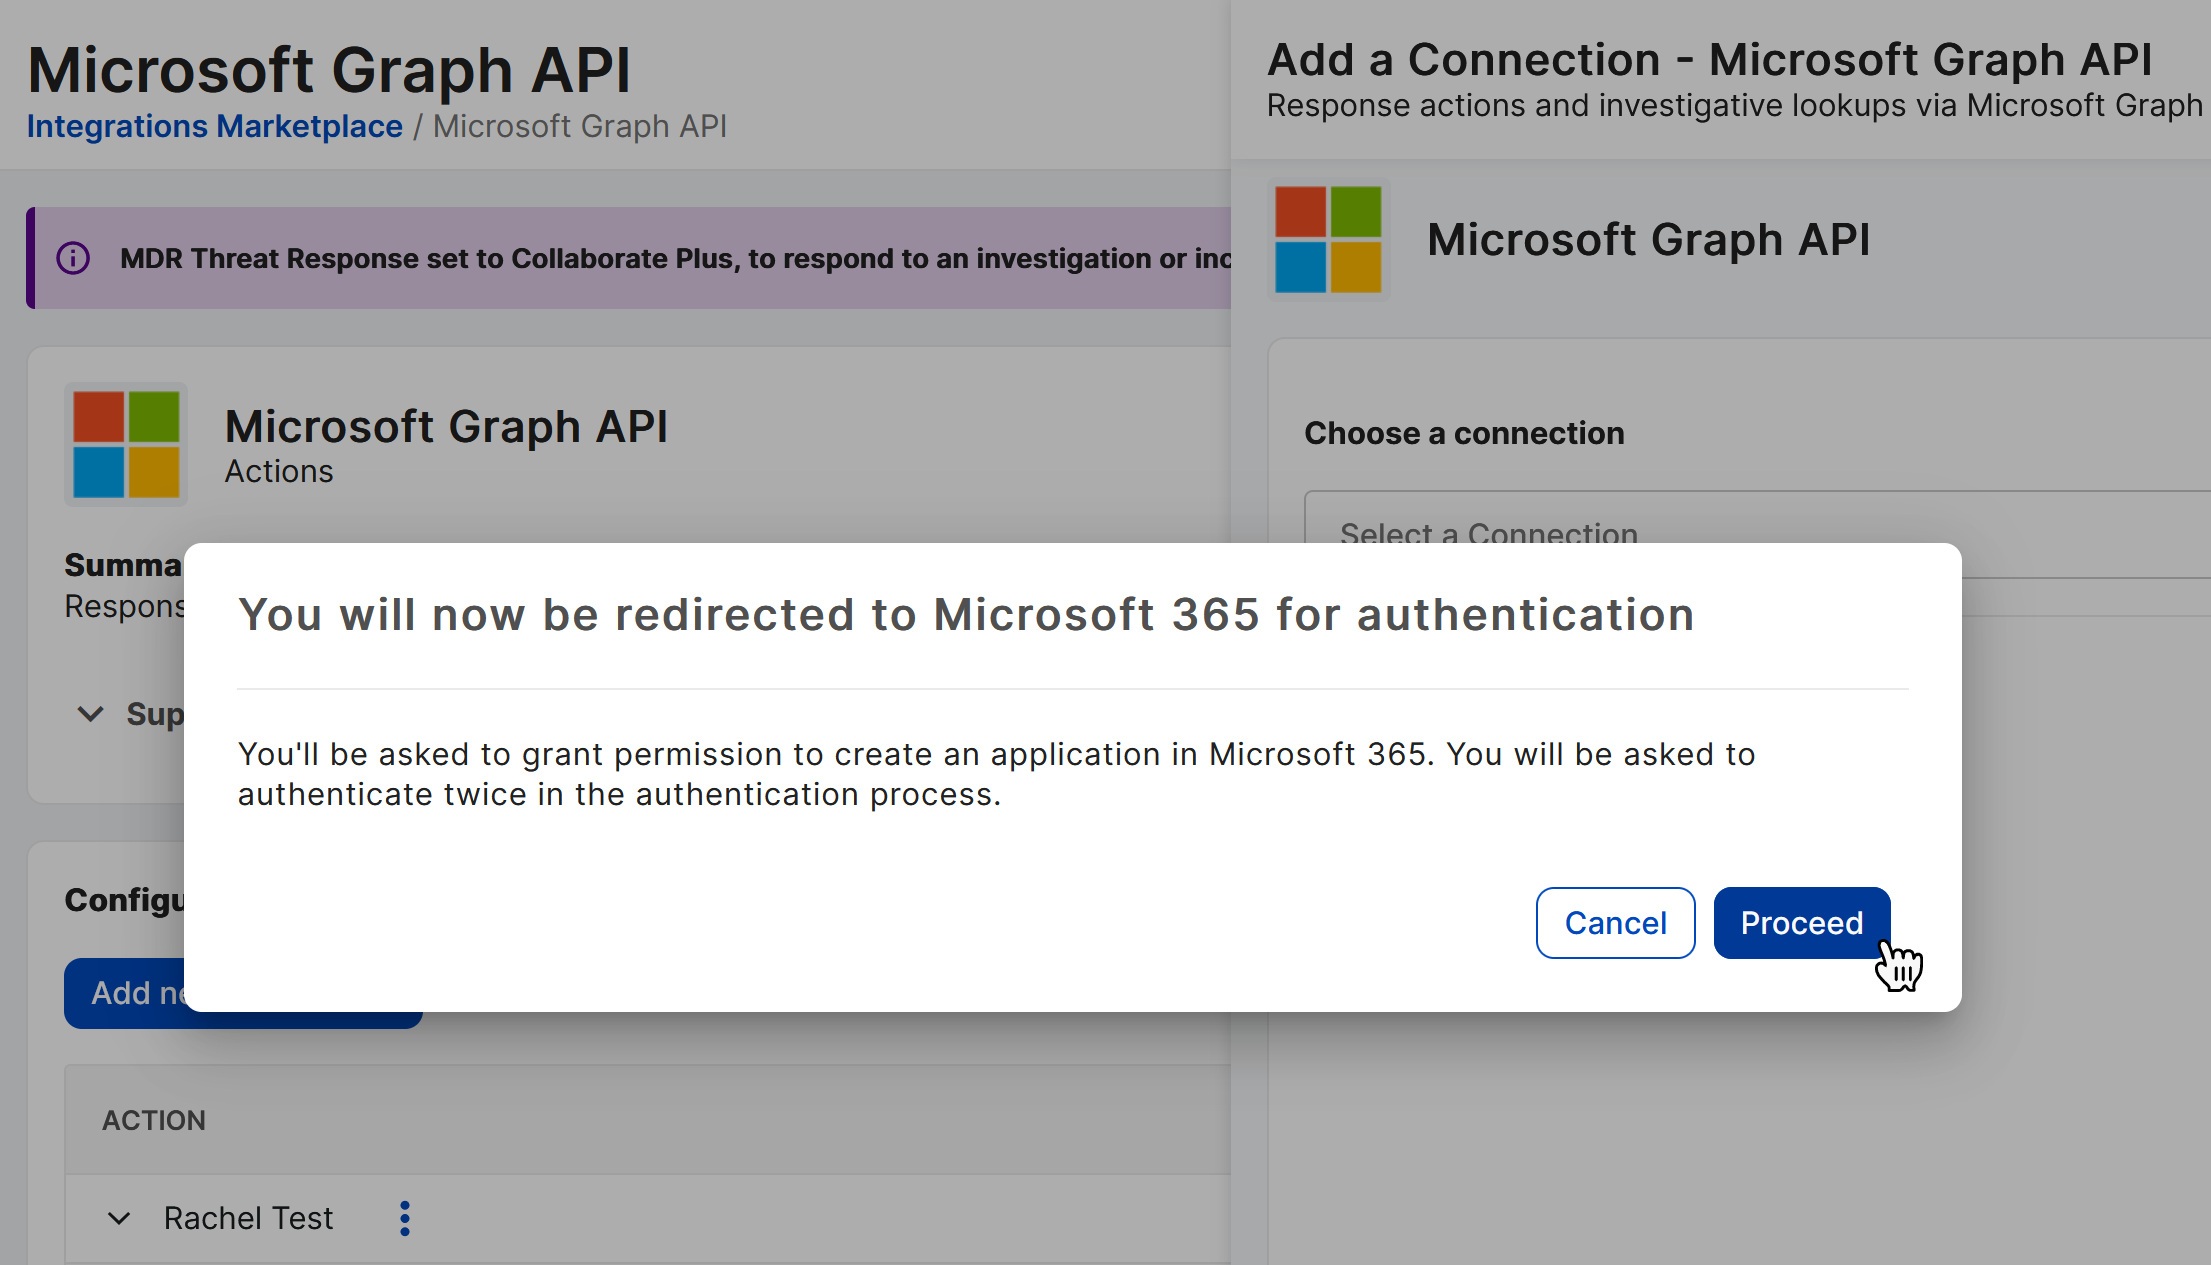
Click Proceed to start the secure, two-step Microsoft 365 authorization.
Grant permissions
To continue configuration and grant the necessary permissions, do as follows:
-
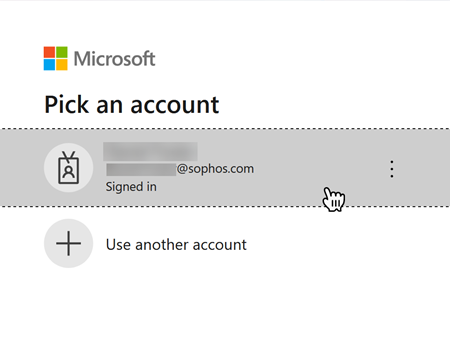
In Pick an account, select your administrator account.
-
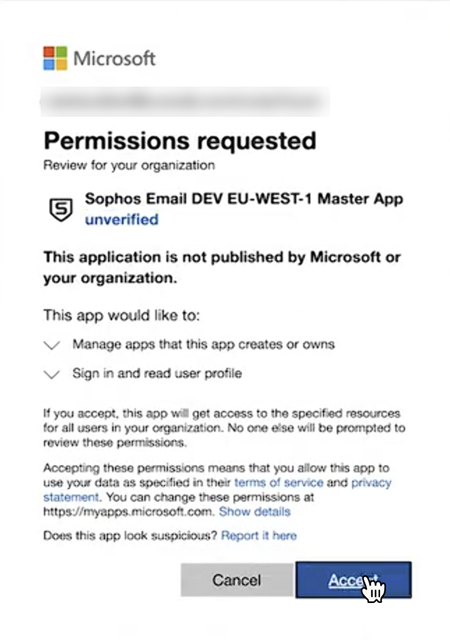
In Permissions requested, click Accept to grant permission to the Sophos master application.
-
You return to Sophos XDR where the connection is created in your environment and then are redirected to the final authorization step where you grant permissions for the response actions connection.
- In Pick an account, select your administrator account.
- In Permissions requested, click Accept to continue.
-
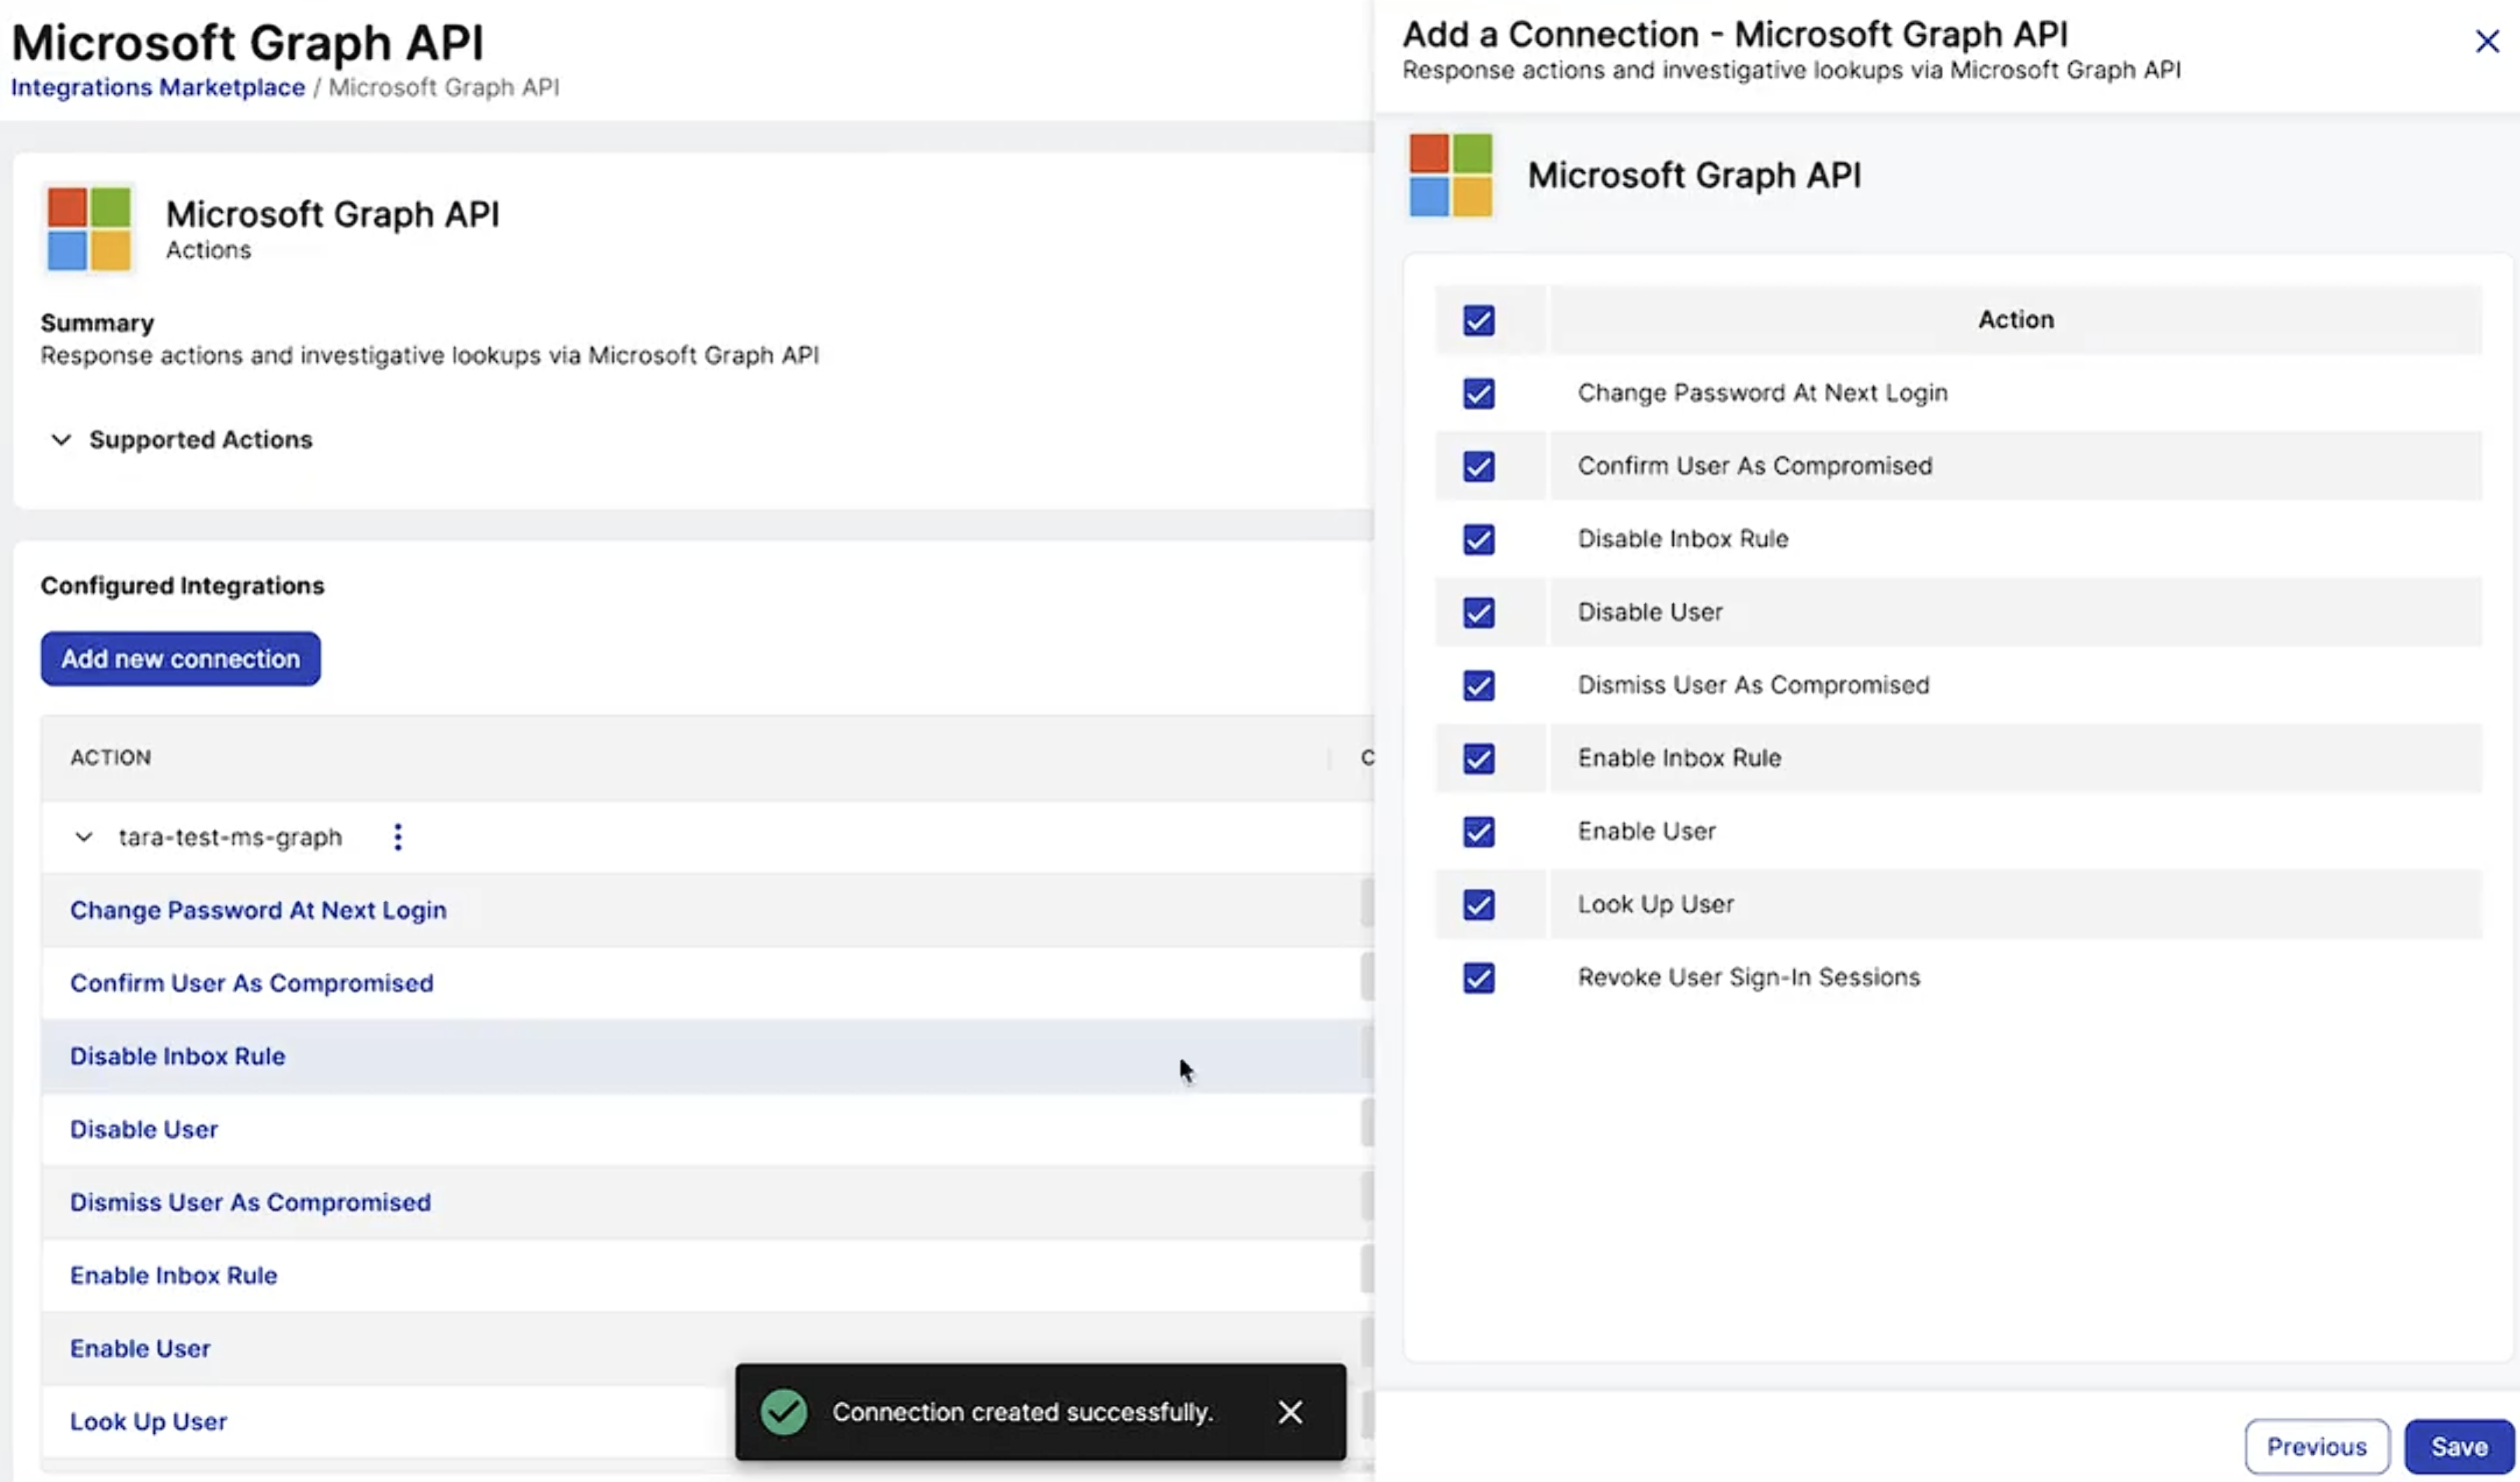
You return to Sophos XDR where you can see the connection is created successfully and all available actions are listed, dependent on your environment.
-
Review the list and click Save when done.
- The new connection shows in the Configured Integrations table.
Note
If you cancel either authorization step, a connection will not be created in your environment.
Verify connection
To verify the connection, do as follows:
- Sign in to Microsoft Entra.
- Go to Manage > All applications.
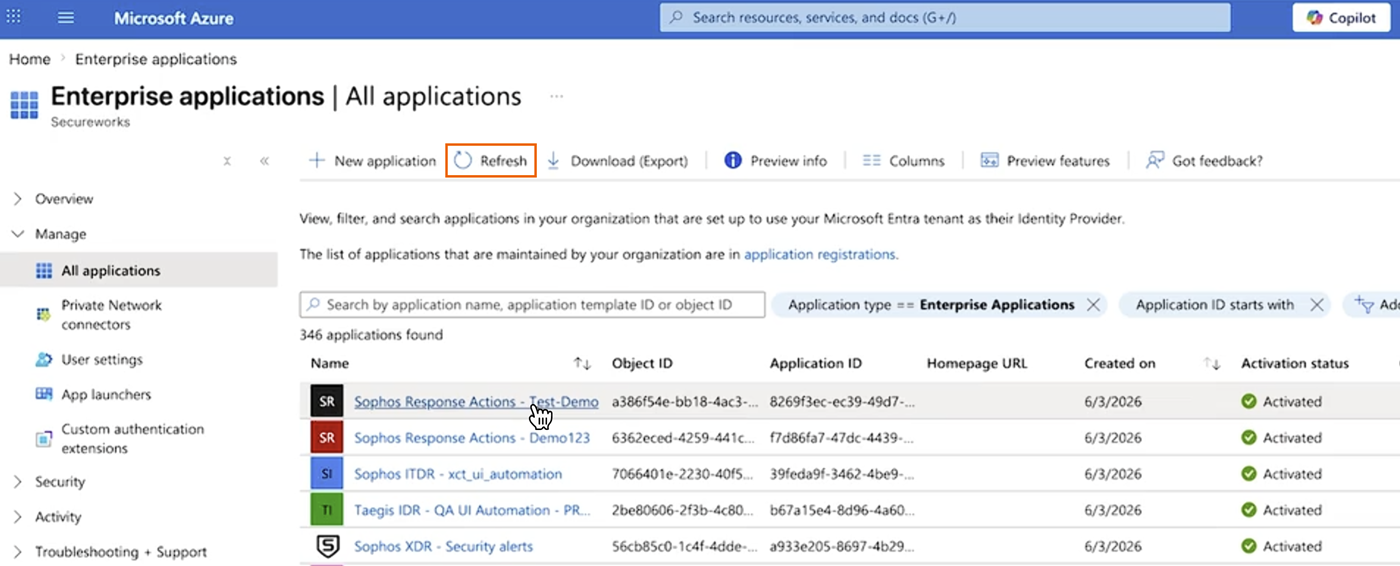
- Click Refresh at the top of the page.
-
Verify you see the new response actions application you created at the top of the list with an activated status.
Reauthorize credentials
If you configured Microsoft 365 response actions before you upgraded to Sophos XDR Powered by Secureworks or the enhanced Sophos MDR, you need to reauthorize your Microsoft credentials. These upgraded solutions require an additional permission that the original credentials didn't include.
Although your existing protection isn't interrupted and your Microsoft integration remains operational, some Microsoft 365 response actions might fail until you reauthorize. This applies to actions you take and to actions that the Sophos MDR team takes on your behalf.
Reauthorization is the only complete fix and takes only a few minutes.
You must reauthorize by October 1, 2027. After that, the existing credentials expire, and Microsoft 365 response actions won't work until you reauthorize.
To reauthorize your credentials, do as follows:
- Sign in to Sophos Fusion as an Admin or Super Admin.
- Go to Security Operations > Integrations > Marketplace.
-
Click the Microsoft Graph API actions card.
The Microsoft Graph API page is shown.
-
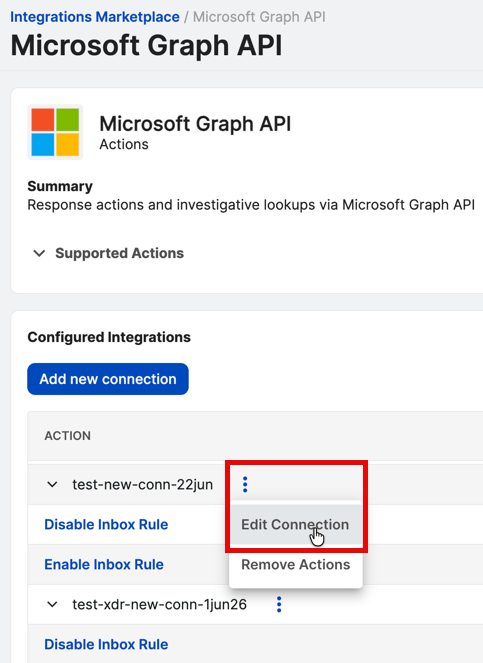
In the Configured Integrations table, click the three dots next to a connection name and choose Edit Connection.
-
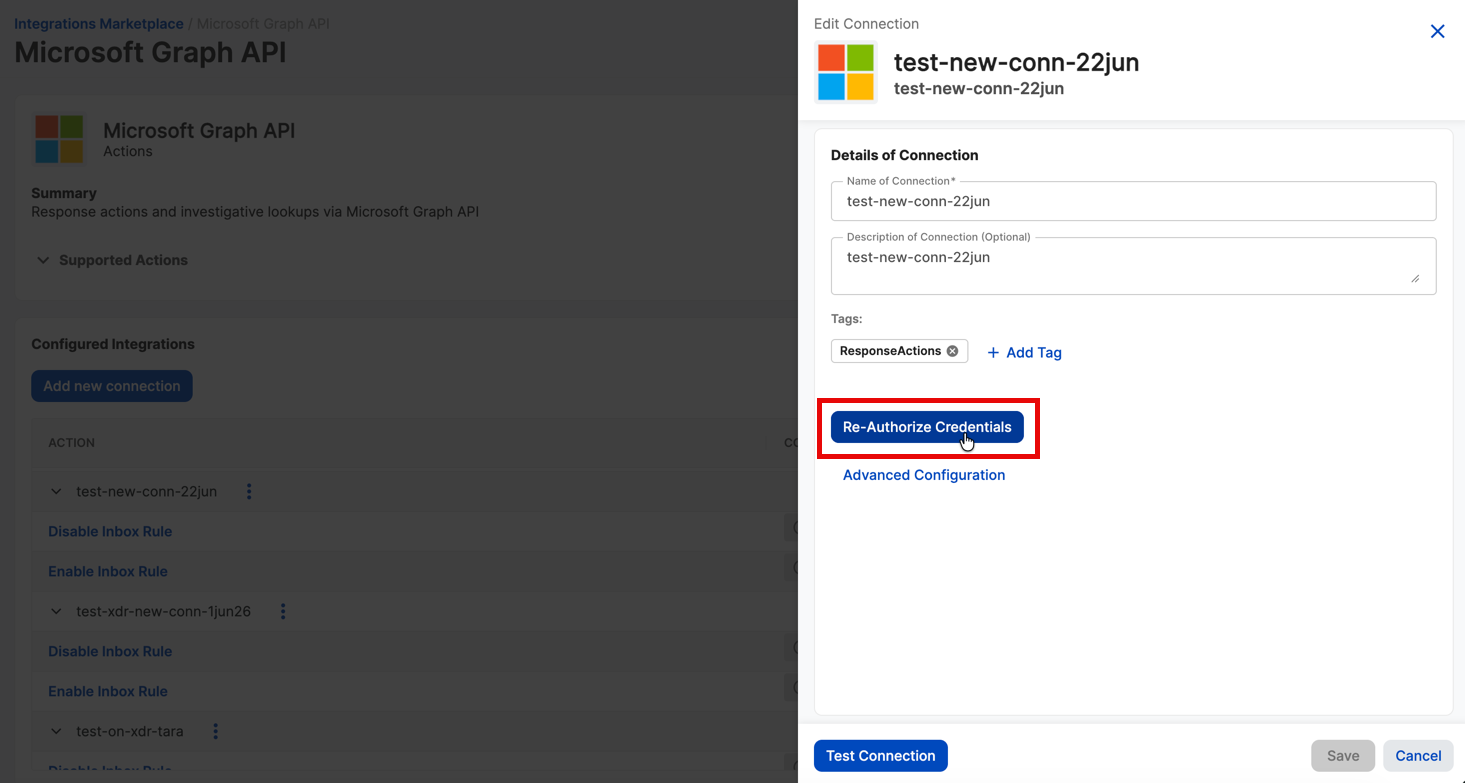
Click Re-Authorize Credentials and follow Microsoft's authorization steps.
This button only appears when reauthorization is needed and disappears when complete.
-
Repeat steps 4 and 5 for each connection in the table.