Quarantine settings
The quarantine digest is emailed to users. It contains a list of the spam emails Sophos Firewall quarantines.
The list includes all spam to the recipient's individual and alias addresses and is emailed at the configured frequency. The digest contains the date and time of email receipt, sender and recipient email addresses, and the email subject.
Restriction
The quarantine digest isn't available on XGS 87 and XGS 87w.
- You can release the quarantined emails from Email > SMTP quarantine on the web admin console.
- Alternatively, users can release their quarantined emails from the user portal. See Quarantine.
Note
Quarantined emails sent to alias addresses aren't shown on the user portal.
You can specify the general settings, the quarantine area, and the reports to skip in MTA mode.
General settings
- Go to Email > Quarantine settings.
- Select Enable quarantine digest to create a quarantine digest for users.
- For Email frequency, select the frequency of emailing the digest, the time, and the day of the week.
- Enter the From email address to show the sender's address in the digest.
- For Display name, enter a name.
-
For Release link settings, select one of the following options for the IP address or hostname to use in the release links in the digest:
-
Reference user portal IP: Select this option and then select the port.
The firewall uses the IP address of the selected port in the release links.
Other users must release their quarantined emails from the user portal.
-
IP address or hostname: It's the IP address or hostname you've specified on Administration > Admin settings > Admin console and end-user interaction. See Admin and user settings.
Example
User portal port: 3311
Release link for IP address (
10.8.9.54):https://10.8.9.54:3311/webconsole/Controller?mode=458Release link for hostname (
myfirewall):https://myfirewall:3311/webconsole/Controller?mode=458 -
Note
You can't click the link in the quarantine digest email to release emails directly. The link in the quarantine digest email takes you to the user portal. You must sign in and release the emails from there.
- Click Send test email to verify the quarantine digest.
- Click Apply.
Quarantine area
To specify the size of the quarantine area, select a disk size.
A disk usage check runs every five minutes and deletes older emails, lowering usage from 90 percent and above to 60 percent of the specified size.
Skip quarantine reports
Under Skip address patterns, enter the email addresses whose quarantined emails you want to exclude from the quarantine digest, then click the plus  button.
For example, you can add the alias email address sales@company.com. The firewall won't include quarantined emails to this address in the digest sent to users belonging to this alias.
General settings
In legacy mode, you can specify the general settings.
- Go to Email > Quarantine settings.
- Select Enable quarantine digest to create a quarantine digest for users.
- For Email frequency, select the frequency of emailing the digest, the time, and the day of the week.
- Enter the From email address to show the sender's address in the digest.
- For Display name, enter a name.
-
For Release link settings, select one of the following options for the IP address or hostname to use in the release links in the digest:
-
Reference user portal IP: Select this option and then select the port.
The firewall uses the IP address of the selected port in the release links.
Other users must release their quarantined emails from the user portal.
-
IP address or hostname: It's the IP address or hostname you've specified on Administration > Admin settings > Admin console and end-user interaction. See Admin and user settings.
Example
User portal port: 3311
Release link for IP address (
10.8.9.54):https://10.8.9.54:3311/webconsole/Controller?mode=458Release link for hostname (
myfirewall):https://myfirewall:3311/webconsole/Controller?mode=458 -
Note
You can't click the link in the quarantine digest email to release emails directly. The link in the quarantine digest email takes you to the user portal. You must sign in and release the emails from there.
- Click Send test email to verify the quarantine digest.
- Click Apply.
Apply quarantine settings to users
You must apply the quarantine settings to users. You can do this on Authentication > Groups or Users.
Alternatively, you can do it from Quarantine settings. Do as follows:
- Scroll down and click Change user's quarantine digest settings.
- To apply the settings to a group, filter by Group.
-
Select the users.
Here's an example:
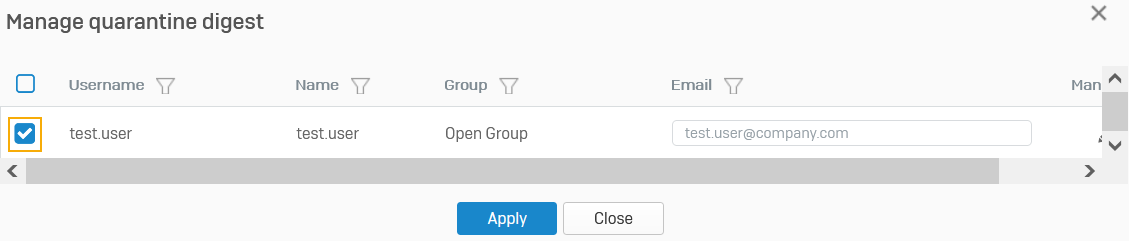
-
Optionally, you can update the email address of individual users. Click the edit button
 , edit the email address, then click the save button that's shown next to the email address.
-
Click Apply.