Add a VLAN interface
- Go to Network > Interfaces, click Add interface, and select Add VLAN.
-
Specify the settings.
Option Description Name Enter a name. You can change this later.
Maximum number of characters: 58
The interface's customizable name rather than the hardware name is shown in other settings.
Hardware The hardware name is created automatically, using the selected interface and the VLAN ID. Interface Interfaces on which you can create a VLAN:
- A physical interface, for example Port1, PortA, or eth0.
- Unbound physical interface, that is, a port to which you haven't assigned an IP address.
- RED
- Virtual interface: Bridge and LAG.
The VLAN becomes a member of the interface you select.
Zone Zone assigned to the interface. The virtual interface becomes a member of the selected zone. VLAN ID Enter an identifier for the VLAN. Traffic from VLANs is tagged with VLAN identifiers.
You can't add a VLAN ID more than once on a physical interface. -
Specify the IPv4 or IPv6 configuration details.
Option Description IP assignment Method of assigning the IP address. Select from the following options:
- Static
- DHCP
IPv4/netmask or IPv6/Prefix For static IP assignment, enter the IP address and select the netmask or prefix. Gateway name For bridge members with WAN ports, enter the gateway name. Gateway IP If you selected static IP assignment and bridge members with WAN ports, enter the gateway IP address. -
Specify the advanced settings:
Option Description DAD attempts Number of consecutive Neighbor Solicitation messages sent while performing Duplicate Address Detection (DAD) on a tentative address. Allowed RA servers List of MAC or IPv6 addresses of Router Advertisement (RA) servers from which you want the interface to accept the stateless configuration. -
Click Save.
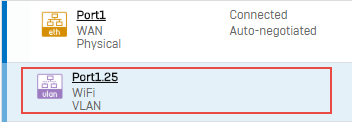
The virtual interface is listed below the physical interface.