Create a firewall rule with a linked NAT rule
This example shows how to create a firewall rule with a linked NAT rule for outgoing traffic from LAN.
Objectives
When you complete this unit, you'll know how to do the following:
- Create a firewall rule to allow traffic from LAN to WAN zone.
- Specify a linked NAT rule to translate outgoing traffic from the LAN.
Linked NAT network diagram
You can create a linked NAT rule when you create a firewall rule. Use this option if you don’t want to manage a NAT rule table and a firewall rule table. You can create linked NAT rules for outgoing traffic because they are source NAT rules. For details, go to the online help.
A linked NAT rule translates only the traffic that matches the settings of the firewall rule that it’s linked to. However, if a NAT rule positioned above the linked NAT rule matches the same traffic, the first rule applies to the traffic. The following network information is illustrative:
- Pre-NAT IP address of LAN users:
10.145.16.10/24 - Post-NAT IP address of LAN users:
MASQ(IP address of the applicable outbound interface)

Here's an example:
- Firewall rule to allow traffic from LAN to WAN zone:
LANtoAny - Linked NAT rule for outgoing traffic with masqueraded source:
10.145.16.10/24translated toMASQ
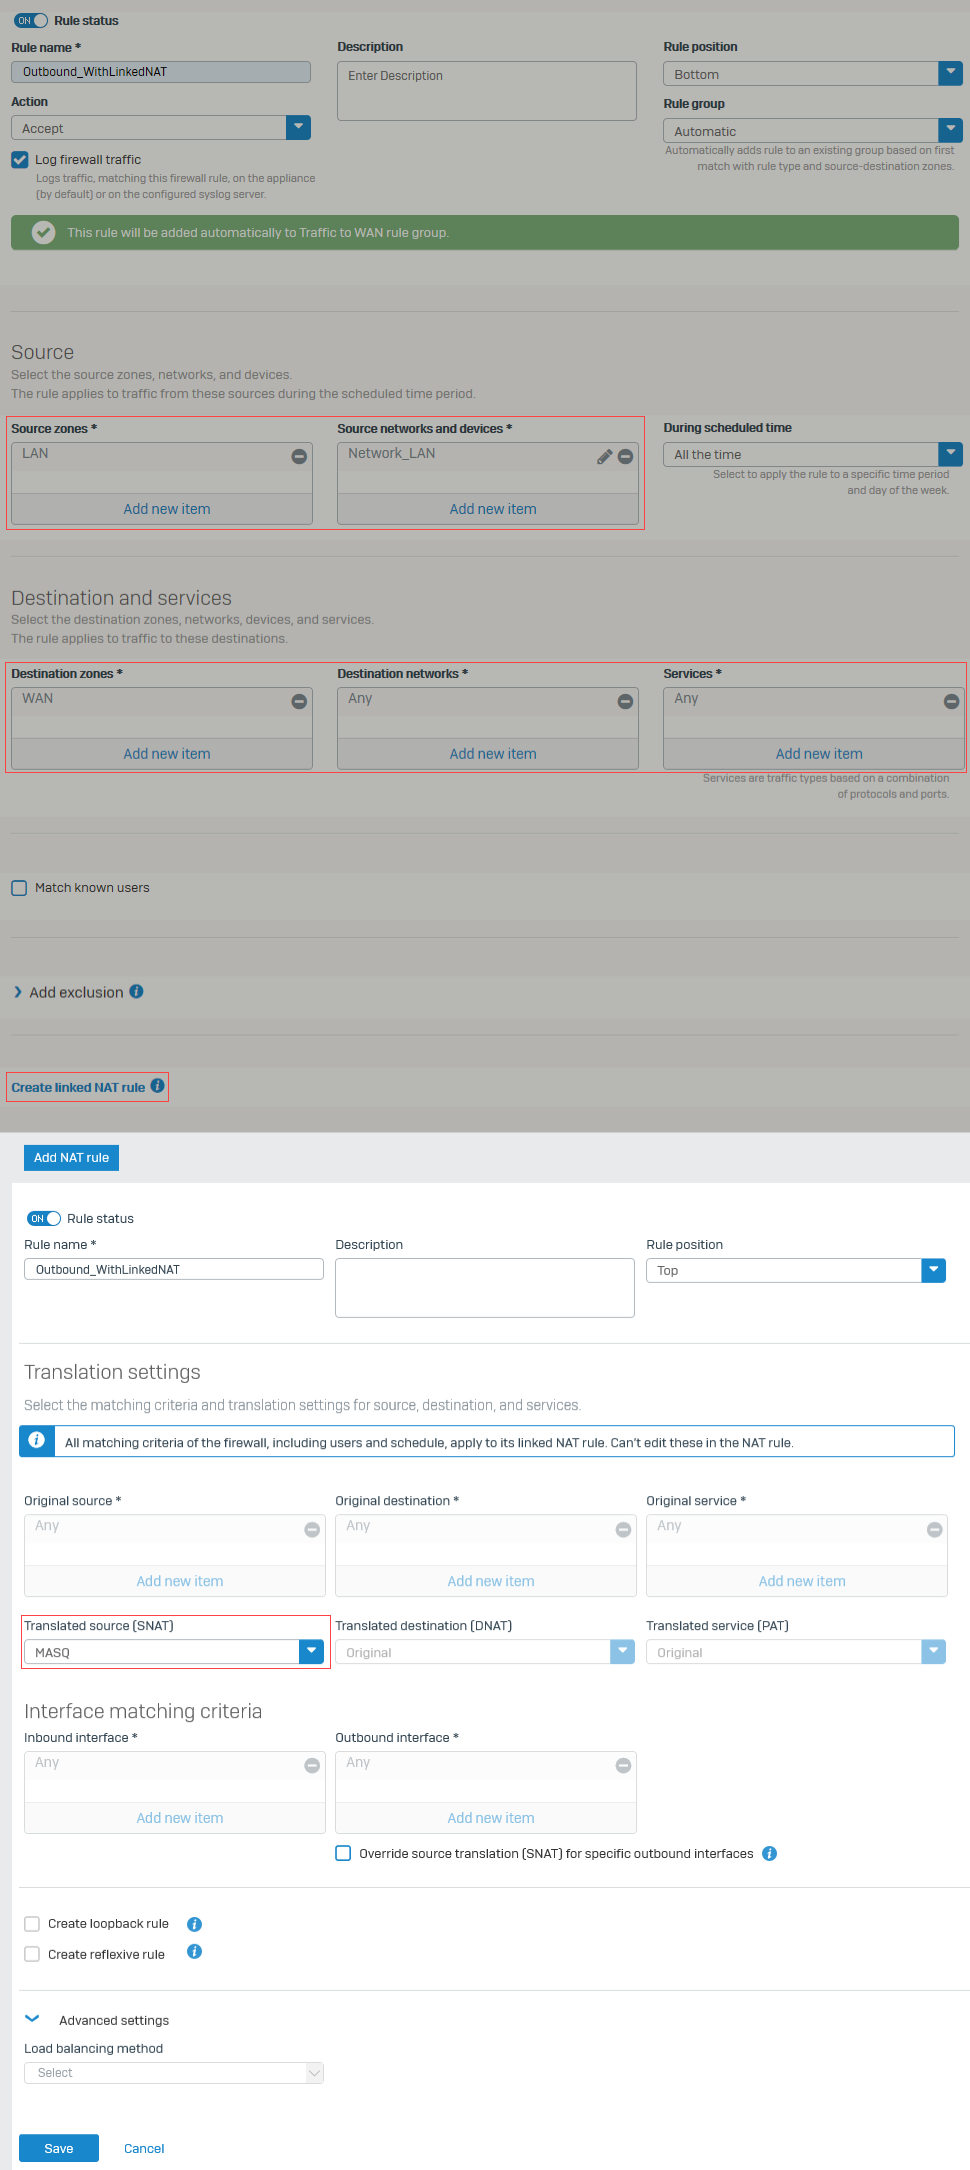
Specify firewall rule and linked NAT rule settings
- Go to Rules and policies > Firewall rules, select protocol IPv4 or IPv6 and click Add firewall rule. Select New firewall rule.
- Enter the rule name and rule position.
-
Select the source and destination settings.
Name Description Source zones LANSource networks and devices Network_LANDestination zones WANDestination networks AnyServices Any -
Select Create linked NAT rule and specify the rule name and position.
- Set Translated source (SNAT) to
MASQ. - Select Save to save the linked NAT rule.
-
Click Save.
The following image shows an example of how to configure the settings:
The firewall rule appears in the firewall rule table. The linked NAT rule appears in the NAT rule table.
More resources