Create a source NAT rule for a mail server (legacy mode)
This example shows how to create a source NAT (SNAT) rule for a mail server in legacy mode.
Introduction
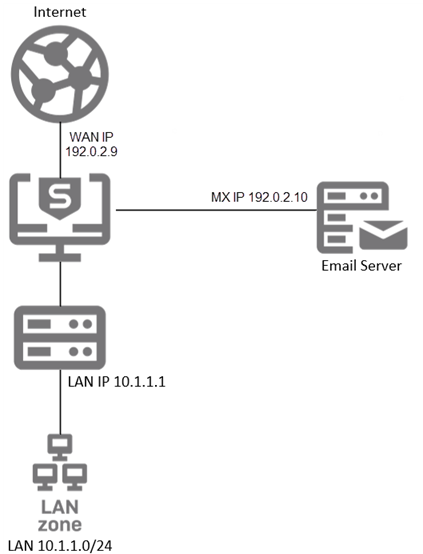
For outgoing traffic, you can configure an SNAT rule to translate the mail server's private IP address to a public IP address other than the firewall's default masquerade address. This is useful in situations where the WAN interface's primary IP address isn't the IP address used by the MX record for outgoing emails.
To configure the SNAT rule, do as follows:
- Create an alias.
- Add an IP host.
- Add a NAT rule.
- Create a firewall rule.
Example scenario
In this example, you have a network with WAN ports assigned from the IP addresses 192.0.2.9 to 192.0.2.14. All traffic going to the outside network will be sent through 192.0.2.9 by default.
Create an alias
- Go to Network > Interfaces.
- Click Add interface and then select Add alias from the drop-down menu.
-
Specify the following settings:
Name Description Physical interface WAN interface IP version IPv4 IPv4/Netmask The additional address (alias) for the WAN interface and corresponding netmask. The following image shows an example of how to configure the settings:

-
Click Save.
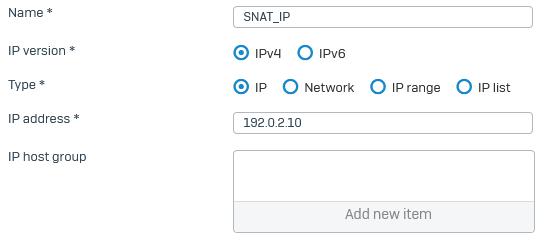
Add an IP host
- Go to Hosts and services > IP host.
- Click Add.
-
Specify the following settings:
Name Description IP family IPv4 Type IP IP address 192.0.2.10 The following image shows an example of how to configure the settings:
-
Click Save.
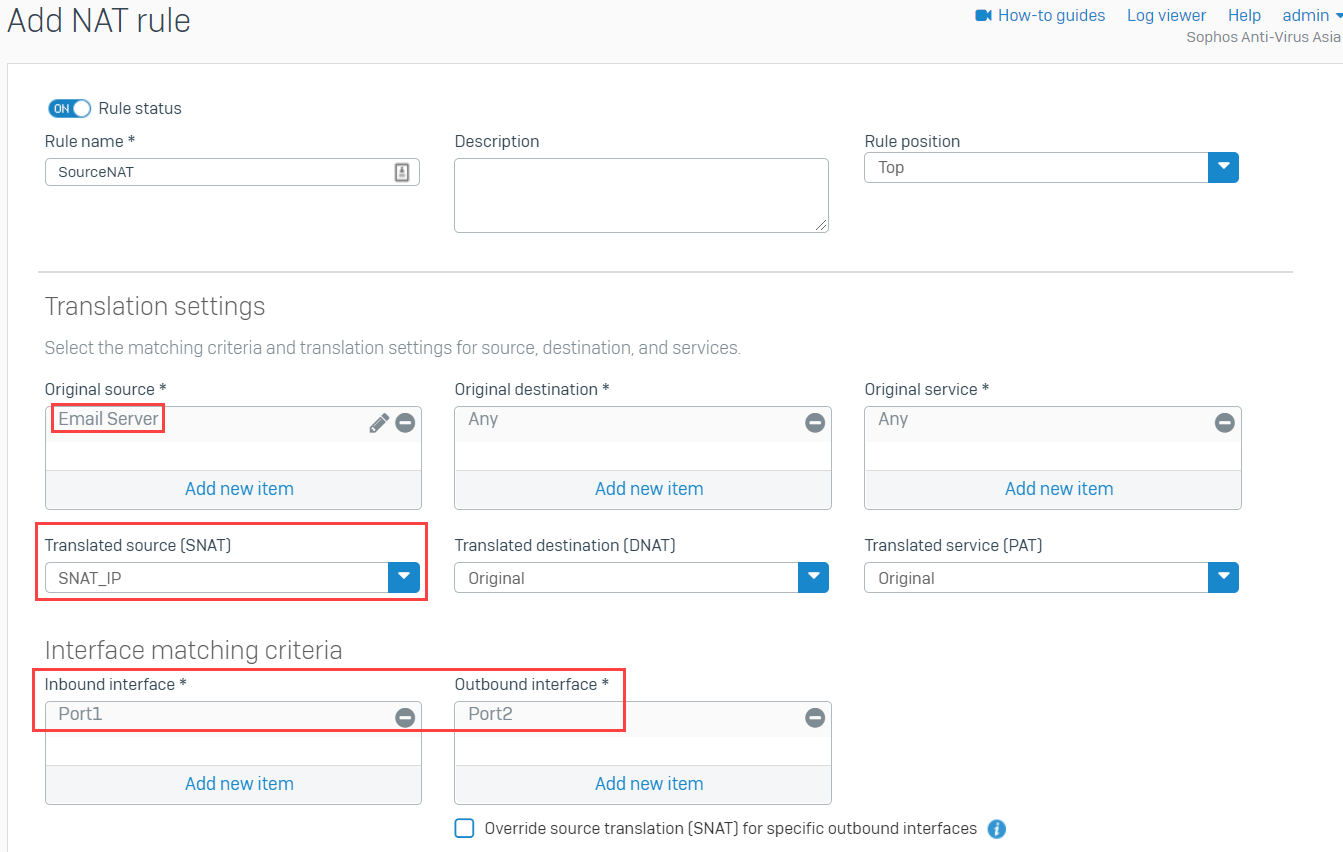
Add a NAT rule
- Go to Rules and policies > NAT rules > New NAT rule.
-
Specify the following settings:
Name Description Rule position Top Original source Your email server Translated source (SNAT) SNAT_IP Original destination Any Translated destination (DNAT) Original Original service Any Translated service (PAT) Original Inbound interface Port1 Outbound interface Port2 The following image shows an example of how to configure the settings:
-
Click Save.
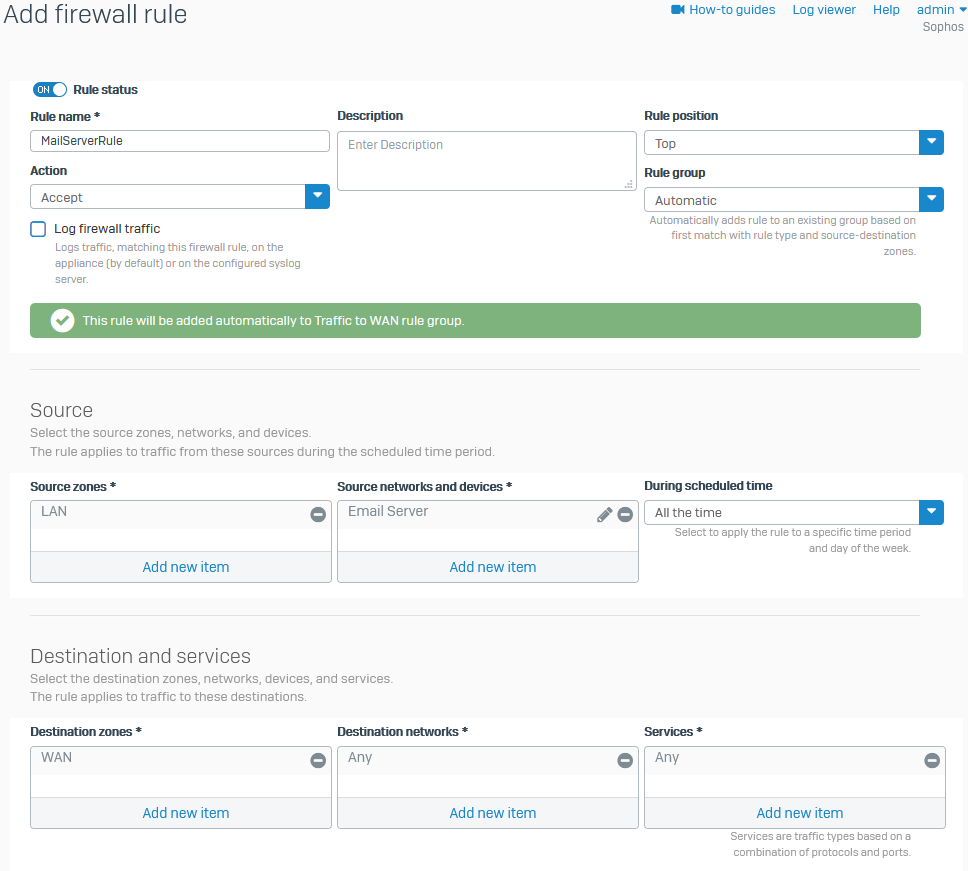
Create a firewall rule
- Go to Rules and policies > Firewall rules > Add firewall rule.
-
Specify the following settings:
Name Description Action Accept Rule position Top Source zones LAN Source networks and devices Email Server During scheduled time All the time Destination zones WAN Destination networks Any Services Any The following image shows an example of how to configure the settings:
-
Click Save.
Note
For MTA mode, you can edit the automatically-added firewall rule the firewall creates when you turn on MTA mode.