Installing on Nutanix Prism Central
You can install Sophos Firewall QCOW2 disks on the Nutanix Prism Central platform.
Download the image disk
-
Go to Sophos Firewall free trial and download the
.zipfile containing the following QCOW2 disks:PRIMARY-DISK.qcow2AUXILIARY-DISK.qcow2
-
Extract the
.zipfile and save the disks on the device from which you access Nutanix Prism Central.
Upload the image to Nutanix Prism
- Sign in to the Nutanix Prism Central console.
-
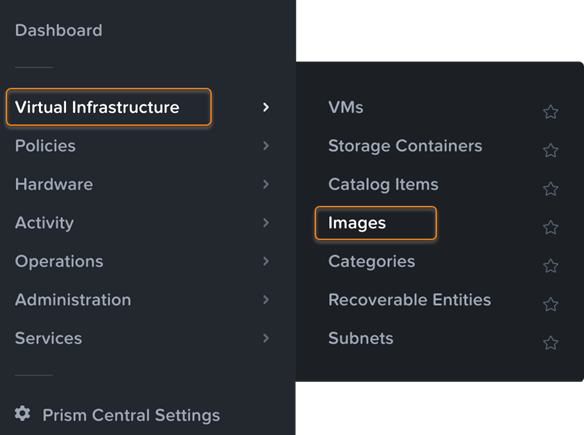
From the top-left menu, go to Virtual Infrastructure > Images.
-
Click Add Image.
-
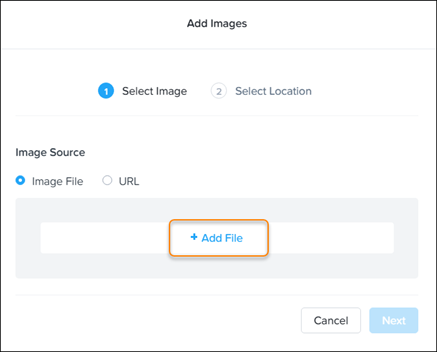
Click Add File.
-
Select one of the image files you extracted.
Make sure that the selected Image Type is Disk.
You can enter a description in the Image Description field.
-
Repeat the last step for the second image.
After you've added both images, you should see them in the dialog.

-
Click Next.
- Specify the settings for Placement Method and Select Clusters according to your needs.
- Click Save.
-
Wait a few minutes and then refresh the browser.
You'll find the newly created images in the images list.
Create the Sophos Firewall virtual machine
-
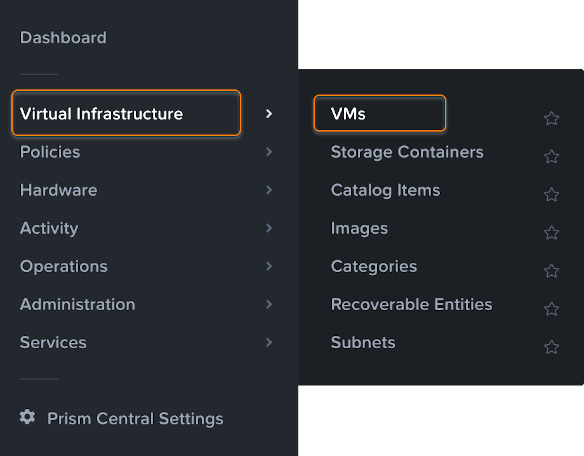
From the top-left menu, go to Infrastructure > VMs.
-
Click Create VM.
- In General Configuration, enter a name for the VM and select a timezone.
-
In Compute Details, enter your desired number of virtual CPUs and RAM.
Select a minimum of 4 GB of RAM.
-
In Disks, delete the CD-ROM that is shown by default.
You must create a startup disk and a log disk for the VM.
-
Create a startup disk as follows:
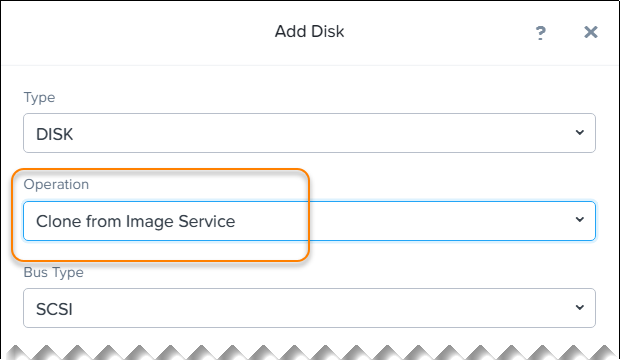
- Click Add New Disk.
-
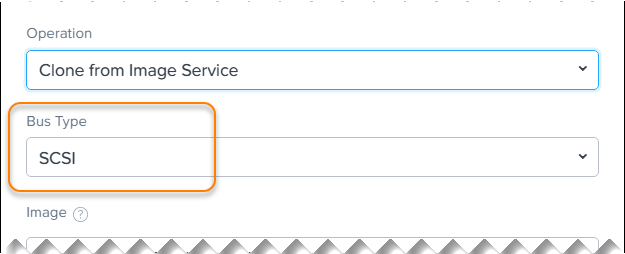
In Operation, select Clone from Image Service.
The startup disk will be cloned from the VM image you uploaded.
-
In Bus Type, select SCSI.
-
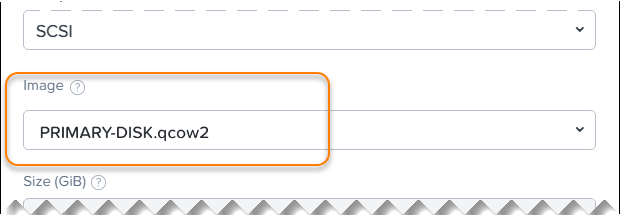
In Image, select PRIMARY-DISK.qcow2.
-
Click Add.
The startup disk is added.
-
Create a log disk as follows:
- Click Add New Disk.
-
In Operation, select Clone from Image Service.
The startup disk will be cloned from the VM image you uploaded.
-
Select the desired Bus Type (for example, SCSI).
- In Image, select AUXILIARY-DISK.qcow2.
-
Click Add.
The log disk is added.
-
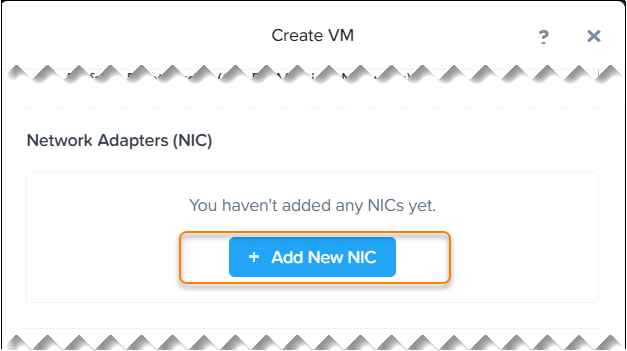
Add a network interface for the VM:
-
In Network Adapters (NIC), click Add New NIC.
-
In VLAN Name, select the desired VLAN.
You can select DHCP first to check connectivity. We recommend that you change the VLAN to a static IP address later.
-
Click Add.
-
Repeat these substeps to add a second network interface.
Sophos Firewall requires two network interfaces.
-
-
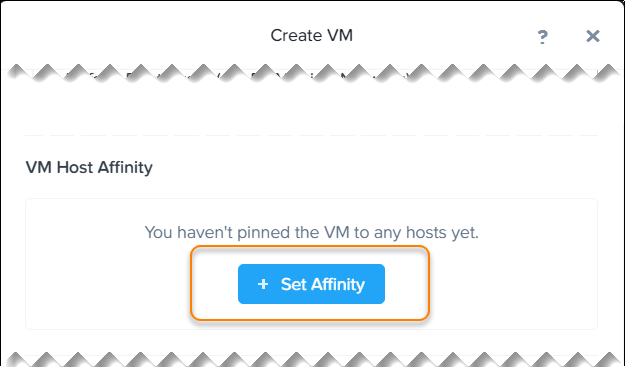
Pin the VM to a host:
-
In VM Host Affinity, click Set Affinity.
-
Select the desired host.
- Click Save.
-
-
Click Save.
The system shows a success message when the VM has been created with no error.
Configure Sophos Firewall
- Find your newly created VM in the VM list and power it on.
-
Once it's powered on, click Launch console.
A window opens and shows the command line interface of Sophos Firewall.
-
Configure Sophos Firewall.
- Enter the administrator password
admin. -
Accept the Sophos End User Terms of Use.
The Main menu appears.
-
From the management device, go to the configured IP address.
-
Select Start to open the initial setup wizard and complete the basic configuration.
Restriction
The wizard won't start if you've changed the default password from the CLI console.
- Enter the administrator password
You need to activate and register Sophos Firewall.