DNAT use-case configuration
Configure a DNAT network using Sophos Firewall with AWS Auto Scaling.
This guide includes instructions for third-party products. We recommend that you check the vendor's latest documentation.
Requirements
You must have a working AWS Auto Scaling deployment. See Sophos Firewall with AWS Auto Scaling.
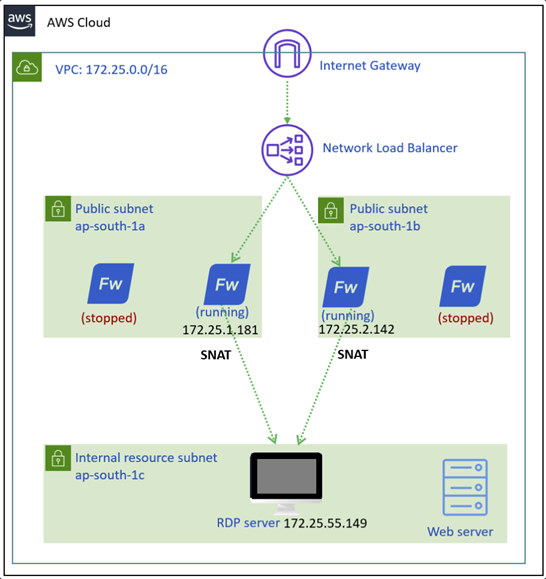
Network diagram
The diagram below shows an RDP server that can be accessed through DNAT using Sophos Firewall with AWS Auto Scaling.
Firewall management
Configure the Sophos Central firewall group as follows:
- Sign in to Sophos Central.
- Go to My products > Firewall management > Firewalls.
- Click the three dots button
 for your Auto Scaling group.
 - Click Manage policy.

Create IP hosts
Create IP range hosts for the WAN subnets of both availability zones. Don't include the first IP address of each subnet. Also, create an IP host for the RDP server.
- Go to Hosts and services > IP host and click Add.
- Enter a name for the IP range of the first availability zone.
-
Configure the following settings:
- IP version: IPv4
- Type: IP range
- IP Address:
172.25.1.2-172.25.1.254
-
Click Save.
- Click Add.
- Enter a name for the IP range of the second availability zone.
-
Configure the following settings:
- IP version: IPv4
- Type: IP range
- IP Address:
172.25.2.2-172.25.2.254
-
Click Save.
- Click Add
- Enter a name for the RDP server.
-
Configure the following settings:
- IP version: IPv4
- Type: IP
- IP Address:
172.25.55.149
-
Click Save.

Create service ports
Create service ports as follows:
- Go to Hosts and services > Services and click Add.
- Enter a name.
-
Configure the following settings:
- Type: TCP/UDP
- Protocol: TCP
- Source port:
3389 - Destination port:
1:65535
-
Click Save.

-
Click Add.
- Enter a name.
-
Configure the following settings:
- Type: TCP/UDP
- Protocol: TCP
- Source port:
8080 - Destination port:
1:65535
-
Click Save.

Firewall rules
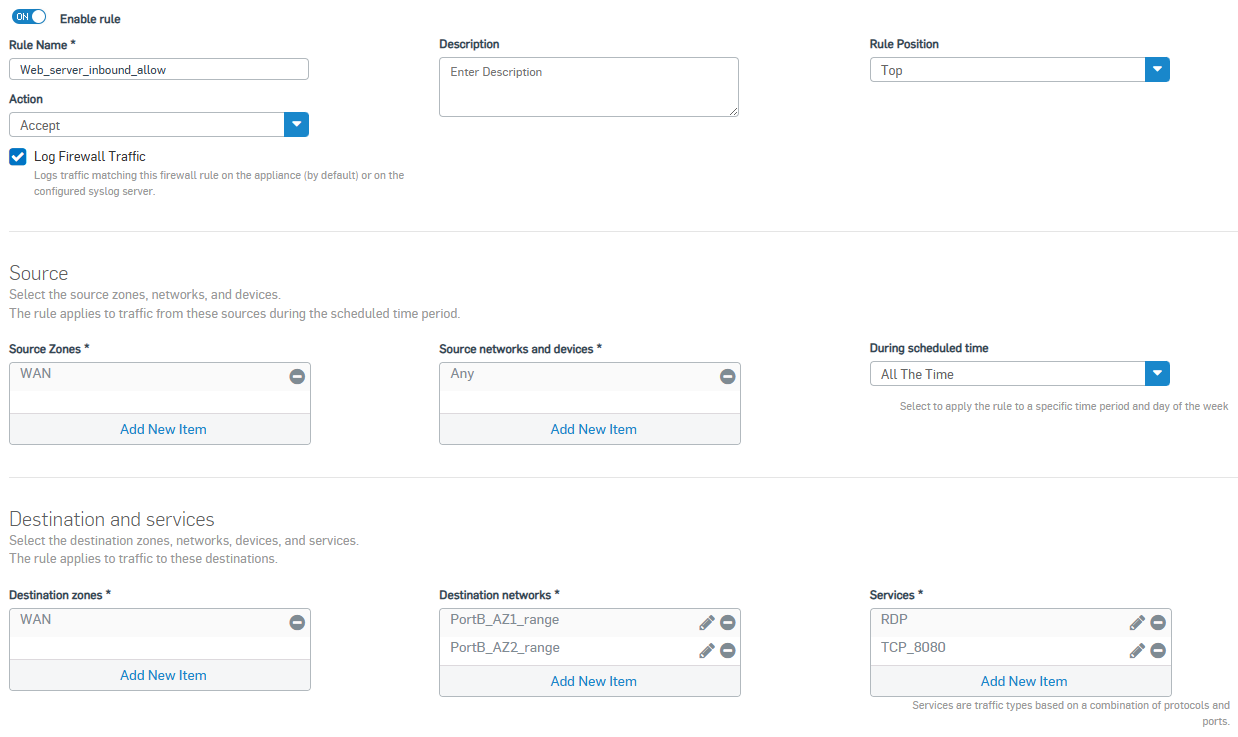
Create firewall rules as follows:
- Go to Rules and policies> Firewall rules > Add firewall rule > New firewall rule.
- Enter a name.
- Under Action, select Accept.
- Under Rule position, select Top.
- Turn Log firewall traffic on.
-
Configure the following settings:
- Source zone: WAN
- Source networks and devices: Any
- Destination zones: WAN
- Destination networks: The IP range hosts you created.
- Services: The service ports you created.
-
Click Save.
NAT rules
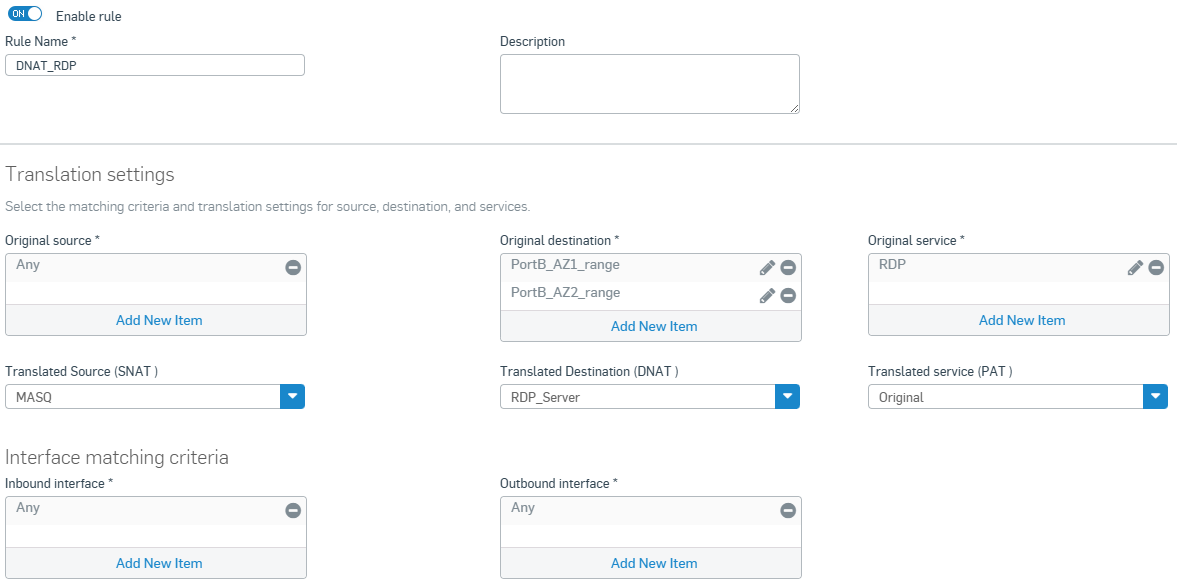
Create a DNAT rule for the RDP server as follows:
- Go to Rules and policies > NAT rules > Add NAT rule > New NAT rule.
- Enter a name.
-
Configure the following settings:
- Original source: Any
- Original destination: The IP range hosts you created.
- Original service: The RDP service you created.
- Translated source (SNAT): MASQ
- Translated Destination (DNAT): The RDP server host you created.
- Translated service (PAT): Original
- Inbound interface: Any
- Outbound interface: Any
-
Click Save.
AWS configuration
Configure the following settings in AWS.
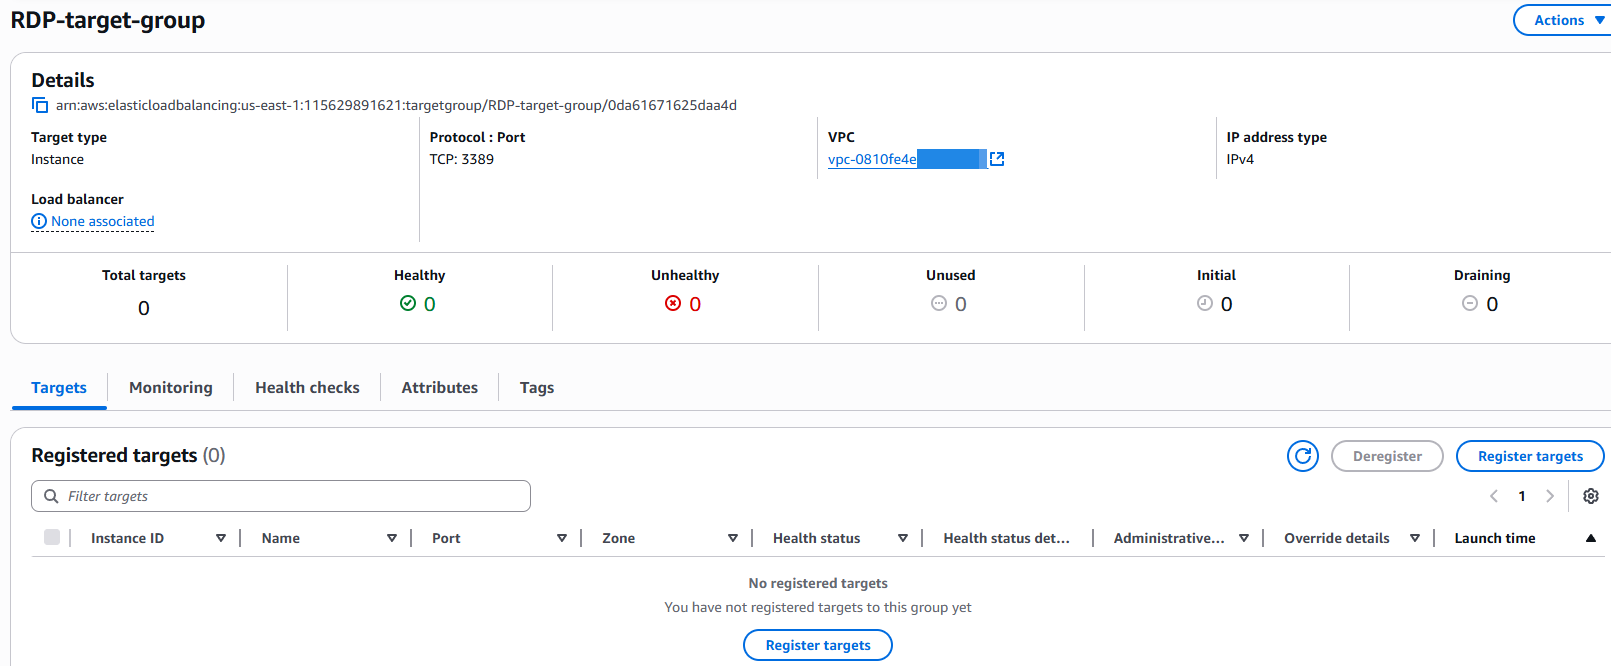
RDP target group
Create the target groups for the RDP server as follows:
- Go to AWS web console and sign in.
- Search for
EC2and click the EC2 service. - Go to Load balancing > Target groups.
- Click Create target group.
- Under Basic configuration, select Instances.
- Under Target group name, enter a name.
- Under Protocol, select TCP.
- Under Port, enter
3389. - Under VPC, select your VPC.
- Click Next.
- Under Available instances, don't select any EC2 instances.
- Click Create target group.
Auto Scaling group
Edit the Auto Scaling group as follows:
- Go to Auto scaling > Auto scaling groups and click the Auto Scaling group created for the firewall EC2 instance.
- In the Integrations tab, under Load balancing, click Edit.
- Select the RDP target group you created and click Update.

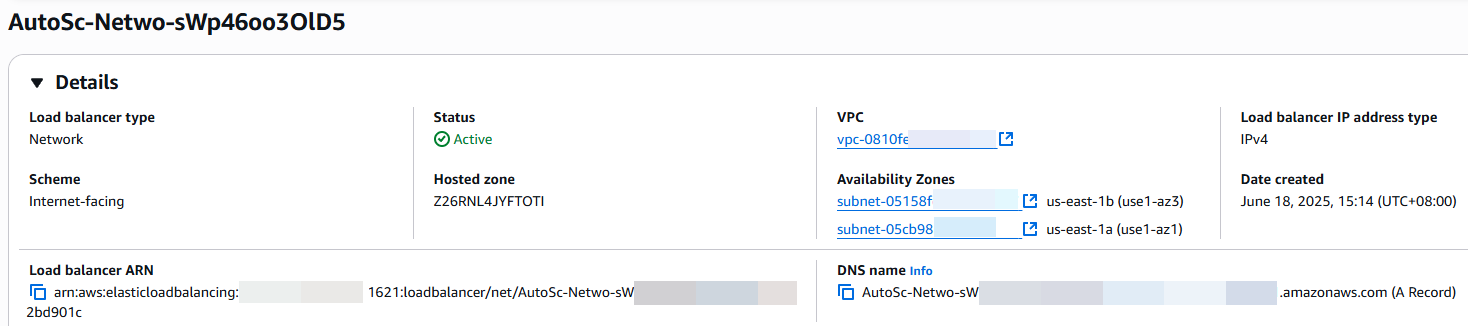
Load balancer
Edit the load balancer as follows:
- Go to Load balancing > Load balancers and click the load balancer created for the Auto Scaling group of firewall EC2 instances.
- In the Listeners tab, click Add listener.
- Under Protocol, select TCP.
- Under Port, enter
3389. - Under Default action, select the target group you created.
- Click Add listener.

You've added a new listener to the network load balancer. It now accepts RDP traffic from the internet and forwards it to the target group, which is the autoscaling group of firewall EC2 instances.

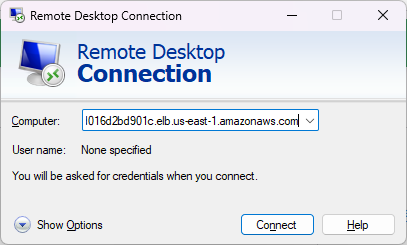
You now have an RDP port opened from the AWS network load balancer. To get access to the RDP server, copy the DNS name of the network load balancer from the Details section.
You now have RDP access to the internal server and the traffic flows through one of the firewall EC2 instances.