Deploy Sophos Firewall in Proxmox Virtual Environment
You can install a Sophos Firewall QCOW2 disk on the KVM platform in Proxmox Virtual Environment.
Download the QCOW disk
To download the .zip file containing the Sophos Firewall QCOW2 disks for the KVM platform, do as follows:
- Go to Firewall Installers.
- Scroll to Virtual Installers: Firewall OS for KVM.
- Click Download.
- Extract and save the disks on the device that has Proxmox Virtual Environment installed. Make a note of the location. You'll need it later.
Deploy the Sophos Firewall QCOW disk
To deploy the Sophos Firewall QCOW disk, do as follows:
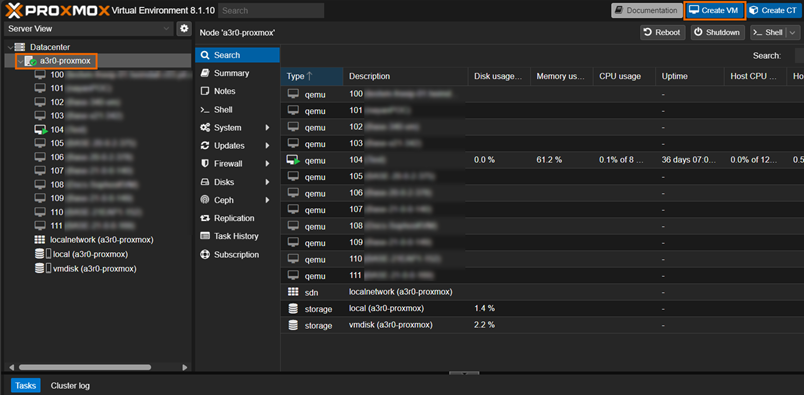
- Sign in to Proxmox Virtual Environment.
-
Select your server and click Create VM.
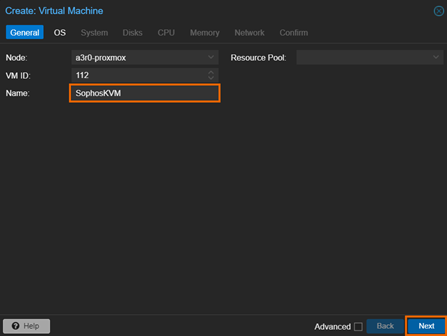
-
Enter a Name and click Next.
-
Select Do not use any media and click Next.

-
Use the default settings for System, Hard Disk, and CPU. Click Next on each tab.
Note
The default settings were used for this example. You may need to adjust settings such as Machine, SCSI Controller, Cache, and so on to better suit your environment.
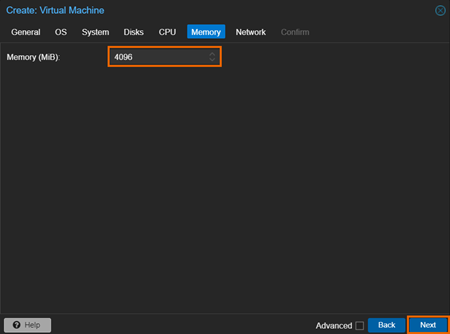
-
Set Memory (MB) to 4096 and click Next.
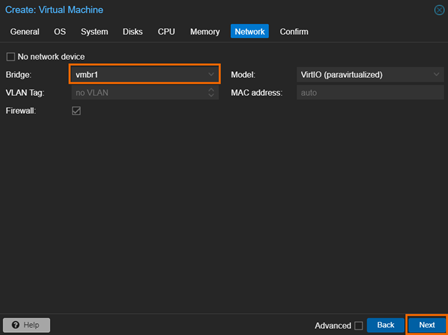
-
Choose your Bridge and click Next.
-
Make sure Start after created is unchecked, confirm your settings, and click Finish.
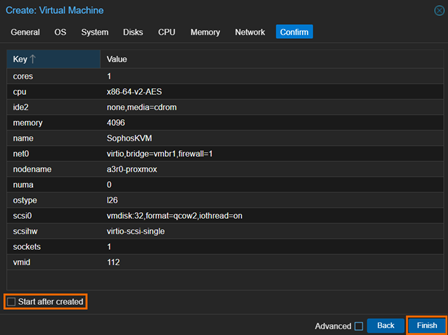
Make a note of the vmid. You'll need it later.
-
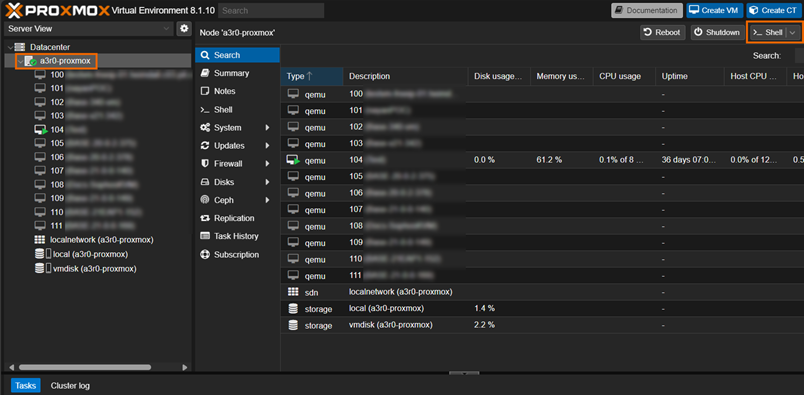
Select your server and click >_ Shell.
-
Sign in and go to the directory where your VM's VHD is stored. By default, Proxmox stores VMs in
/var/lib/vz.Example
root@a3r0-proxmox:~# cd /var/lib/vz/images/108/
root@a3r0-proxmox:/var/lib/vz/images/108# ls
vm-108-disk-0.qcow2
Note
There are many different storage options in a Proxmox environment. Check
/etc/pve/storage.cfgto see your storage IDs and theirpathsettings before following any path‑based steps. -
Move the .zip file containing the Sophos Firewall QCOW2 disks for the KVM platform to this directory.
-
Extract the Sophos Firewall QCOW2 disks.
Example
root@a3r0-proxmox:/var/lib/vz/images/108# unzip VI-20.0.2_MR-2.KVM-378.zip Archive: VI-20.0.2_MR-2.KVM-378.zip inflating: AUXILIARY-DISK.qcow2 inflating: PRIMARY-DISK.qcow2 root@a3r0-proxmox:/var/lib/vz/images/108# ls AUXILIARY-DISK.qcow2 VI-20.0.2_MR-2.KVM-378.zip PRIMARY-DISK.qcow2 vm-108-disk-0.qcow2 root@a3r0-proxmox:/var/lib/vz/images/108# -
Open the configuration file in a text editor. By default, the file is at
/etc/pve/qemu-server/<vmid>.confwhere<vmid>is your vmid.Example
root@a3r0-proxmox:/var/lib/vz/images/108# nano /etc/pve/qemu-server/108.conf -
Remove the line that starts with
scsi0.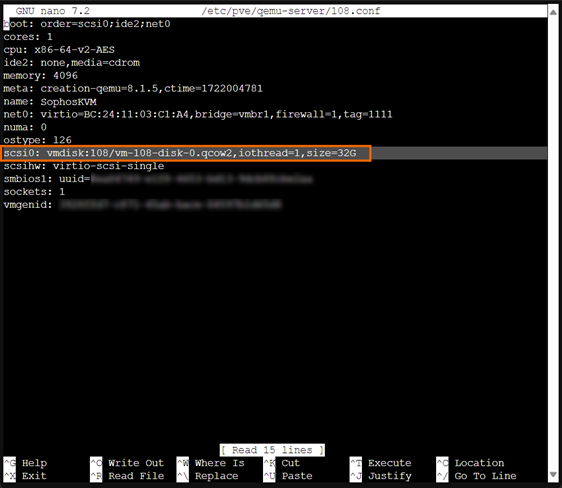
-
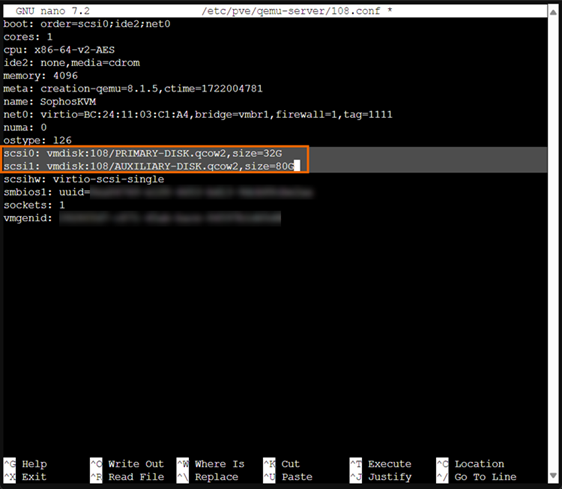
Copy the following two lines and paste them into the configuration file where the line that starts with
scsi0was, replacing<vmid>with your vmid.scsi0: vmdisk:<vmid>/PRIMARY-DISK.qcow2,size=32G scsi1: vmdisk:<vmid>/AUXILIARY-DISK.qcow2,size=80GExample
-
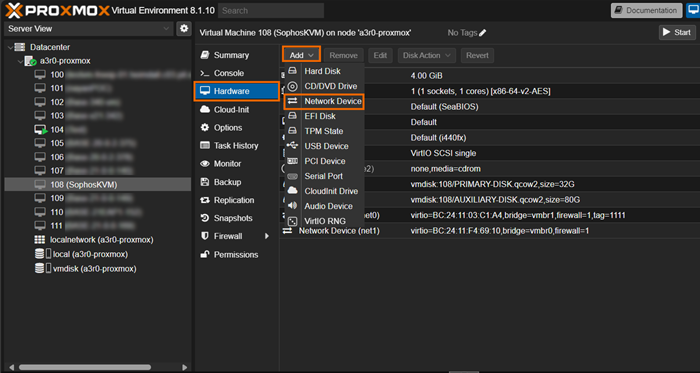
Go back to Proxmox Virtual Environment and select your firewall.
-
Click Hardware, click Add. and select Network device.
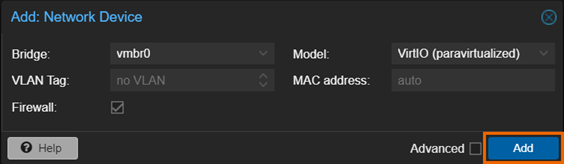
-
Enter your network settings and click Add.
-
Click Options and make sure QEMU Guest Agent is turned off.

Configure your firewall
To power on and configure the virtual firewall, do as follows:
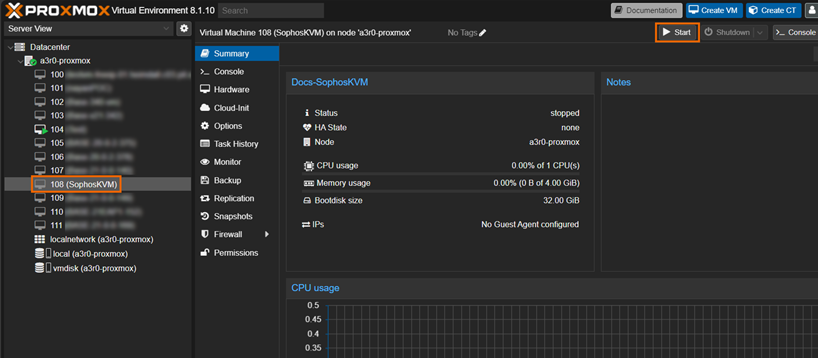
-
Select your firewall and click Start.
-
Enter
https://172.16.16.16:4444into your web browser to connect to the firewall. - Review and accept the Sophos End User Terms of Use.
-
Click Start setup to begin registration and basic setup. See Registration and basic setup.
Restriction
The setup assistant won't start if you've changed the default password from the CLI console. You can complete the basic setup manually or reset the firewall to default to use the setup assistant.