Set up Microsoft Office 365 with Sophos Firewall
You can configure Sophos Firewall for use with Microsoft Office 365 for advanced email protection and management.
Configure Sophos Firewall for Office 365
-
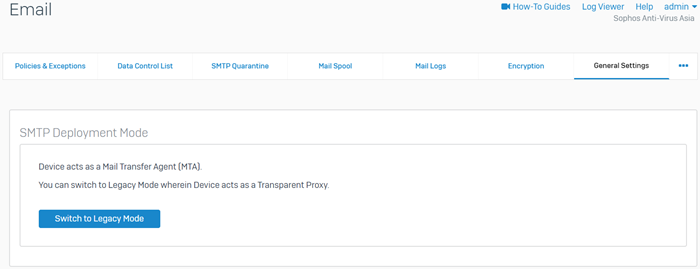
Go to Email > General settings and verify that the firewall uses the Mail Transfer Agent (MTA) mode.
-
Go to Rules and policies and verify that the default firewall rule named Auto added firewall policy for MTA exists.
If the rule doesn't exist, go to Email > General settings, click Switch to legacy mode, and then click Switch to MTA mode to create the default firewall rule.
-
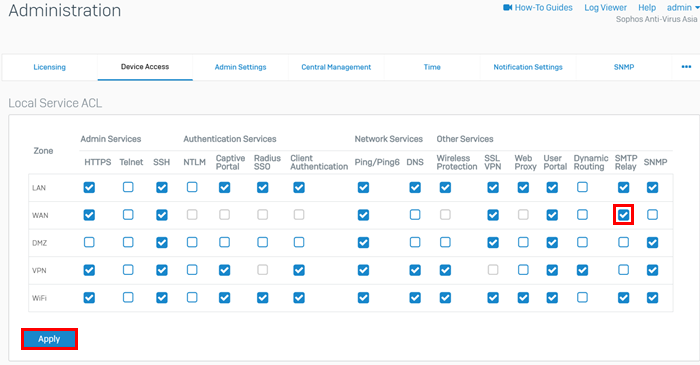
Go to Administration > Device access, allow SMTP relay for the WAN zone, and click Apply.
-
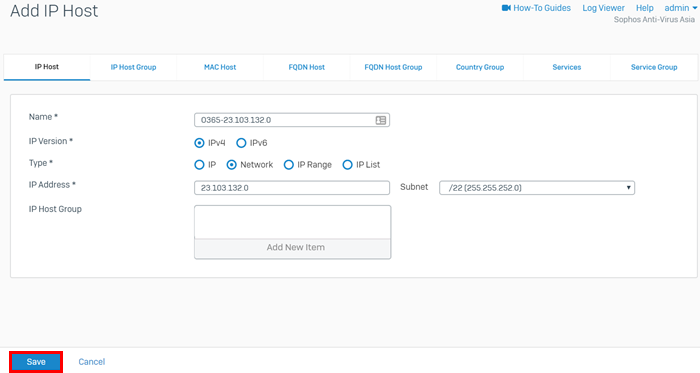
Go to Hosts and services > IP host and click Add.
- Enter a name. Use a prefix (example: O365) to identify the host easily.
-
Enter the IP address ranges listed for Exchange Online Protection and click Save.
You must configure IP hosts for all the ranges listed here: Exchange Online Protection IP addresses.
-
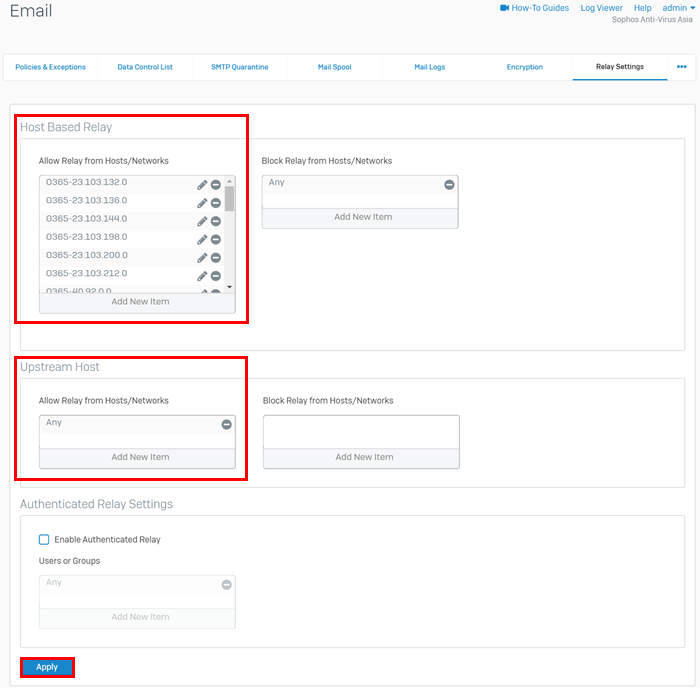
Go to Email > Relay settings.
- Under Host-based relay, click Add new item in the Allow relay from hosts/networks box.
-
In the search box, enter
O365to find the IP hosts you've created, click Select all, and then apply these.Warning
For security reasons, you must set Block relay from hosts/networks to Any. If you don't, Sophos Firewall may become an open relay.
-
Go to Upstream host and click Add new item under Allow relay from hosts/networks. Select Any, and then click Apply "Any" as selected item.
-
Click Apply.
-
Go to Email > Policies and exceptions.
-
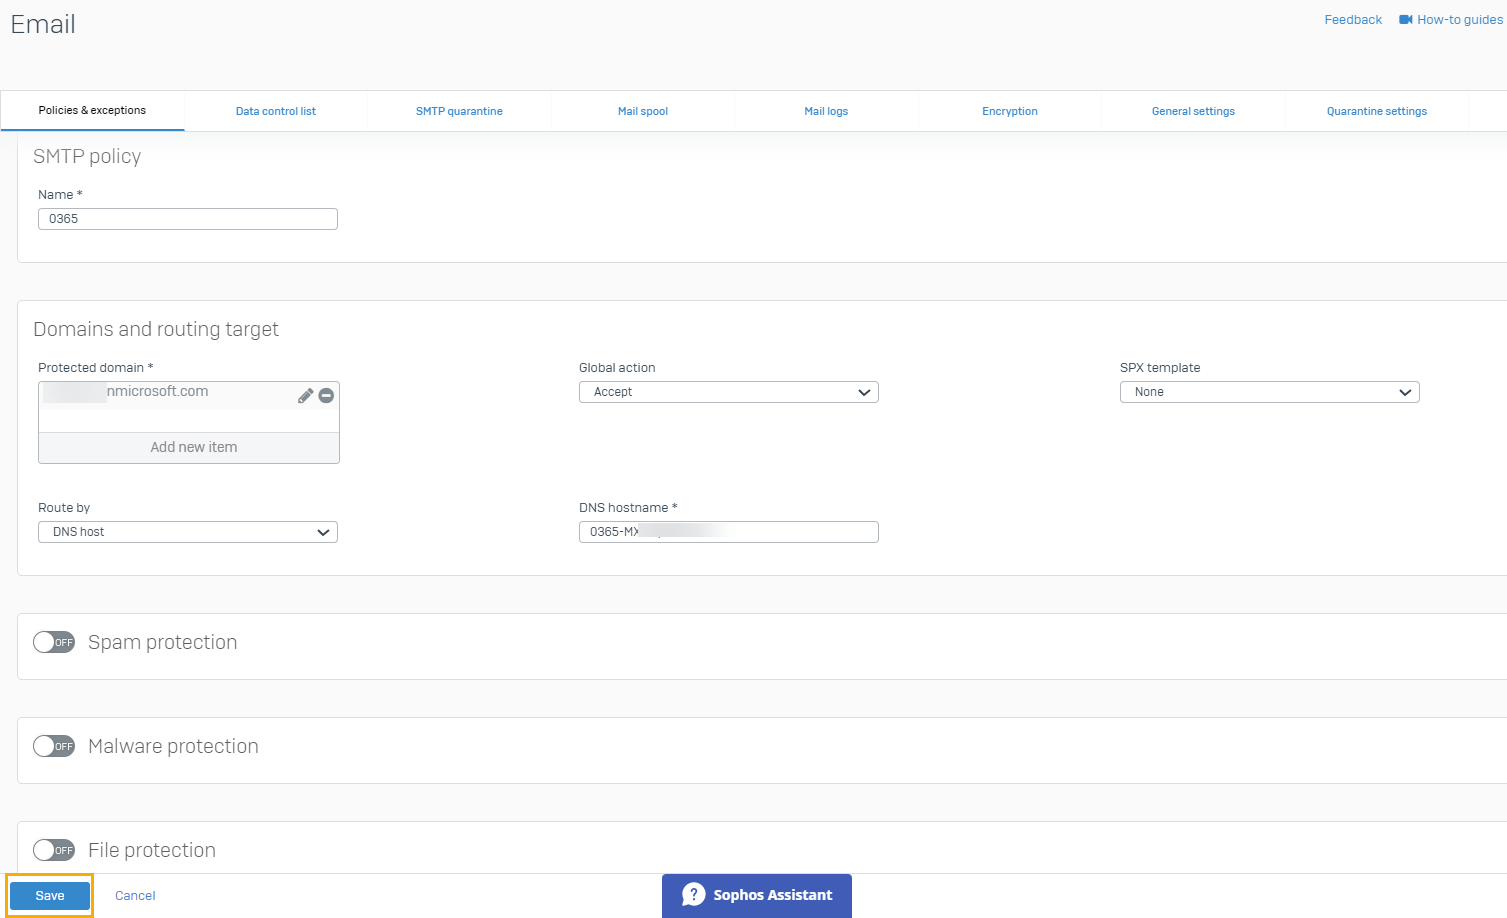
In the Policies section, click Add policy > SMTP route and scan and configure the following settings:
Setting Description Name Enter a name for the policy. Protected domain Add the domains. Global action Select Accept. Route by Select DNS host and enter the DNS hostname of the MX record. -
Click Save.
Configure Microsoft Exchange
-
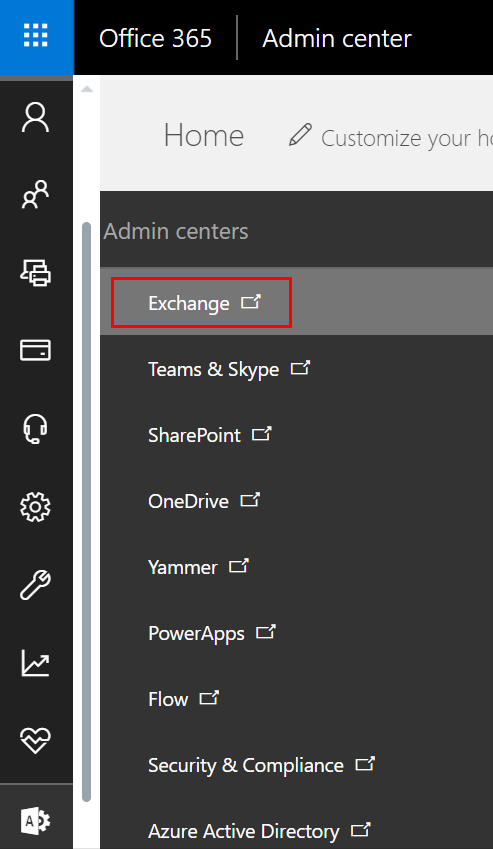
Sign in to Office 365 and go to Admin > Admin centers > Exchange.
-
Go to mail flow > connectors and click the Plus icon to add a new connector.
-
Configure the connector with the following settings and then click Next.
Setting Description From Office 365 To Partner organization -
Enter a name for your connector and click Next.
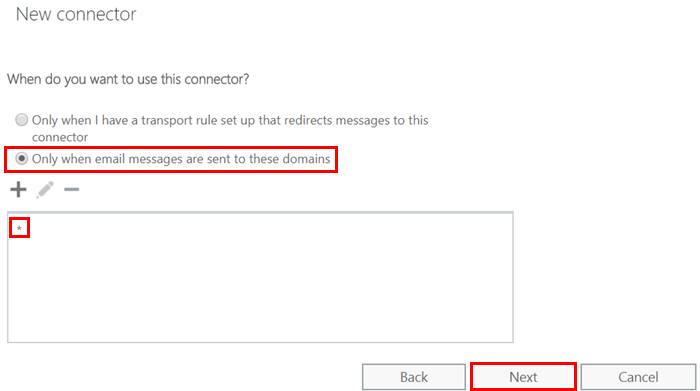
- Select Only when email messages are sent to these domains.
- Click the plus icon, enter
*as the value, and click OK. - Click Next.
-
Make the following routing settings:
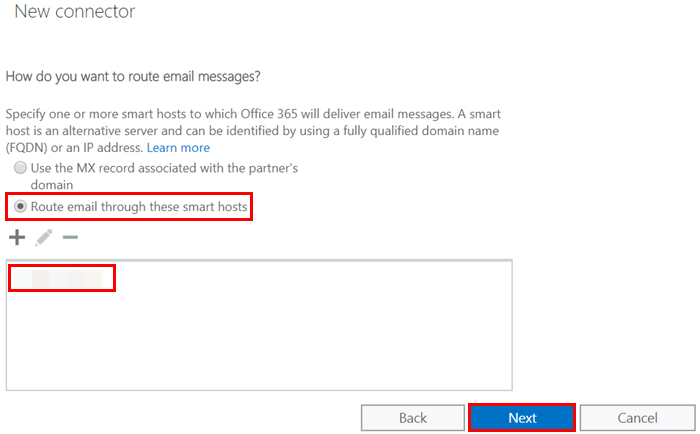
- Select Route email through these smart hosts.
- Click the plus icon, enter the public IP address or FQDN of Sophos Firewall, and click Save.
- Click Next.
-
Select Always use Transport Layer Security (TLS) to secure the connection (recommended) and Any digital certificate, including self-signed certificates.
- Click Next.
- Review the configuration and then click Next.
-
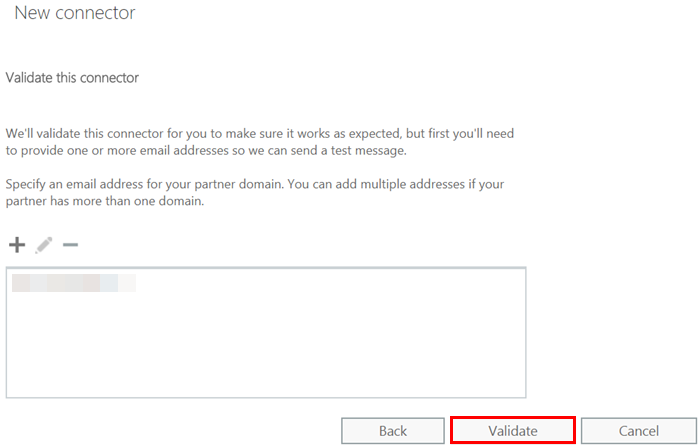
Validate the connector as follows:
Click the Plus icon, enter an email address, click OK and then click Validate. The connector may not validate successfully until MX and SPF are changed.
-
Click Save.
- Ensure you've set an FQDN for Sophos Firewall under Email > General Settings > SMTP Settings > SMTP Hostname.
- Update the MX record to point to the IP address or FQDN of Sophos Firewall.
-
Update the SPF record to include Sophos Firewall or
+mx (v=spf1 +include:spf.protection.outlook.com +mx -all).This adds the new MX record of Sophos Firewall and allows it to verify emails sent from Office 365 with the SPF record.
More resources
