Configure NAT for an interface address
Use the CLI to translate interface addresses of outbound traffic.
Use cases and examples
You can translate an interface address using the CLI command that translates system-generated traffic's source IP address.
- For use cases of this command, see Use cases.
- For configuration examples, see NAT for system-generated traffic and interfaces.
This example translates the interface IP address using the following scenario:
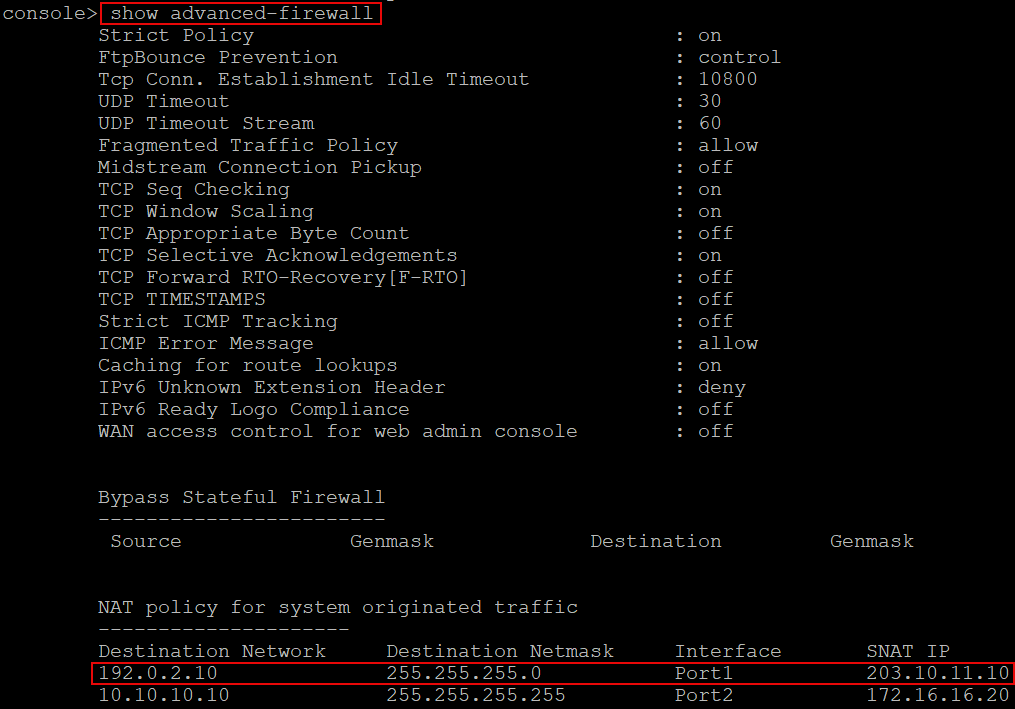
- Destination IP address:
192.0.2.10 - Firewall interface to translate:
Port1 - Alias IP address of Port1 (translated address):
203.10.11.10
Translate the interface address
To translate the interface address, do as follows:
- Sign in to the Command-line console.
- Enter 4 for Device Console.
-
Run the following command:
set advanced-firewall sys-traffic-nat [add|delete] destination {destination IP address} netmask {netmask} interface {interface} snatip {snat IP address}Note
If you don't specify the interface in the command, the firewall translates the source IP address of traffic passing through any firewall interface to the specified destination.
Example options:
-
To translate the source IP address of traffic passing through a specific interface, add the interface attribute in the command.
Example
set advanced-firewall sys-traffic-nat add destination 192.0.2.10 netmask 255.255.255.0 interface Port1 snatip 203.10.11.10 -
The subnet mask must be
255.255.255.255if you want to send the traffic to a specific host, such as when you have an upstream mail relay. If you use other subnet masks, the firewall translates traffic destined to all the IP addresses in the corresponding subnet.Example
set advanced-firewall sys-traffic-nat add destination 192.0.2.10 netmask 255.255.255.255 interface Port1 snatip 203.10.11.10
-
See the configuration
To see the list of NAT configurations you've created on the CLI, run the following command:
show advanced-firewall