Manually configure OTP tokens
You can manually configure the secret for hardware and software tokens and assign it to users.
Note
The firewall only supports the SHA1 algorithm.
Configure MFA settings
If you haven't already configured MFA settings, do as follows:
- Go to Authentication > Multi-factor authentication.
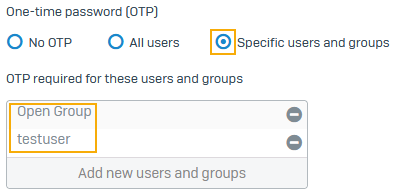
- For One-time password, select Specific users and groups.
-
Click Add new users and groups, select the users and groups, and click Apply selected items.
-
Don't turn on Generate OTP token with next sign-in.
The firewall won't generate QR codes. Users can use the hardware token or the one-time passcode you share with them.
They can also manually enter the secret in their authenticator apps. Users who've already scanned the QR code can continue to use the passcode the app generates.
-
Select the services that require MFA.
This example selects VPN portal, web admin console, and SSL VPN remote access.
-
For OTP timestep settings, enter the timestep (time period) value your hardware token or authenticator app requires.
- Click Apply.
Add a token
To manually create a token, do as follows:
- Go to Authentication > Multi-factor Authentication.
- Under Issued tokens, click Add.
-
For Secret, enter as follows:
- For hardware tokens, enter the key the device manufacturer provides.
-
For software tokens, enter a unique hexadecimal value. The authenticator app will use the secret to generate passcodes.
Go to a third-party website and convert the hexadecimal secret to Base32. For example, go to Cryptii. Share the Base32 secret with the user.
Users can manually enter the secret in their authenticator app to generate the OTP. See See Generate OTPs and sign in.
-
Select the user.
- This example configuration uses the Default token timestep value under MFA settings rather than a custom timestep.
- Click Save.

