Configure transparent authentication using STAS
Clientless SSO is in the form of Sophos Transparent Authentication Suite (STAS). You can integrate STAS in an environment with a single Active Directory server.
You can download STAS from Authentication > Client downloads.
Supported Windows Servers
STAS 2.5 and later supports the following Windows Servers:
- Windows Server 2025
- Windows Server 2022
- Windows Server 2019
- Windows Server 2016
- Windows Server 2012 R2
- Windows Server 2008 R2
Supported deployment modes
STAS 2.5 and later supports the following deployment modes:
- STAS on a domain controller
- STAS 2.5 and later on a member server
Objectives
When you complete this unit, you'll know how to do the following:
- Install STAS and configure an agent and a collector.
- Integrate STAS in the firewall.
- Verify live users.
Configure the STAS user
Configure the user account that will install and configure STAS. It doesn't have to be an administrator account, but you must configure permissions for the account on the Domain Controller and all endpoint computers.
Permissions on the Domain Controller
To configure the STAS user's permissions on the Domain Controller, do as follows:
- Open the Command Prompt and enter
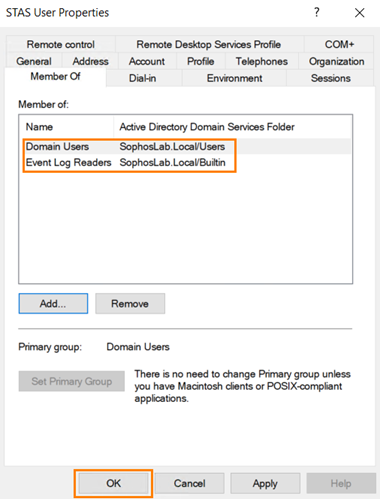
dsa.mscto open Active Directory Users and Computers. - Right-click the STAS user and click Properties.
- Click Member of and click Add.
- Add the user to the Domain Users and Event Log Readers groups.
-
Click OK when finished.
-
Open File Explorer.
- Go to
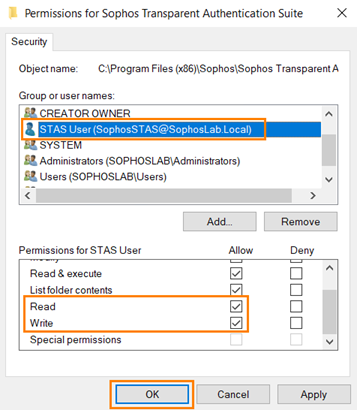
C:\Program Files (x86)\Sophos\ - Right-click
Sophos Transparent Authentication Suiteand click Properties. - Click Security.
- Grant Read and Write permissions to the STAS user.
-
Click OK
Permissions on all endpoint computers
To configure the STAS user's permissions on all endpoint computers, do as follows:
Tip
You can push these settings out in a GPO. The WMI Control changes require a Powershell or logon script as part of the GPO.
- Open the Command Prompt and enter
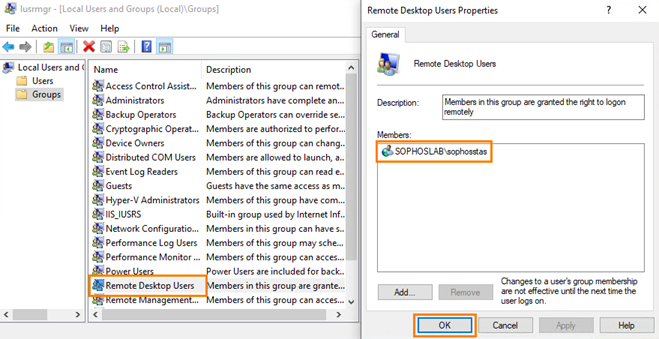
lusrmgr.mscto open Local Users and Groups. - Right-click Remote Desktop Users and click Properties.
- Click Add.
-
Add the STAS user and click OK.
-
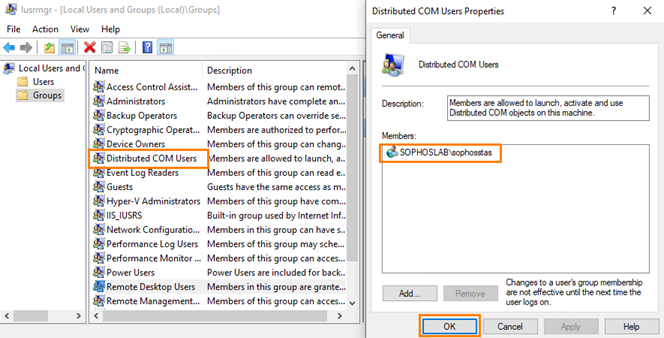
Right-click Distributed COM Users and click Properties.
- Click Add.
-
Add the STAS user and click OK.
-
Open the Command Prompt and enter
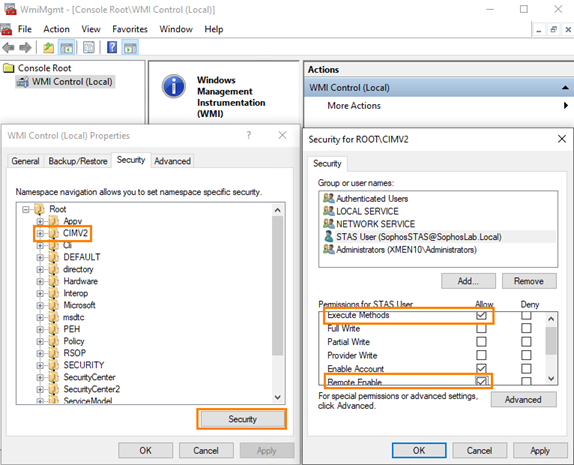
wmimgmt.msc. - Right-click WMI Control (Local) and click Properties.
- Click Security.
- Expand Root, click CIMV2, and click Security.
- Select the STAS user and make sure they have Execute Methods and Remote Enable permissions.
-
Click OK.
Configure system security
Configure audit policies, assign user rights, and modify firewall settings.
- On Windows, click the Start button and go to Windows Administrative Tools > Local Security Policy.
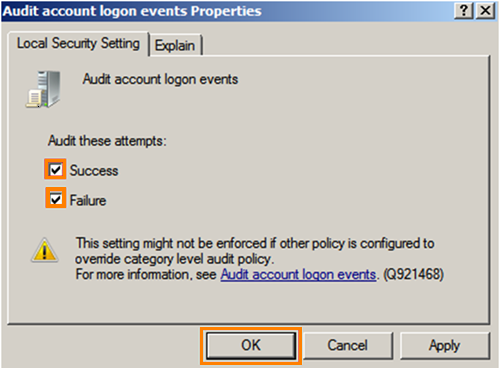
- Go to Local Policies > Audit Policy and open Audit account sign-in events.
-
Select the Success and Failure options and click OK.
-
Go to Local Policies > User Rights Assignment and open Log on as a service.
- If the administrative user installing and running STAS isn't listed, click Add User or Group, add the user, and click OK.
-
Configure the Windows Firewall and third-party firewalls to allow communication over the following ports:
- AD Server: Inbound UDP 6677, Outbound UDP 6060, Outbound TCP 135 and 445 (if using Workstation Polling Method WMI or Registry Read Access), Outbound ICMP (if using Logoff Detection Ping), Inbound/Outbound UDP 50001 (collector test), Inbound/Outbound TCP 27015 (config sync).
- Workstation(s): Inbound TCP 135 & 445 (if using Workstation Polling Method WMI or Registry Read Access), Inbound ICMP (if using Logoff Detection Ping).
Note
RPC, RPC locator, DCOM and WMI services should be enabled on workstations for WMI/Registry Read Access.
Install STAS
Download STAS and install it on the domain controller or member server.
- On the firewall, go to Authentication > Client downloads and download Sophos Transparent Authentication Suite (STAS).
- Move the installer to the domain controller or member server.
-
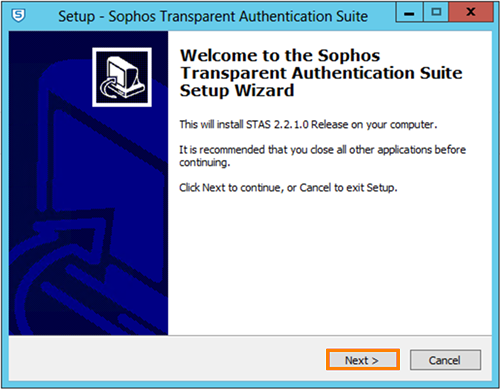
Start the installer and click Next.
-
Follow the setup wizard to specify the location and other options. Then, click Install.
-
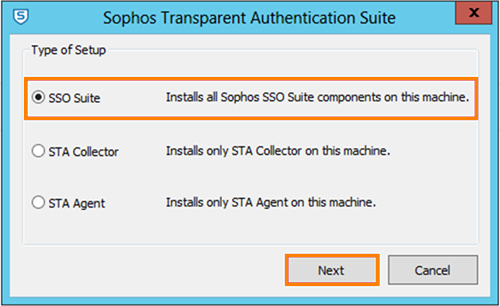
Select SSO Suite and click Next.
-
Enter the administrator credentials and click Next.
- Click Finish.
Configure STAS
Configure a collector, an agent, and general settings.
Note
For settings not listed here, use the default value.
-
On the server, start STAS, click the General tab, and specify the following settings.
Option Value NetBIOS name NetBIOS name of the domain you want to monitor Fully qualified domain name FQDN of the domain you want to monitor Note
In STAS, the NetBIOS name must be in capital letters.
-
Click the STA Agent tab and specify the following settings.
Option Value Domain Controller IP The IP address of the domain controller. Leave this blank if you're installing STAS on a domain controller. Specify the networks to be monitored The networks you want to monitor. Use the CIDR notation. -
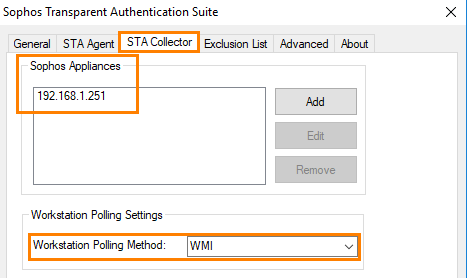
Click the STA Collector tab, and specify the following settings.
Option Value Sophos appliances IP addresses of Sophos Firewall appliances in the network Workstation polling method Choose WMI (default) or Registry Read Access -
Click Apply.
- Click Start to start the STAS service.
Integrate STAS with the firewall
Activate STAS on the firewall and add a new collector. Then, open STAS on the server and check to see if the firewall’s IP address appears. Finally, create a firewall rule to control traffic based on user identity.
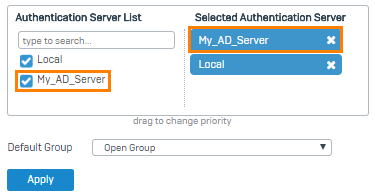
Before you integrate STAS, go to Authentication > Services and select your AD server as the primary authentication method.
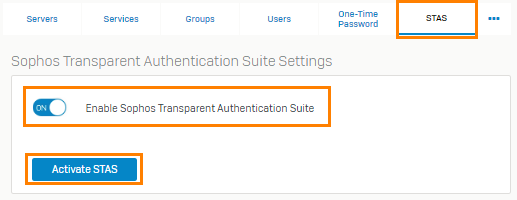
- On the firewall, go to Authentication > STAS.
-
Turn on Enable Sophos Transparent Authentication Suite and click Activate STAS.
-
Click Add new collector and specify the following settings.
Option Value Collector IP IP address of your collector -
Click Save. The firewall attempts to contact STAS on the server over UDP 6060.
-
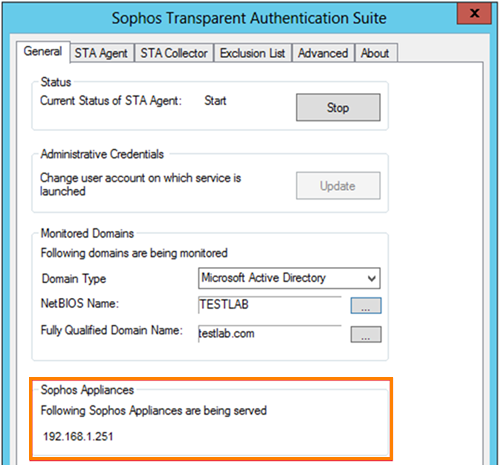
On the server, start STAS and click the General tab. You should see the firewall’s IP address in the list of Sophos appliances. This indicates that STAS is connected to the firewall.
-
Go to Rules and policies > Firewall rules.
- Select IPv4 protocol.
-
Click Add firewall rule, select New firewall rule, and create a firewall rule. Make sure you specify the user settings.
-
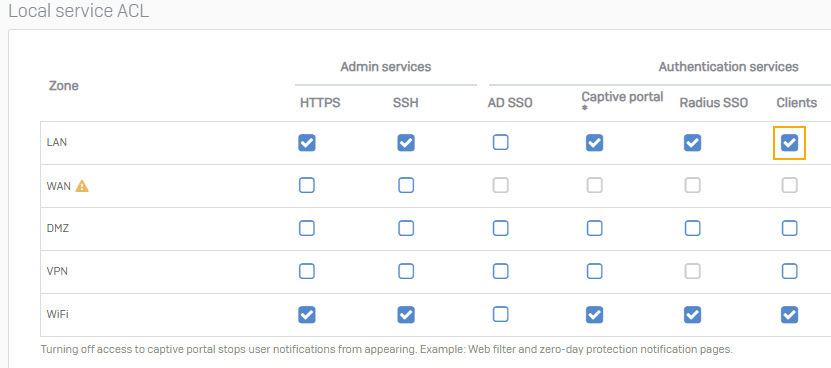
Go to Administration > Device Access.
-
Under Authentication services > Clients, select the checkbox for the required zone.
-
Click Apply.
Verify live users
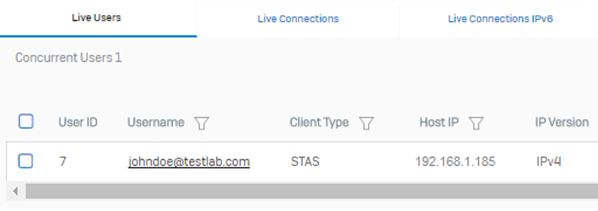
Once users have successfully authenticated to the domain, you can view them as live users on both STAS and the firewall.
-
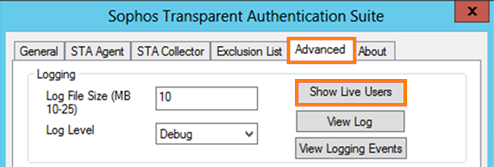
On STAS, go to Advanced and select Show live users.
-
In the firewall, go to Current activities > Live users.
If some or all STAS users don't appear on Live users, see STAS.
