Remove untrusted certificate error
The firewall uses the default appliance certificate for services, such as the web admin console and the user portal.
The firewall's default certificate authority (CA) signs the certificate. So, browsers show an untrusted certificate error when the default appliance certificate is used, for example, when you open the web admin console, the user portal, or the Sophos Connect client.
You can ensure that browsers trust the certificate by using the firewall's hostname in the certificate.
Generate a locally-signed certificate
- Go to Certificates > Certificates and click Add.
- Click Generate locally-signed certificate.
- Enter a name.
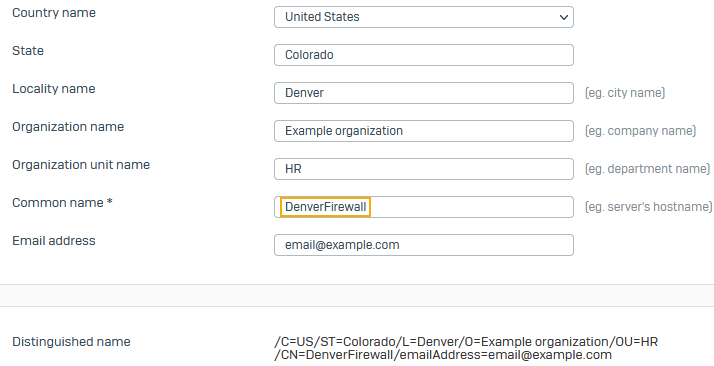
- Enter the Subject name attributes.
-
For Common name, enter your firewall's hostname (example: DenverFirewall).
-
Under Subject Alternative Names, for DNS names, enter the firewall's hostname (example: DenverFirewall) and click the plus button
 .
. -
Click Save.
Edit the Admin and user settings
- Go to Administration > Admin and user settings.
- For Hostname, enter your firewall's hostname (example: DenverFirewall).
-
Click Apply.
-
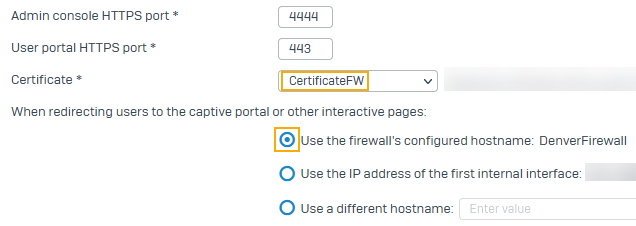
Under Admin console and end-user interaction, for Certificate, select the certificate you generated.
-
Make sure you select Use the firewall's configured hostname.
It shows the hostname you entered.
-
Click Apply.
Import the CA to browsers
Import the CA used to generate the locally-signed certificate to the browser or your mobile device.
- Go to Certificates > Certificate authorities.
-
Click the download button
 for the CA named Default.
The firewall signs all locally-generated certificates using the Default CA.
-
Extract the certificates from the
.tarfile. -
Rename the
Default.derorDefault.pemfile toDefault.crt.Note
You must change the file extension to meet browser requirements.
-
Import the file to the browser's Trusted Root Certificate Authorities or the mobile device's certificate store. See Add a CA manually to endpoints.
- Refresh the window and open the firewall's web admin console. The untrusted certificate error won't appear.
Note
You can also install trusted root CAs on your endpoint. You can push the default CA to users' endpoints using Active Directory Group Policy Objects (GPO).
More resources


