Encrypt outbound emails in MTA mode
Configure Sophos Firewall to encrypt outbound emails to secure confidential financial data.
Introduction
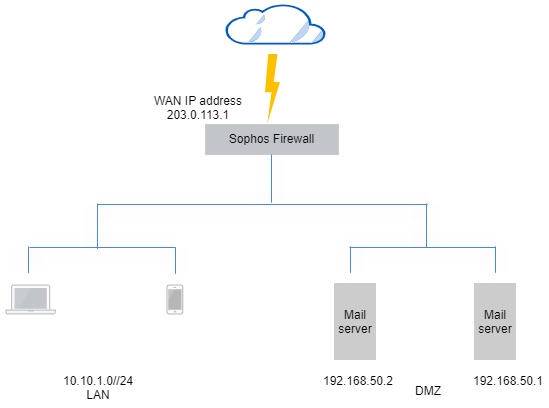
This example shows how to encrypt emails containing confidential data sent from your mail server hosted in the DMZ. Sophos Firewall is in MTA mode.
We show the following example settings:
- IP hosts and certificate for the mail servers. This example uses static servers. If you use MX records, the mail server's MX record must point to the WAN interface of Sophos Firewall.
- SMTP relay for the mail servers.
- SMTP TLS settings.
- Data control list to protect financial information.
- SPX encryption template.
- Email domain as an address group.
- SMTP route and scan policy.
When Sophos Firewall finds protected data in emails, it sends an email to mail recipients asking them to register a password. After recipients register a password, Sophos Firewall encrypts the email using the password and then sends the email to the recipients.
Configure mail server hosts and certificate
Create IP hosts for the mail servers. Upload the mail server certificate.
- Go to Hosts and services > IP host and click Add.
- Enter a name.
- Set Type to IP.
- Enter the IP address.
-
Create another IP host for the second server. Alternatively, use an IP range or IP list to create a single host for all the mail servers.
Here's an example of how to create an IP host for the mail server:
-
Go to Certificates > Certificates and click Add.
- Select Upload certificate.
- Enter a name.
-
Upload the Certificate and Private key files.
Here's an example:
Allow outbound emails
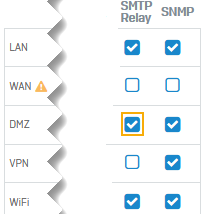
Turn on SMTP relay for the DMZ zone and specify the relay settings for the mail servers. Sophos Firewall then relays outbound mails from your mail servers to the internet.
- Go to Administration > Device access.
-
Under SMTP relay, select DMZ.
-
Go to Email, hover over the more button, and click Relay settings.
-
Go to Host-based relay.
-
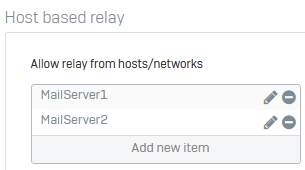
Under Allow relay from hosts/networks, select the mail servers.
Here's an example:
-
Click Apply.
Configure SMTP security settings
Configure the SMTP and TLS settings.
- Under SMTP settings, for SMTP hostname, enter the outgoing mail server's name.
- Select Reject based on IP reputation.
-
Select SMTP DoS settings.
Here's an example:
-
Under SMTP TLS configuration, for TLS certificate, select the mail server certificate.
You can upload the mail server certificate on Certificates > Certificates > Upload certificate.
-
Clear the check box Allow invalid certificate.
-
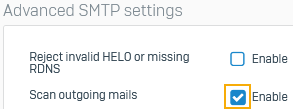
Under Advanced SMTP settings, select Scan outgoing mails.
Add a data control list
Select the data you want to control in emails. This example shows the protection settings for financial data.
- Go to Email > Data control list and click Add.
- Enter a name.
- For CCLs (Control control list), set Type to Financial data.
-
Select the required items from the list. Scroll down to see the full list.
Here's an example:
-
Click Save.
Create an SPX template
Configure an SPX encryption template and specify the SPX portal settings. The SPX portal allows users to reply to emails securely.
- Go to Email > Encryption > SPX templates and click Add.
-
Set Password type to Specified by recipient.
-
Select Enable SPX reply portal.
-
Select Include original body into reply.
-
Click Save.
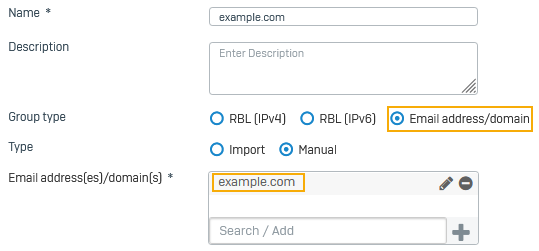
Add an address group
Create an address group for the email domain.
- Go to Email > Address group and click Add.
- Check if Group type is set to Email address/domain.
- Check if Type is set to Manual.
-
For Email address/domain, enter your email domain and click the add button. Here, we use
example.com.Here's an example:
-
Click Save.
Add an SMTP route and scan policy
Configure an SMTP route and scan policy specifying the data control list and an SPX template for the list.
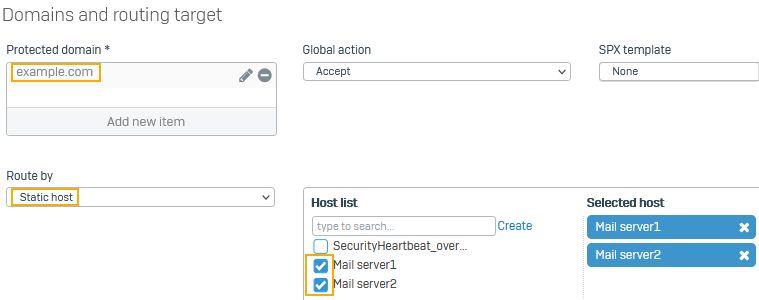
- Go to Email > Policies and exceptions and click Add a policy. Click SMTP route and scan.
- Under Protected domain, select the address group you configured.
- Set Route by to Static host.
-
Under Host list, select the mail servers you've configured.
Here's an example:
-
Turn on Data protection.
Here's an example:
-
Click Save.
