Set up VPN and user portals
Users can access the VPN portal to download the Sophos Connect client and configuration files to establish remote access IPsec and SSL VPN connections. They can also establish clientless SSL VPN connections.
Users can use the user portal to see their personal details, such as the other client downloads, internet usage, email quarantine and exceptions, and policy overrides.
To set up VPN and user portals for your users, do as follows.
Portal settings
-
Go to Administration > Admin and user settings and see the default port and certificate under Admin console and end-user interaction:
-
VPN portal HTTPS port: 443
If you want to change the default port, see Protocols and ports.
-
Check Certificate for the certificate that signs the VPN portal.
The default certificate is a locally-signed certificate. So, browsers show an untrusted certificate error. See Remove untrusted certificate error.
-
-
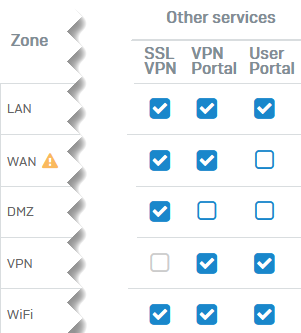
Go to Administration > Device access and select the zones from which you want users to access the VPN portal, for example, WAN.
Authentication
-
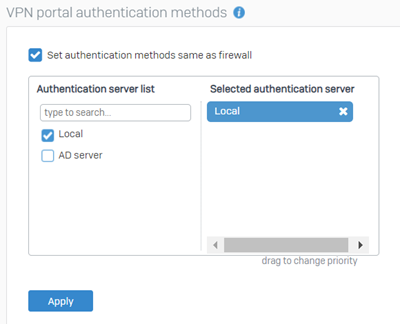
Go to Authentication > Services and select an authentication server under VPN portal authentication methods.
-
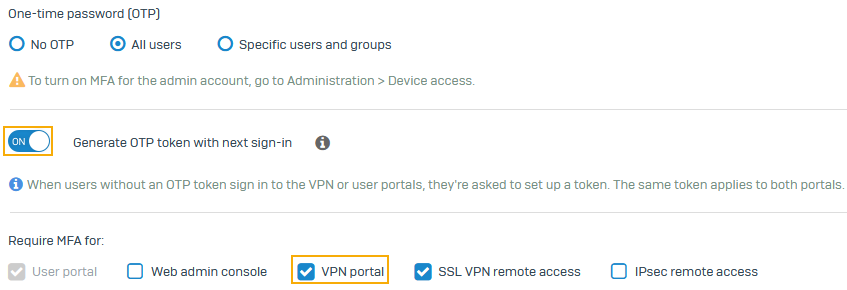
Optional: Set up multi-factor authentication (MFA) as follows:
- Go to Authentication > Multi-factor Authentication.
-
Under One-time password (OTP), select an option:
- All users
- Specific users and groups. Select the users and groups.
-
Turn on Generate OTP token with next sign-in.
- Under Require MFA for, select VPN portal.
- Click Apply.
The OTP token (QR code) appears on the VPN and user portals. Users can scan the code on either portal using an authenticator app on their mobile devices.
VPN settings and policies
-
Go to Remote access VPN and add the users or their groups to one of the following remote access VPN policies:
- IPsec
- SSL VPN
- Clientless SSL VPN
- L2TP
- PPTP
Note
The VPN portal only appears to users if they or their groups are selected in remote access policies.
Access the VPN portal
The URL format to open the VPN portal is as follows:
https://<firewall's IP address or hostname>:<VPN portal port>
Example
https://10.170.0.1:443
Portal settings
-
Go to Administration > Admin and user settings and see the default port and certificate under Admin console and end-user interaction:
-
User portal HTTPS port: 4443
Note
You can't share the user portal port with any other service. If you change its default port, make sure it's unique.
Note
VPN portal was introduced in SFOS 20.0. It uses the default port 443, which was previously used by the user portal. When you upgrade or restore a backup from an earlier version to SFOS 20.0 and later, the user portal's port (default 443 or custom port) is automatically assigned to the VPN portal. The user portal is then assigned the new default port 4443. If 4443 isn't available, 65040 is automatically assigned to the user portal. See New VPN portal in SFOS 20.0 and later.
-
Check Certificate for the certificate that signs the user portal.
The default certificate is a locally-signed certificate. So, browsers show an untrusted certificate error. See Remove untrusted certificate error.
-
-
Go to Administration > Device access and select the zones from which you want users to access the user portal.
Warning
Don't select WAN for the user portal. It's a security risk. You can allow access from VPN, LAN, and Wi-Fi zones.
Authentication
-
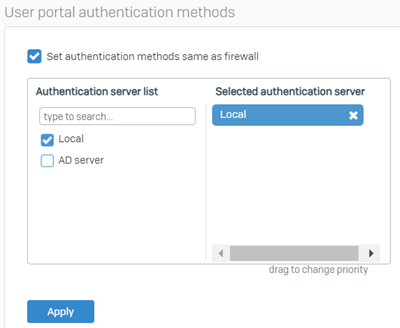
Go to Authentication > Services and select an authentication server under user portal authentication methods.
-
Optional: Set up multi-factor authentication (MFA) as follows:
- Go to Authentication > Multi-factor Authentication.
-
Under One-time password (OTP), select an option:
- All users
- Specific users and groups. Select the users and groups.
-
Turn on Generate OTP token with next sign-in.
User portal is selected by default.
-
Click Apply.
The OTP token (QR code) appears on the user portal. Users can scan the code using an authenticator app on their mobile devices.
Access the user portal
The URL format to open the user portal is as follows:
https://<firewall's IP address or hostname>:<user portal port>
Example
https://10.170.0.1:4443


