How to deploy Sophos Firewall on Amazon Web Services (AWS)
Sophos Firewall runs as a virtualized security appliance on an Amazon EC2 instance and deploys inline into an Amazon Virtual Private Cloud (VPC) to scan inbound and outbound traffic.
This information is provided as-is without any guarantees. If you require assistance with your specific AWS environment, contact Sophos Professional Services.
-
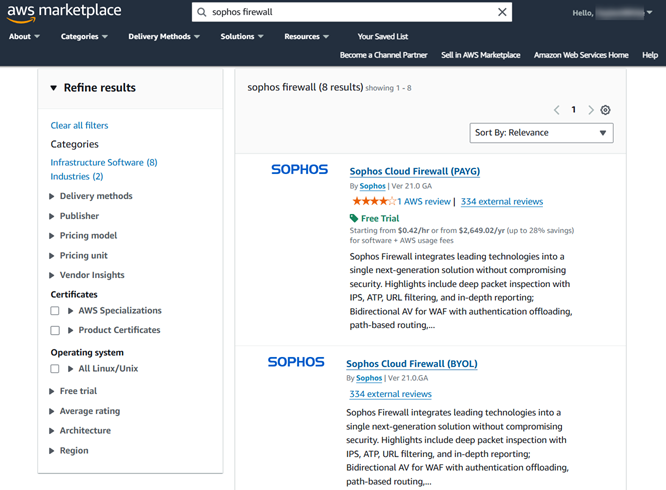
Go to the Sophos AWS Marketplace Product page, search for "Sophos", and select the listing you want to use.
Sophos Firewall is available for standalone deployment using the BYOL and PAYG licensing methods. Both license types offer free trial options.
-
To subscribe to the software terms, click View purchase options.
-
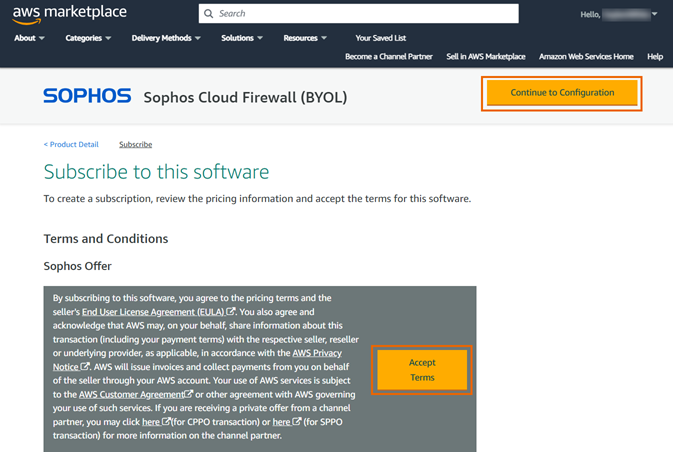
Review the terms, click Accept terms to complete the subscription process, then click Continue to Configuration.
-
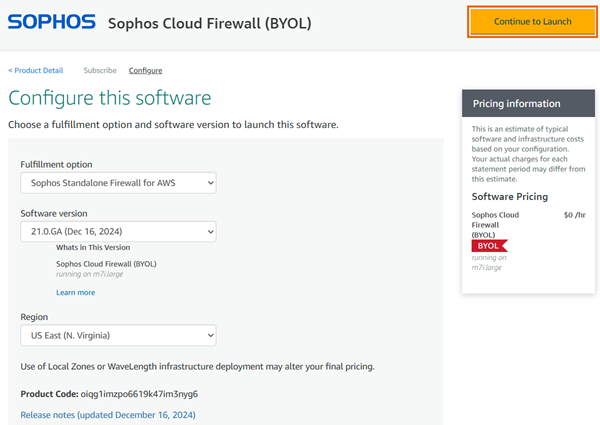
Select a Fulfillment option, a Software version, and a Region, then click Continue to Launch.
-
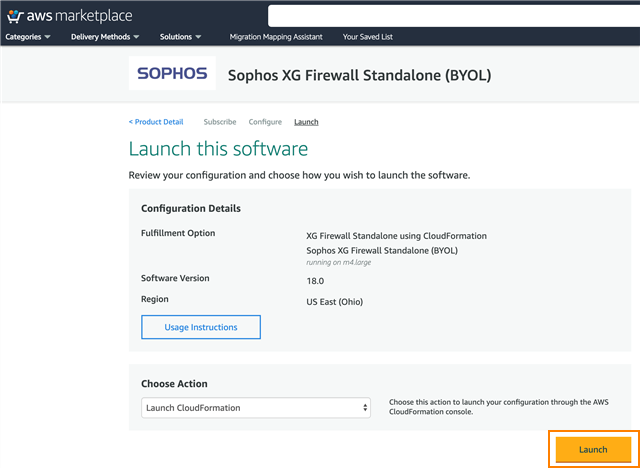
Under Choose Action, select Launch CloudFormation, then click Launch to go to the AWS CloudFormation console. A CloudFormation template simplifies deploying Sophos Firewall into an AWS account.
-
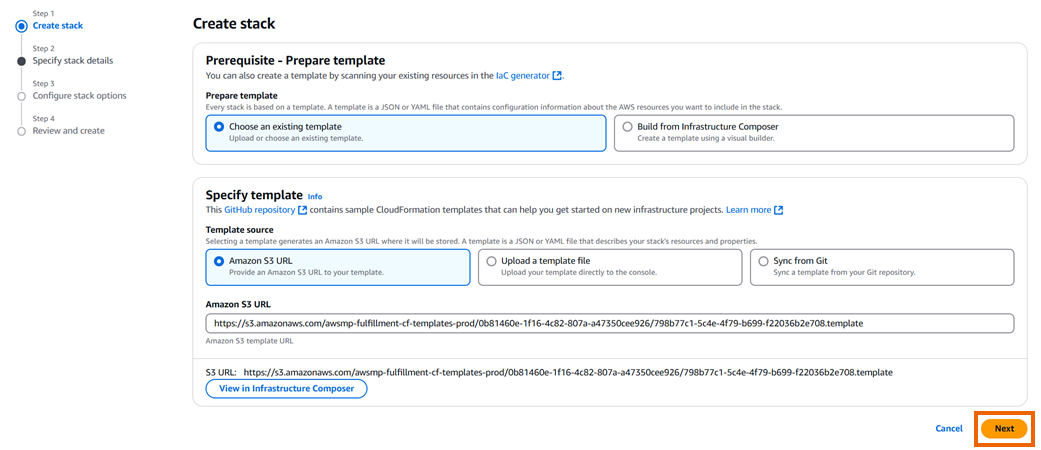
On the Create stack page, click Next.
-
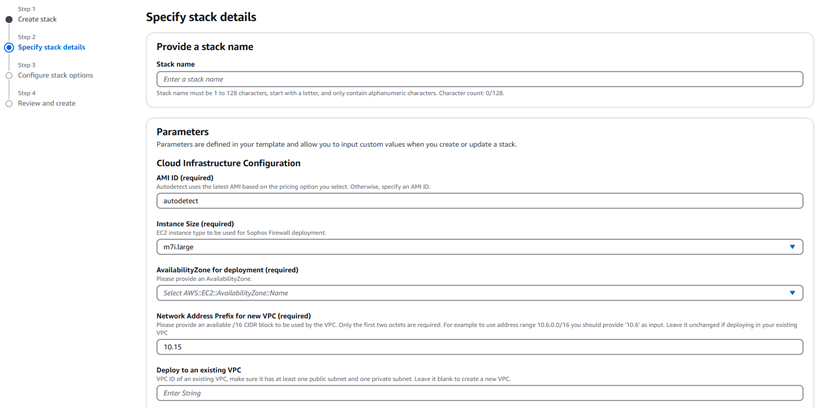
On the Specify stack details page, enter a Stack name.
If you want to use an existing Virtual Private Cloud (VPC), don't change the Network Address Prefix for new VPC (Required). If you want to create a new VPC, accept or change the default parameters for AMI ID, EC2 Instance size, Public Subnet Availability Zone, and Network Prefix.
-
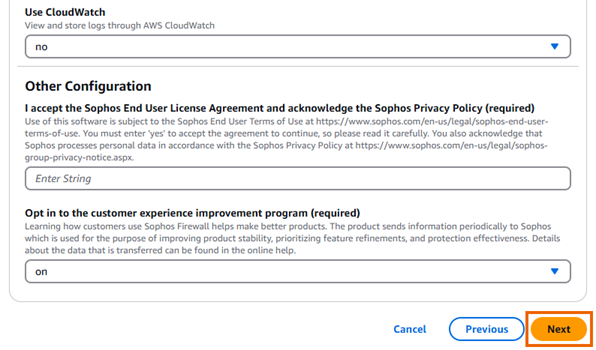
Configure all the required settings under Parameters, Sophos Firewall Configuration, and Other Configuration.
-
If you're deploying into an existing VPC, enter the VPC ID, an existing public subnet ID, an existing private subnet ID, and choose to have the template create a new Elastic IP (EIP) address or utilize an existing available EIP address.
-
Click Next.
-
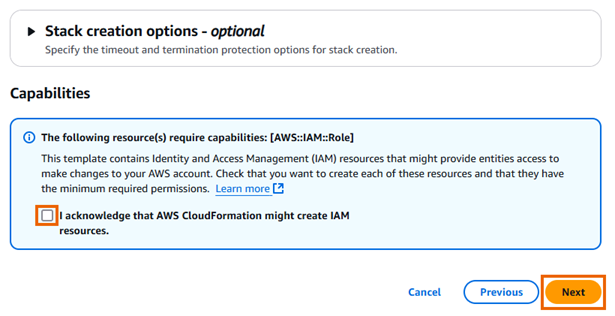
Click the I acknowledge that AWS CloudFormation might create IAM resources checkbox and click Next.
-
Review the settings and click Submit.
Stack creation typically takes from five to ten minutes. When stack creation is complete, the status changes to CREATE_COMPLETE. The Outputs tab shows the EIP address assigned to the Sophos Firewall. After stack creation, the EC2 instance may need additional time to complete startup before it's ready. You can see the status of the EC2 instance in the EC2 console. You can see details about the EC2 instance, including its physical ID, under the Resources tab.
-
When the EC2 instance starts, connect to the web admin console by entering the assigned public IP address into your web browser in the following format:
https://PublicIPAddress:4444.Sophos Firewall uses a locally signed certificate by default, so your browser shows a warning message. Once you pass the certificate warning, you see the Welcome to Sophos Firewall page.
-
Review and accept the Sophos End User Terms of Use.
- Click Start setup to begin registration and basic setup. See Registration and basic setup.
Warning
By default, AWS only turns on management access (web admin console and SSH access) for a firewall. You must use AWS security group rules to allow access to the firewall from different locations or to access other firewall services, such as SSL VPN, IPsec, RED, user portal, or WAF. For example, to establish a RED tunnel with a firewall in AWS, add port 3410 to the AWS security group.
More resources
