Deploy Sophos Firewall in Virtual Machine Manager
You can install a Sophos Firewall QCOW2 disk on the KVM platform in Virtual Machine Manager.
Download the QCOW disk
To download the .zip file containing the Sophos Firewall QCOW2 disk for the KVM platform, do as follows:
- Go to Firewall Installers.
- Scroll to Virtual Installers: Firewall OS for KVM.
- Click Download.
- Extract and save the disk on the device that has Virtual Machine Manager installed.
Deploy the Sophos Firewall QCOW disk
To deploy the Sophos Firewall QCOW disk, do as follows:
- Open Virtual Machine Manager.
-
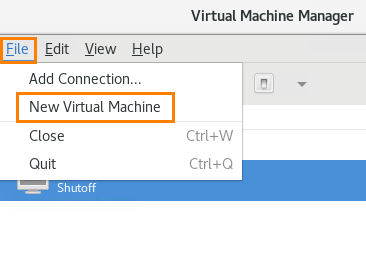
Click File and click New Virtual Machine.
-
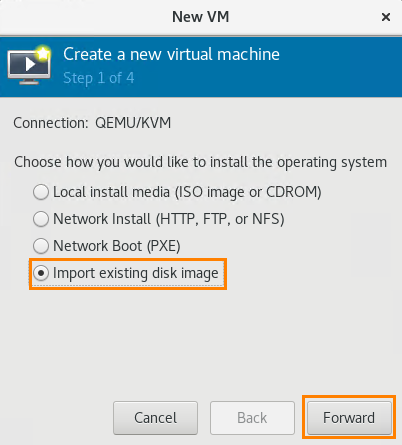
Select Import existing disk image and click Forward.
-
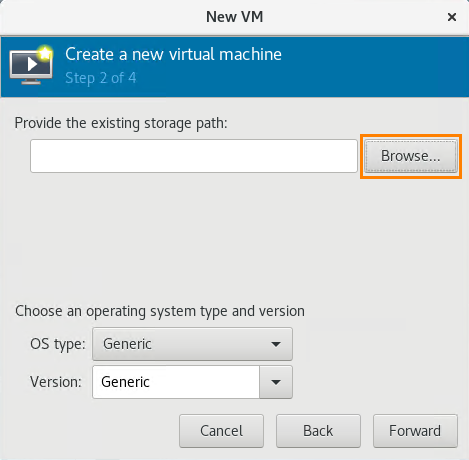
Click Browse.
-
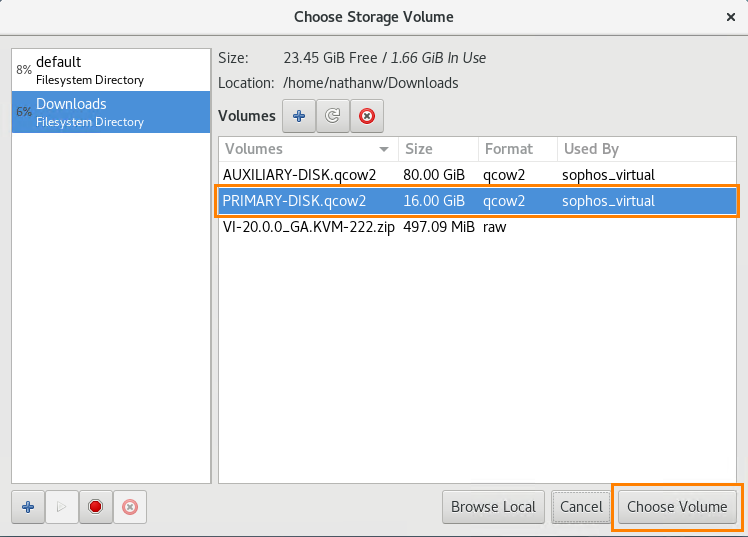
Select
PRIMARY-DISK.qcow2and click Choose volume. -
Click Forward.
-
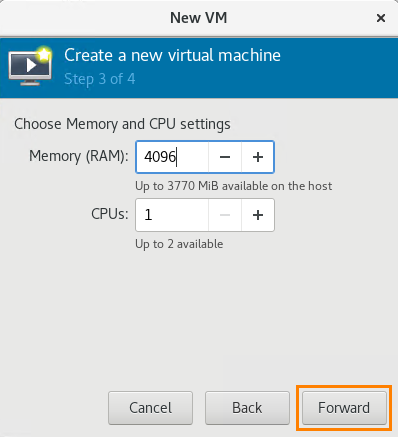
Set Memory (RAM) to at least 4096 MB and CPU to 1. Click Forward when done.
-
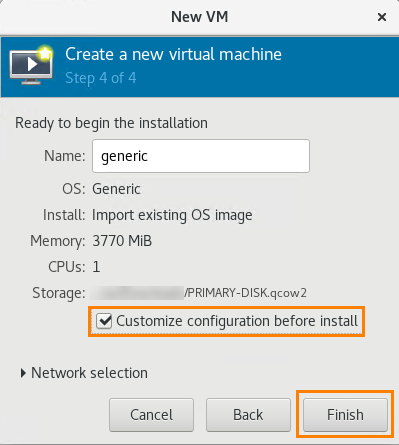
Select Customize configuration before install and click Finish.
-
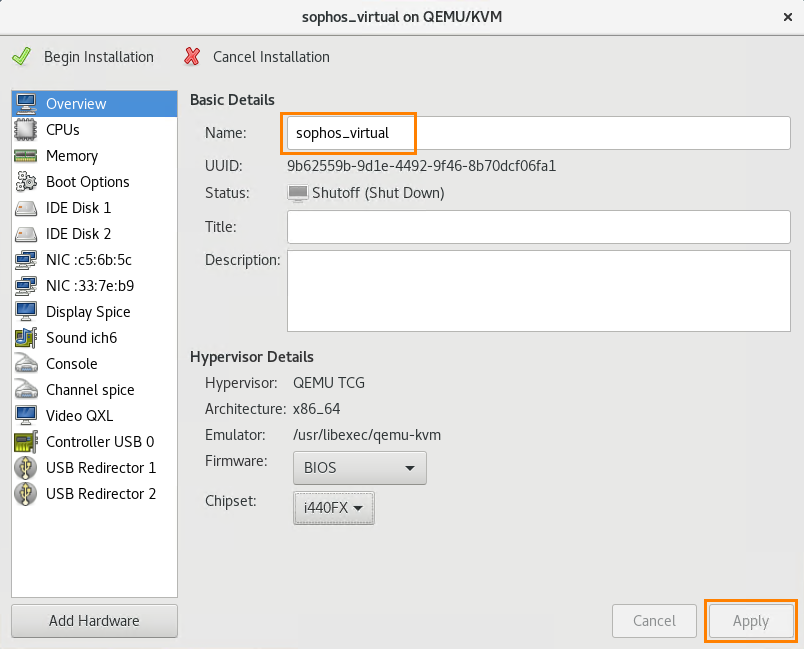
Enter a name and click Apply.
-
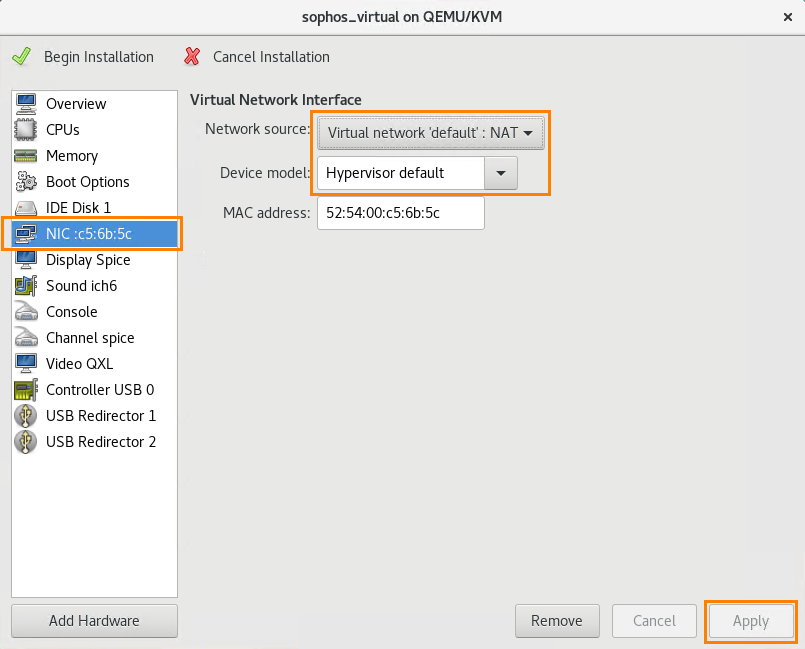
Select your NIC and configure the following options:
- Network source: Select your network from the drop-down.
- Device model: Select Hypervisor default.
Click Apply when finished.
-
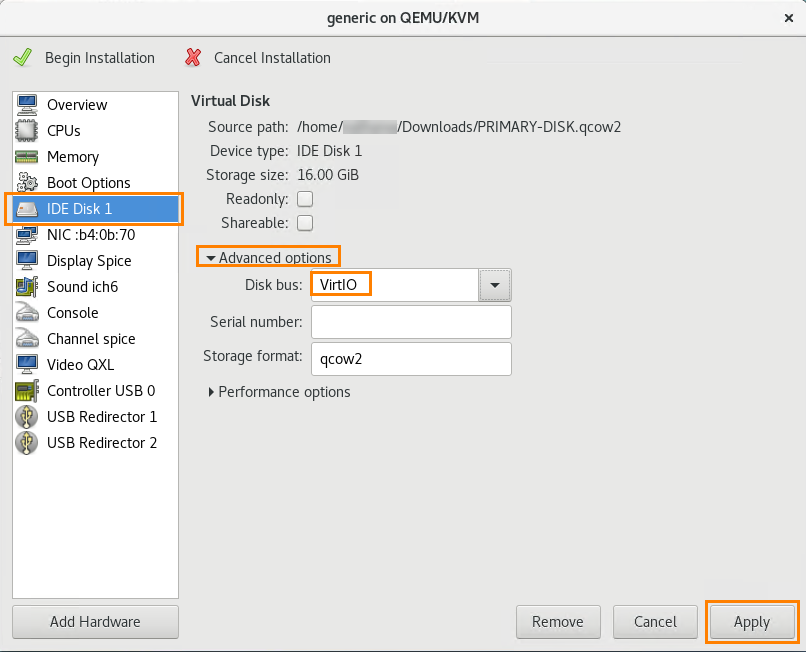
Select IDE Disk 1, expand Advanced options, and select VirtIO from the Disk bus drop-down.
-
Click Apply.
- Click Add Hardware.
-
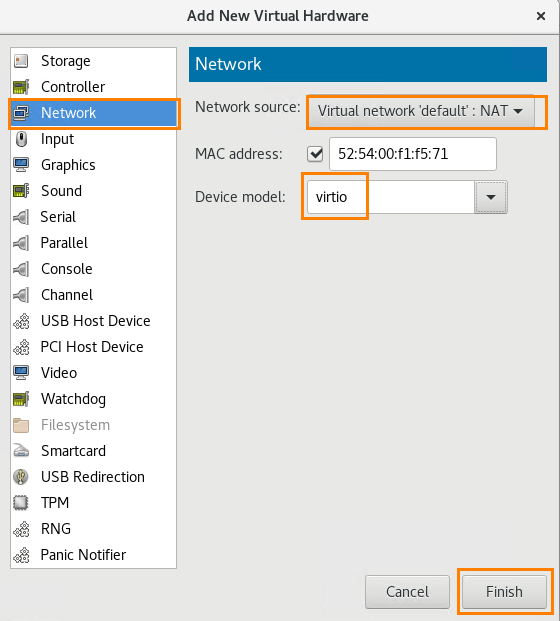
Select Network and configure the following options:
- Network source: Select the network you want from the drop-down.
- Device model: Select virtio.
-
Click Finish.
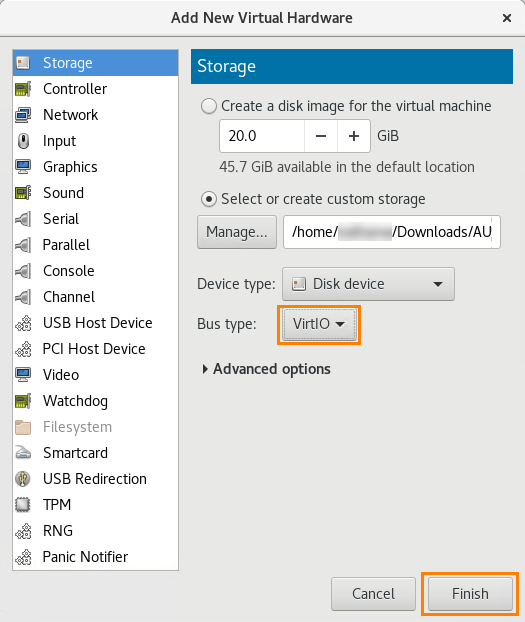
- Click Add Hardware, select Storage, and click Select or create custom storage.
-
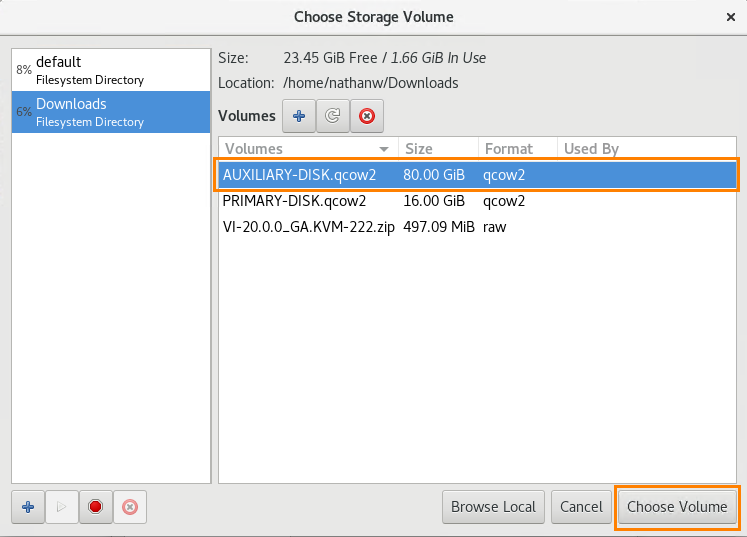
Click Manage, select
AUXILIARY-DISK.qcow2, and click Choose volume. -
Select VirtIO from the Disk bus drop-down and click Finish.
-
Click Begin Installation to create the firewall.
Configure Sophos Firewall
To power on and configure the virtual firewall, do as follows:
-
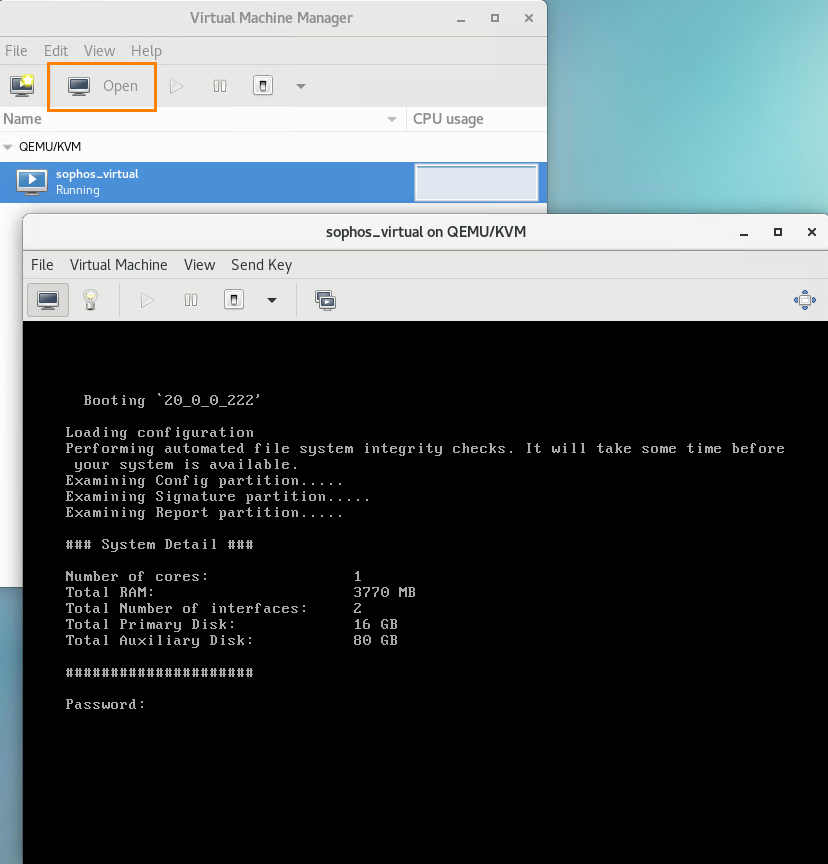
Select your firewall and click Open.
-
Enter the administrator password
admin. - Enter
https://172.16.16.16:4444into your web browser to connect to the firewall. - Review and accept the Sophos End User Terms of Use.
-
Click Start setup to begin registration and basic setup. See Registration and basic setup.
Restriction
The setup assistant won't start if you've changed the default password from the CLI console. You can complete the basic setup manually or reset the firewall to default to use the setup assistant.
To manage your Sophos Firewall licenses and subscriptions, see Licensing.
