Integrate Microsoft Entra ID with Sophos Firewall
Complete configuration to integrate Microsoft Entra ID SSO with Sophos Firewall
- Configure Entra ID
- Configure firewall
- Add redirect URIs
- Allow Azure URLs
- Import groups
This task has several steps. Click a link to go to the page for that step.
In the Azure Portal, you must integrate your Microsoft Entra ID with Sophos Firewall to authenticate administrators and users through single sign-on (SSO).
Create a Microsoft Entra ID application for the firewall
You must create a separate Microsoft Entra ID application for the firewall.
To create an application for the firewall, do as follows:
- Sign in to Azure Portal.
- Go to Home > Microsoft Entra ID > App registrations.
- Click New registration.
- Enter a name for the application.
- Under Supported account types, for Who can use this application or access this API?, select Accounts in this organizational directory only (Default Directory only - Single tenant).
-
Under Redirect URI (optional), in the Select a platform list, select Web.
You don't need to enter the URLs now. You must enter them after you create the Microsoft Entra ID server in the firewall.
-
Click Register.
Microsoft Entra ID shows the details of the application you created.
-
Copy the following IDs:
- Application (client) ID: Identifies the firewall application.
- Directory (tenant) ID: Identifies the Microsoft Entra ID tenant to which the application belongs.
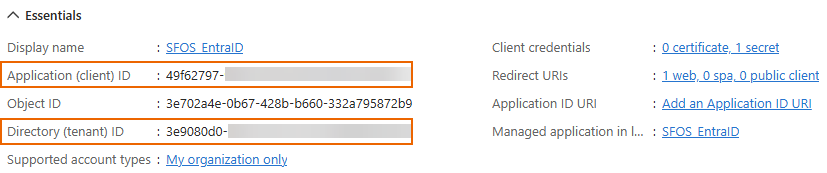
You must paste these when you configure the Microsoft Entra ID server in the firewall. During authentication, the firewall presents them to Microsoft Entra ID.
Create API permissions
Delegated permissions allow the application you created for the firewall to read the user profile and group information when users sign in to the firewall.
Application permissions allow the firewall to import groups from Microsoft Entra ID.
To create these API permissions, do as follows:
- Go to Home > Microsoft Entra ID > App registrations and click the application you created for the firewall.
- Go to Manage > API permissions, then click Add a permission.
-
Click Microsoft Graph.
-
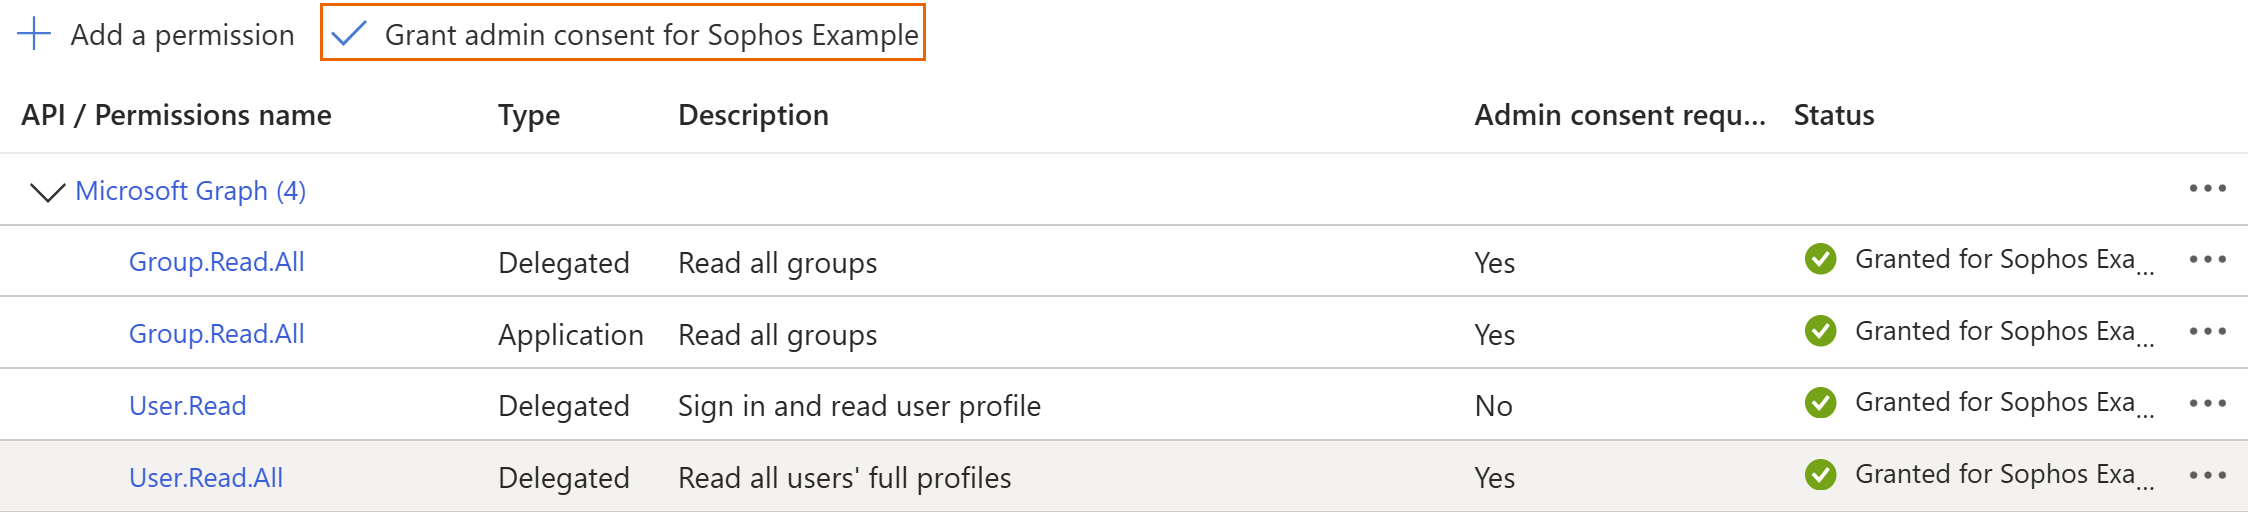
To allow authentication, click Delegated permissions. Under Select permissions, do as follows:
- Search for "user.read", then select User.Read.All.
- Search for "group.read", then select Group.Read.All.
-
To allow the import of groups to the firewall, click Application permissions. Under Select permissions, search for
group.read, then select Group.Read.All.
-
-
Click Add permissions.
-
Grant admin consent for the selected permissions and click Yes when prompted.
Note
Granting admin consent authorizes access to the firewall services on behalf of all users, eliminating the need for individual prompts to users for consent at the time of sign-in. See Permissions and consent in the Microsoft identity platform.
Create a client secret
You must create a client secret to allow secure communication between Sophos Firewall and Microsoft Entra ID.
To create a client secret in Microsoft Entra ID, do as follows:
- Go to Home > Microsoft Entra ID > App registrations and click the application you created for the firewall.
- Go to Manage > Certificates & secrets, then click New client secret.
- Enter a description.
- Under Expires, select the secret's lifetime.
- Click Add.
-
Under Value, copy the secret immediately.
Warning
Microsoft Entra ID hides the secret when the page reloads. If you don't copy the secret immediately, you must create a new client secret.
Note
Make a note of the expiration date so you can renew the client secret in advance.
All users and groups in the tenant can sign in to the firewall's user services, such as the captive portal. Their access is based on the policies and rules you assign to them in the firewall.
Configure groups or roles for administrators
To allow administrators to sign in to the firewall's web admin console, you can create groups or roles and assign these to individual administrators in Microsoft Entra ID.
You must map these Microsoft Entra ID groups or roles to administrator profiles in the server configuration in the firewall.
Create groups and add firewall administrators
If you want to use groups, we recommend that you create groups in Microsoft Entra ID specifically for the firewall administrators, so you prevent others from accessing the web admin console.
To create groups for the firewall administrators in Microsoft Entra ID, do as follows:
- In the Home menu, click Groups and click New group.
- Under Group type, select Security.
- Enter a Group name and description.
- Under Members, click No members selected, search for the firewall administrators, select them, and click Select.
- Click Create.
For granular read-write permissions in the firewall, you can create multiple groups, for example, "Firewall Admin Full Access" and "Firewall Admin Read Access" groups.
For more information, see Manage Microsoft Entra groups and group membership.
Assign application roles to firewall administrators
Application roles are specific to each application. So, you must create roles and assign these to the firewall administrators in Microsoft Entra ID.
Create roles for the administrators
To create application roles in Microsoft Entra ID, do as follows:
- Click App registrations and click the firewall application in the list.
- Go to Manage > App roles and click Create app role.
- Enter a display name for the role.
- Under Allowed member types, select Both (Users/Groups + Applications).
-
Under Value, enter a name to define an administrator role.
For example,
adminFullAccessoradminReadOnlyAccess.When you add a Microsoft Entra ID server in the firewall configuration, you must map these to the firewall's administrator profiles.
When users sign in to the firewall, the token sent by Microsoft Entra ID includes their role value and group name. The firewall maps the value with the administrator profile in its Microsoft Entra ID SSO server configuration and allows the sign-in. See Role mapping.
-
Enter a description for the role.
- Make sure that Do you want to enable this app role? is selected.
- Click Apply.
You can create more than one application role and map these to the different administrator profiles in your firewall.
Assign roles to administrators
To assign roles to administrators, do as follows:
- Click App registrations and click the firewall application in the list.
-
Next to Manage application in local directory, click the application's name.
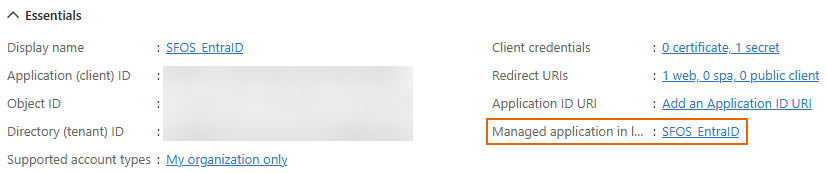
-
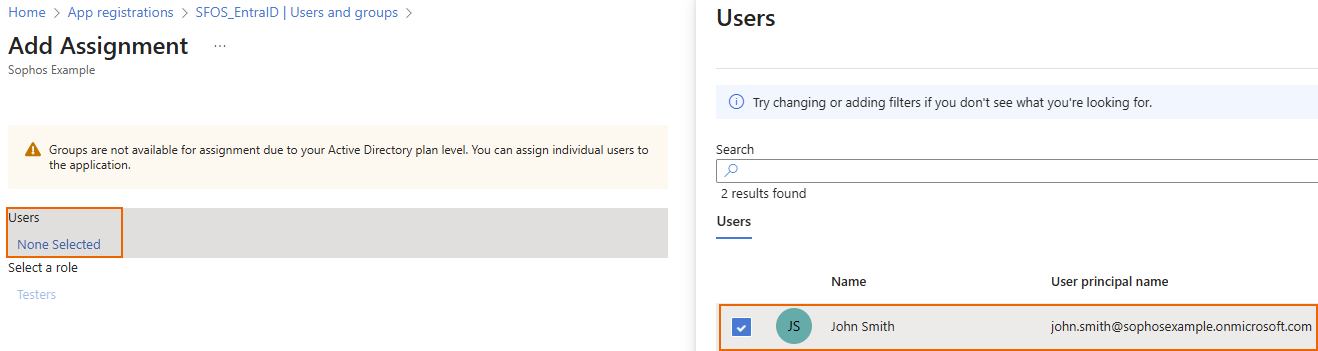
Go to Manage > Users and groups, then click Add user/group.
- Under Users, click None selected, then select the administrators.
- Click Select.
- Select a role for each administrator, then click Select.
- Click Assign.
You've assigned a role to the users you selected and assigned the users to the firewall application.
Secure the access to firewall services
(Optional) If you want to make sure only assigned users and groups can access the firewall services, make their assignment to the firewall application mandatory.
If you don't make it mandatory, all users in the tenant can try to sign in to the firewall services, which is less secure. However, the firewall only allows access to users and groups based on the firewall rules and policies.
Make the assignment mandatory
To make the assignment of users and groups mandatory, do as follows:
- Go to Home > Microsoft Entra ID > App registrations and click the application you created for the firewall.
- Go to Overview.
-
Next to Manage application in local directory, click the application's name.
-
Go to Manage > Properties.
- Under Assignment required?, select Yes.
- Click Save.
Assign users or groups to the application
If you turned on Assignment required, you must assign users or their groups to the firewall application so they can access the firewall's services.
To assign users or groups to the application, do as follows:
- Go to Home > Microsoft Entra ID > App registrations and click the application you created for the firewall.
-
Next to Manage application in local directory, click the application's name.
-
Go to Manage > Users and groups, then click Add user/group.
-
Under Users, click None selected, then select the users or groups.
-
Click Select.
- Under Select a role, click None selected.
- Select a role for the users then click Select.
- Click Assign.
To continue with the configuration, see Add a Microsoft Entra ID (Azure AD) server.