Sophos Firewall with AWS Auto Scaling
You can deploy Sophos Firewall using AWS Auto Scaling to automatically adjust the number of firewall EC2 instances based on traffic load and trigger events.
The firewall EC2 instances in AWS act as worker nodes and are automatically provisioned, approved, and added to the correct firewall group in Sophos Central.
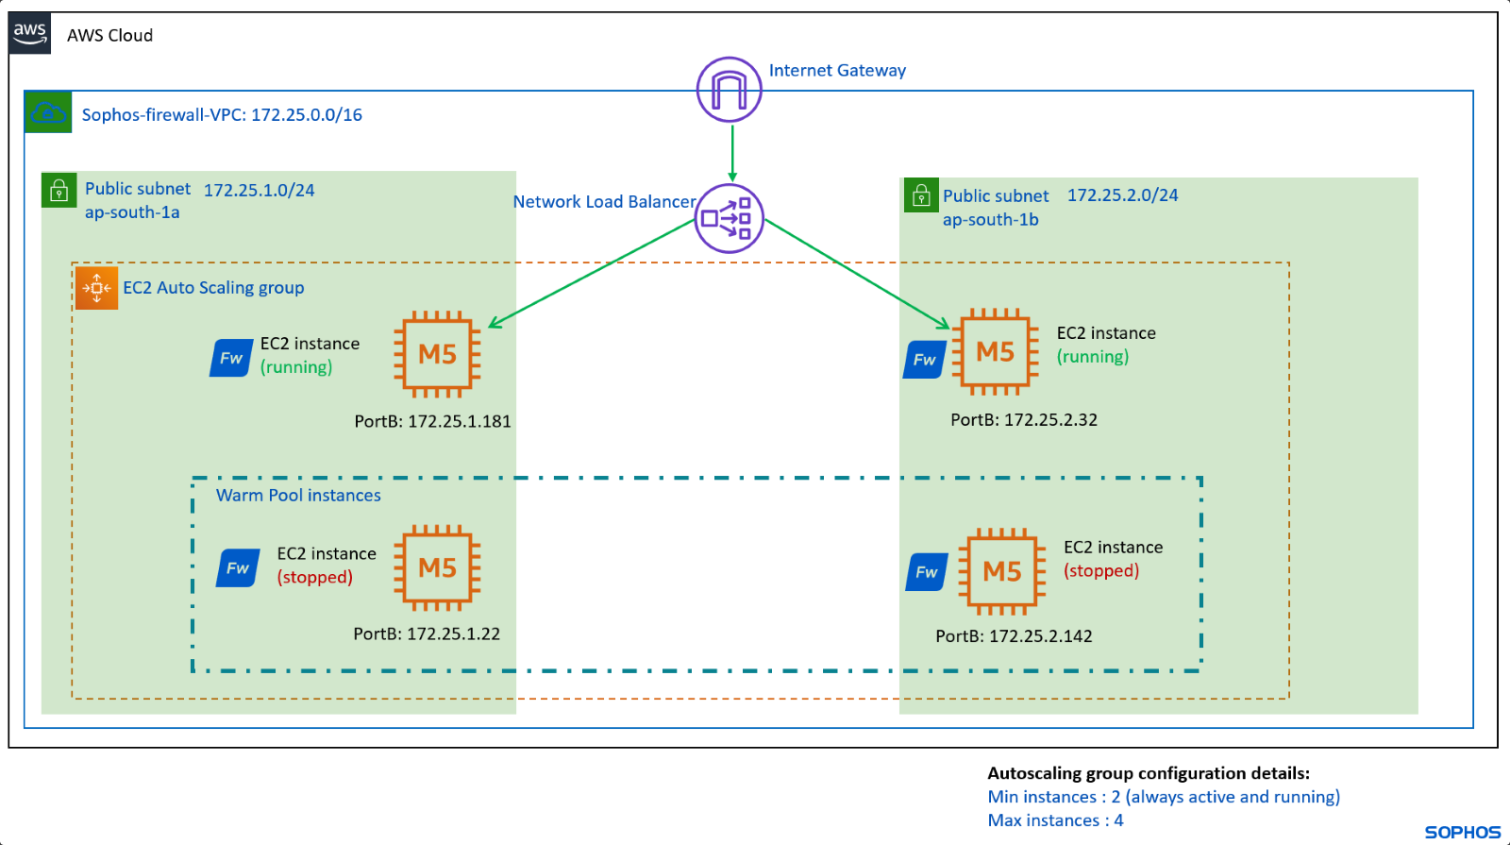
The firewall EC2 instance in Auto Scaling is deployed in a single-arm deployment, meaning it has only one functioning interface (PortB).
This deployment only supports inbound traffic, such as DNAT and WAF traffic.
This guide includes instructions for third-party products. We recommend that you check the vendor's latest documentation.
Requirements
- An AWS account
- Pay-as-you-go (PAYG) license
Network diagram
The diagram below shows the AWS Auto Scaling network.
Note
The IP addresses used are for demo purposes. You can choose any IP address and subnet values in the Auto Scaling group.
Sophos Central
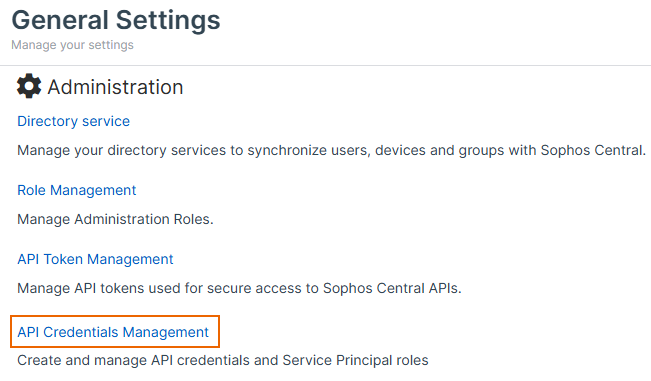
Create API credentials in Sophos Central as follows:
- Go to Sophos Central and sign in.
-
Go to My products > General settings and click API credentials management.
-
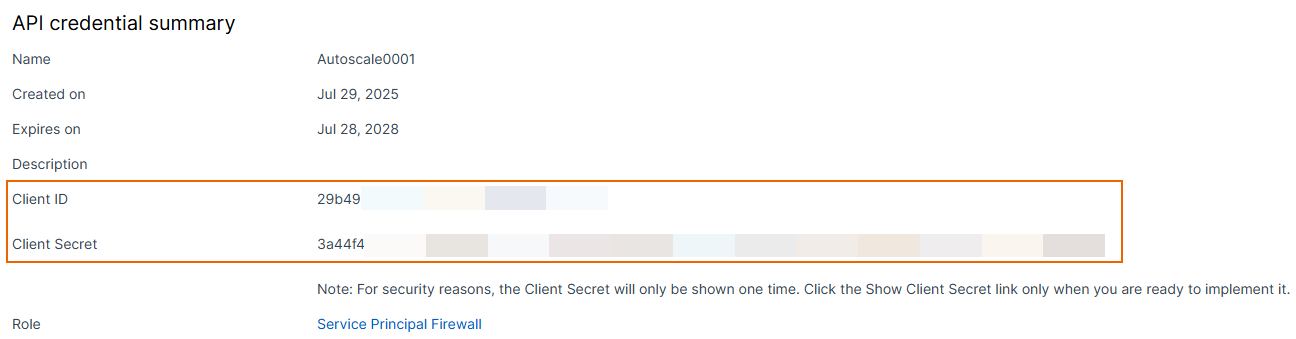
Accept the Terms of Use Agreement & Privacy Policy.
- Click Add credential.
- Enter a credential name and description.
- Under Role, select Service principal firewall.
- Click Add.
-
Copy the values in Client ID and Client secret and save them in a text file.
AWS
The Auto Scaling feature is only available in Sophos Cloud Firewall (PAYG).
Create key pair
Create a key pair as follows:
- Go to AWS web console and sign in.
- Search for
EC2and click the EC2 service. -
Go to Network & security > Key pairs and click Create key pair.
Note
You can skip this step if you already have a key pair in your AWS account.
-
Enter a name and leave the other settings at their default values.
-
Click Create key pair.

Launch Cloudformation template
Launch the cloudformation template as follows:
- On the AWS web console, search for
AWS marketplaceand click the AWS marketplace service. -
Click Discover products, search for
Sophos Cloud Firewall (PAYG), and click Sophos Cloud Firewall (PAYG).
-
Click View purchase options, then click Continue to configuration.
- Under Fulfillment option, select Sophos Auto Scaling Firewall for AWS.
- Under Software version, select the latest firewal version.
- Under Region, select your region.
-
Click Continue to launch.
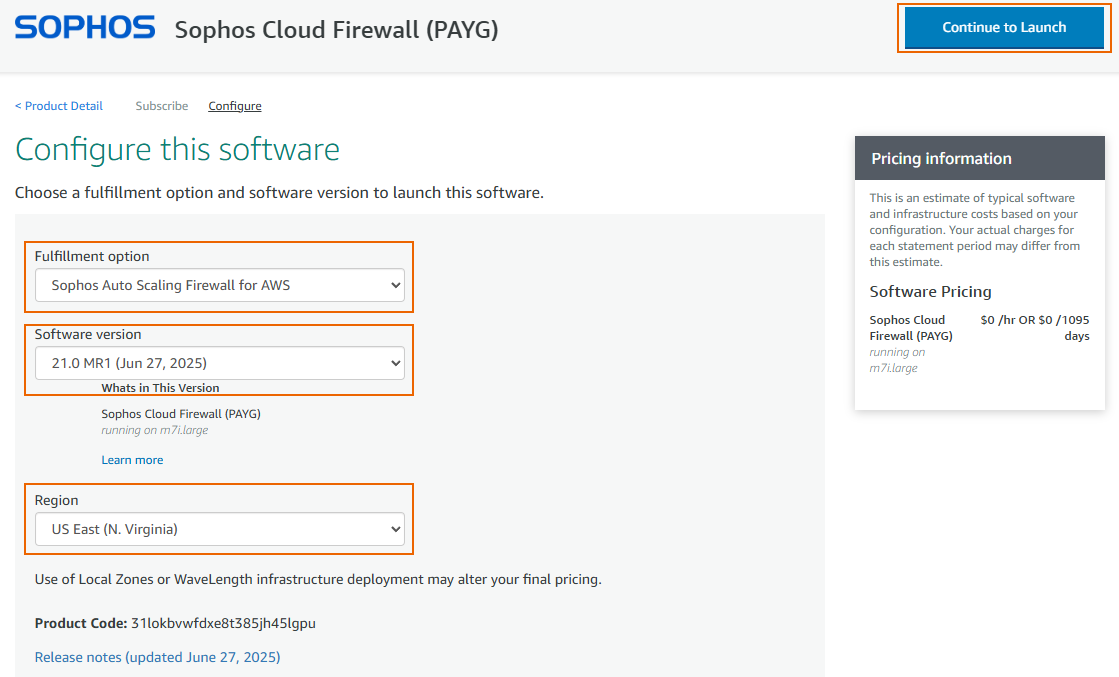
-
Under Choose Action, select Launch Cloudformation, then click Launch.
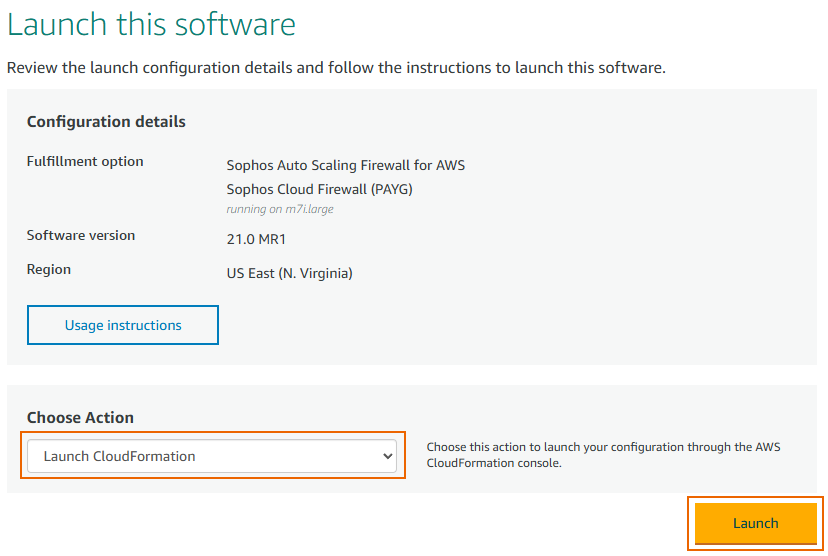
-
Click Next.

Create a stack
Enter a Stack name and configure the following settings.
Cloud Infrastructure Configuration
Configure the cloud infrastructure as follows:
-
Under AMI ID, it shows the default location of the AMI ID.
Example
/aws/service/marketplace/prod-6ntmye5sxmqum/21.0-mr1 -
Under Instance size, select m5.xlarge.
You can also select a smaller instance size.

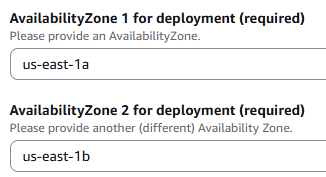
-
Under AvailabilityZone 1 for deployment, select an availability zone.
-
Under AvailabilityZone 2 for deployment, select a separate availability zone.
You must select a different availability zone for each so that the firewall EC2 instances are deployed in both availability zones.
-
Select one of the following options, depending on whether you're using a new or existing VPC.
-
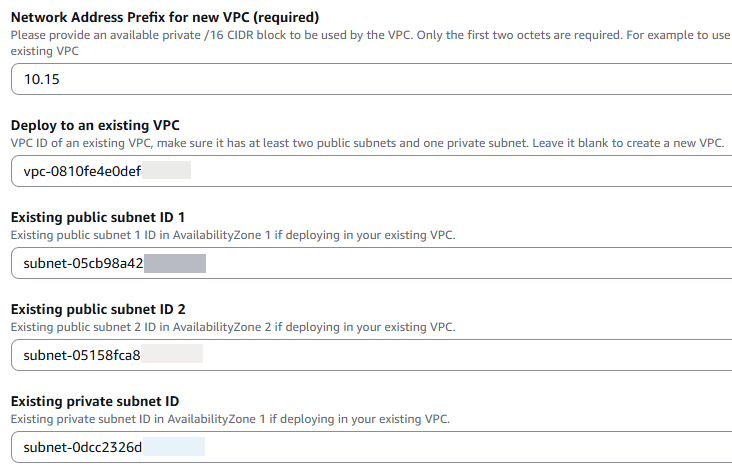
To deploy the firewall EC2 instances in a new VPC, enter the first two octets of an unused VPC under Network Address Prefix for new VPC and leave the other settings blank.
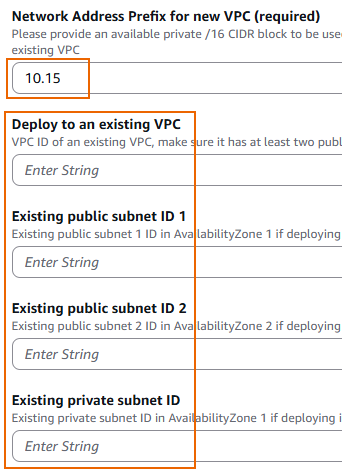
-
To deploy the firewall EC2 instances in an existing VPC, don't change the value in Network Address Prefix for new VPC. Configure the following settings:
- Deploy to an existing VPC: Enter your existing VPC ID.
- Existing public subnet ID 1: Enter an existing public subnet ID in your existing VPC.
- Existing public subnet ID 2: Enter another existing public subnet ID in your existing VPC.
- Existing private subnet ID: Enter an existing private subnet ID in your existing VPC.
Note
Make sure that the subnets have the Auto-assign public IPv4 address option turned on.

-
-
Under Trusted Network CIDR, enter your public IP address with a
/32subnet.
Warning
Don't enter
0.0.0.0/0because it will allow access to all the firewall interfaces over the internet.Tip
You can go to What Is My IP? to check your public IP address.
-
Under Public Network CIDR, enter
0.0.0.0/0.This allows inbound traffic to the firewall instances from all ports, except the management ports 22 and 4444.

Note
You can change this value according to your security requirements after deployment.
Sophos Firewall configuration
Configure the settings for the firewall as follows:
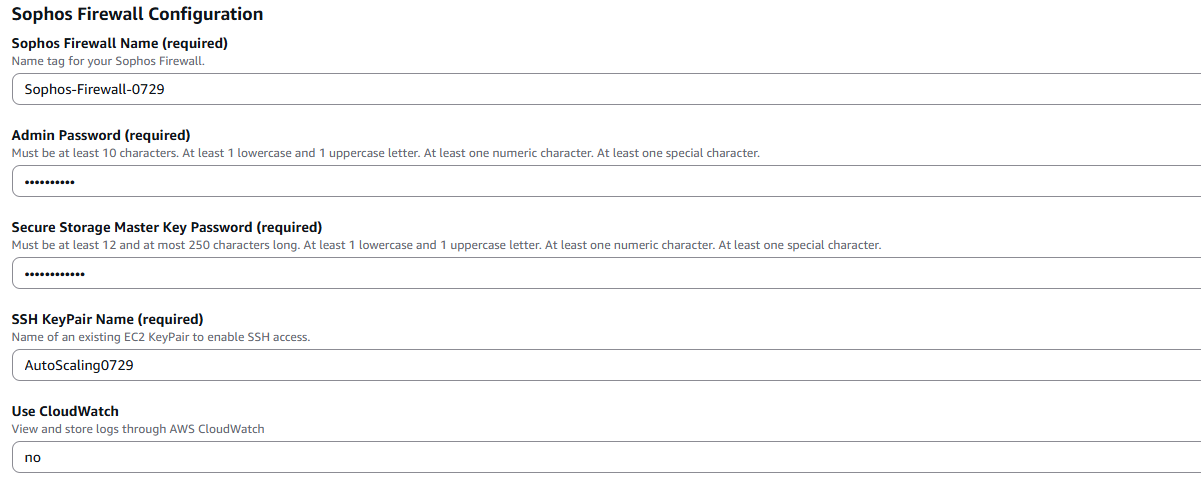
- Enter a firewall name.
-
Under Admin Password, enter a password.
This is the password for the user
adminto access the web admin console and CLI. -
Under Secure Storage Master Key Password, enter a password.
- Under SSH KeyPair Name, select the key pair you created.
- (Optional) Under Use CloudWatch, select yes if you want the firewall to send logs to CloudWatch for monitoring and storage.
Sophos Central Configuration
Configure the settings for Sophos Central as follows:
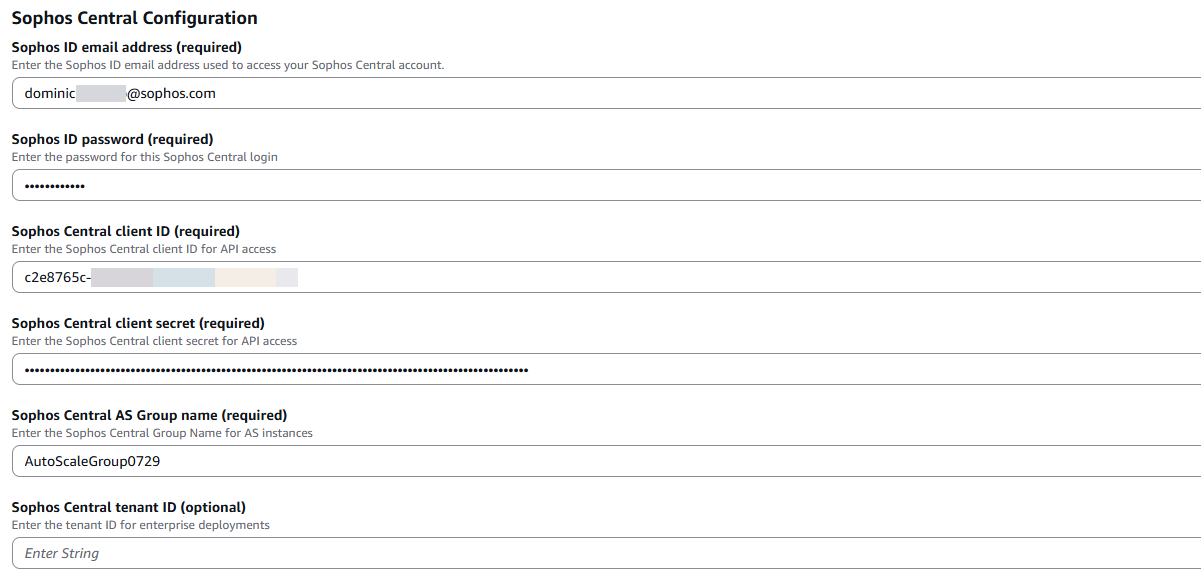
- Enter your Sophos ID email address and Sophos ID password.
- Enter the Sophos Central client ID and Sophos Central client secret you noted earlier.
-
Under Sophos Central AS Group name, enter a name.
A firewall group will be automatically created in the Sophos Central account.
Auto Scaling Configuration
Configure the number of firewall EC2 instances that are required in the Auto Scaling group, as follows:
-
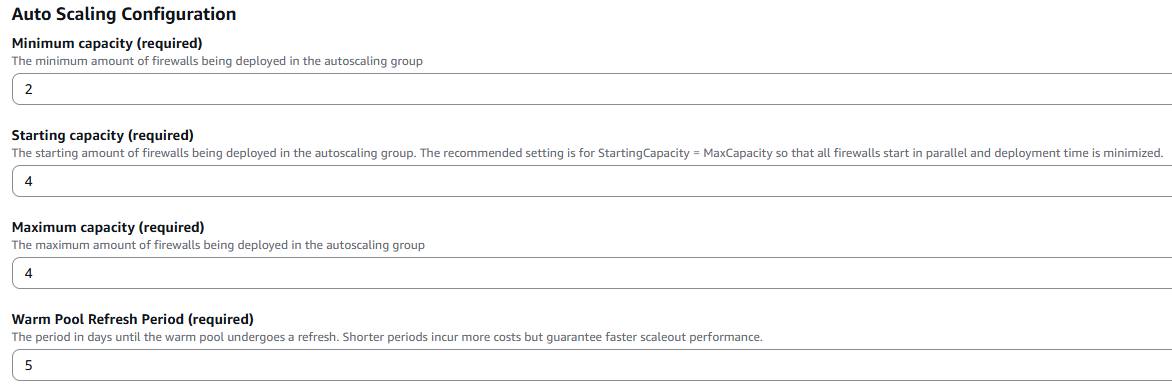
Under Minimum capacity, enter the minimum number of firewalls in the Auto Scaling group.
If you require a minimum of two instances to run all the time, enter
2. In this example, the value is2. -
Under Starting capacity, enter the number of firewalls in the Auto Scaling group to start with.
Starting capacity is the number of instances that are deployed initially as part of the deployment. So, if the maximum number of instances you specify is four, we recommend that you set this value as the Starting capacity. This allows all the instances to be deployed simultaneously, registered, and added to the firewall group instantly. This example uses the value
4. -
Under Maximum capacity, enter the maximum number of firewalls in the Auto Scaling group.
This example uses the value
4. -
Under Warm Pool Refresh Period, enter a value.
At the end of this period, instances in Stopped status move to Running status, then synchronize with Sophos Central to get the updated configuration from the firewall group.
Default: Five days
Example
If two out of four instances run continuously, the other two instances move to Running status once every five days to synchronize their configurations with the firewall group in Sophos Central.
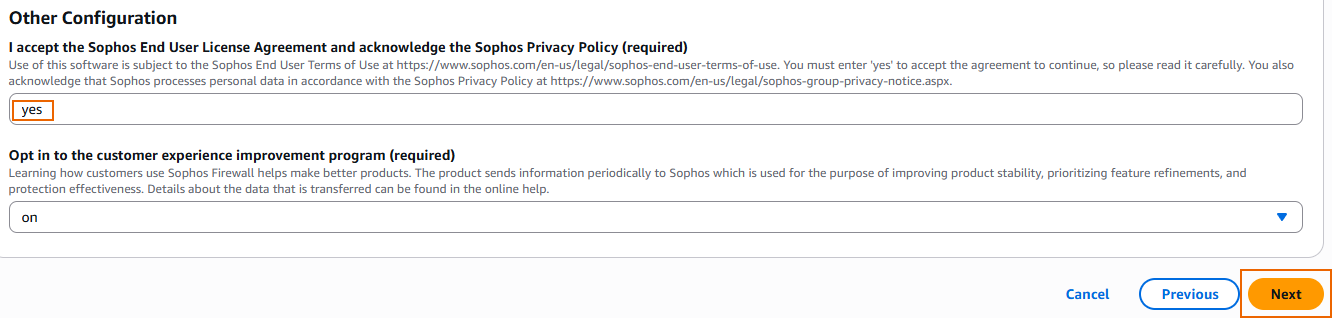
Other configuration
Configure the other settings as follows:
- Under I accept the Sophos End User License Agreement and acknowledge the Sophos Privacy Policy, enter
yes(case-sensitive). - Under Opt in to the customer experience improvement program, select an option.
- Click Next.
Configure stack options
Configure the stack options as follows.
- (Optional) Under Tags, click Add new tag.
-
(Optional) Enter a key and value.

Tip
We recommend you enter
OwnerNameas the Key and enter your first and last name as the Value. This helps you identify the owner of the resources in the AWS account. You can also use the naming conventions of your organization as tags. -
Under Capabilities, select the checkbox for I acknowledge that AWS CloudFormation might create IAM resources.
- Click Next.

Review and create
Review the configurations, then click Submit.
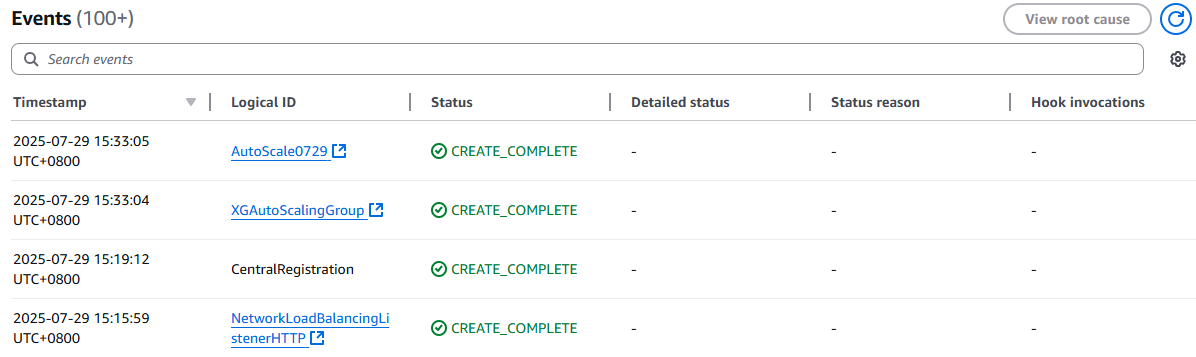
The deployment process starts and takes 15 to 20 minutes.
After the deployment is complete, the status becomes CREATE_COMPLETE for your stack. This means that you have successfully deployed the Sophos Firewall EC2 instances in the Auto Scaling group.
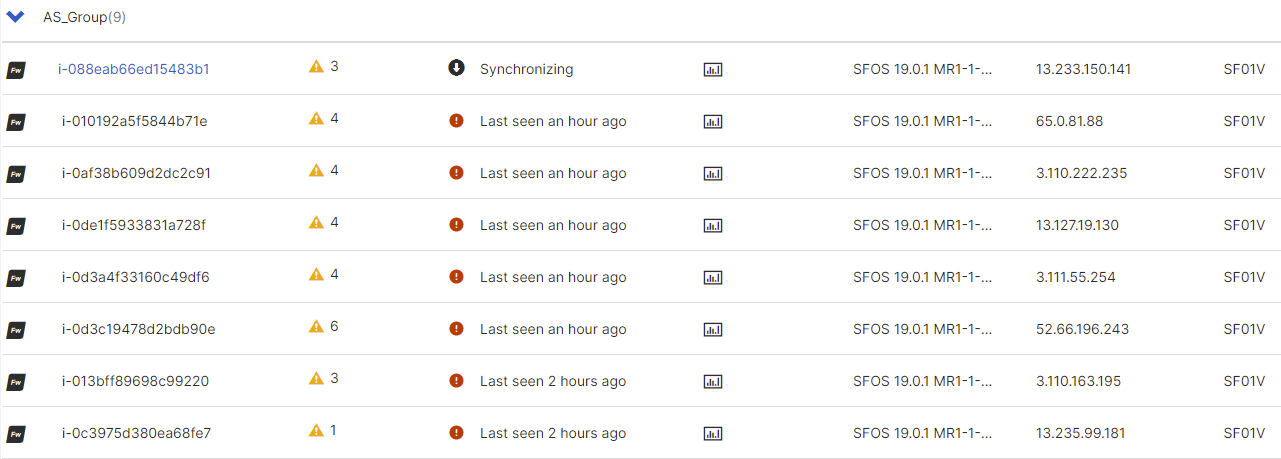
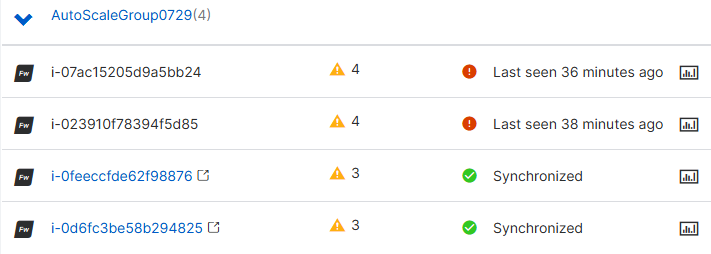
To check the deployed firewalls in Sophos Central, do as follows:
- Sign in to Sophos Central.
-
Go to My products > Firewall management > Firewalls.
You can see the created firewall group and the firewall PAYG instances automatically placed in that group.
Edit the EC2 configurations
Edit the EC2 configurations as follows:
- Go to AWS web console and sign in.
- Search for
EC2and click the EC2 service. -
On the left menu, go to Auto scaling > Auto scaling groups.
You can see the Auto Scaling group you created.
-
(Optional) To edit the capacity, do as follows:
- Click the Auto Scaling group.
- Under Capacity overview, click Edit.
- Update the values of the options you want to change.
- Click Update.

-
On the left menu, click Instances.
-
Search for the firewall name you created. You can see the firewalls using the same name.
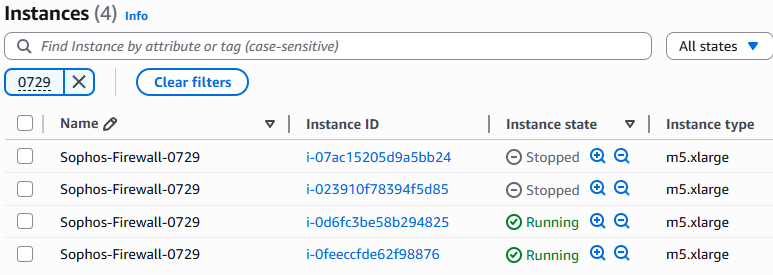
-
Hover over a firewall instance and click edit

- Edit the name. Give each firewall a unique name to easily identify them.
Additional information
Additional information for an Auto Scaling deployment is as follows:
-
If you turned on CloudWatch during the CloudFormation deployment section, the firewall EC2 instance logs are stored in the CloudWatch log groups of your AWS account. To see the logs, go to CloudWatch > Logs > Log groups and search for
/sophos/xg/.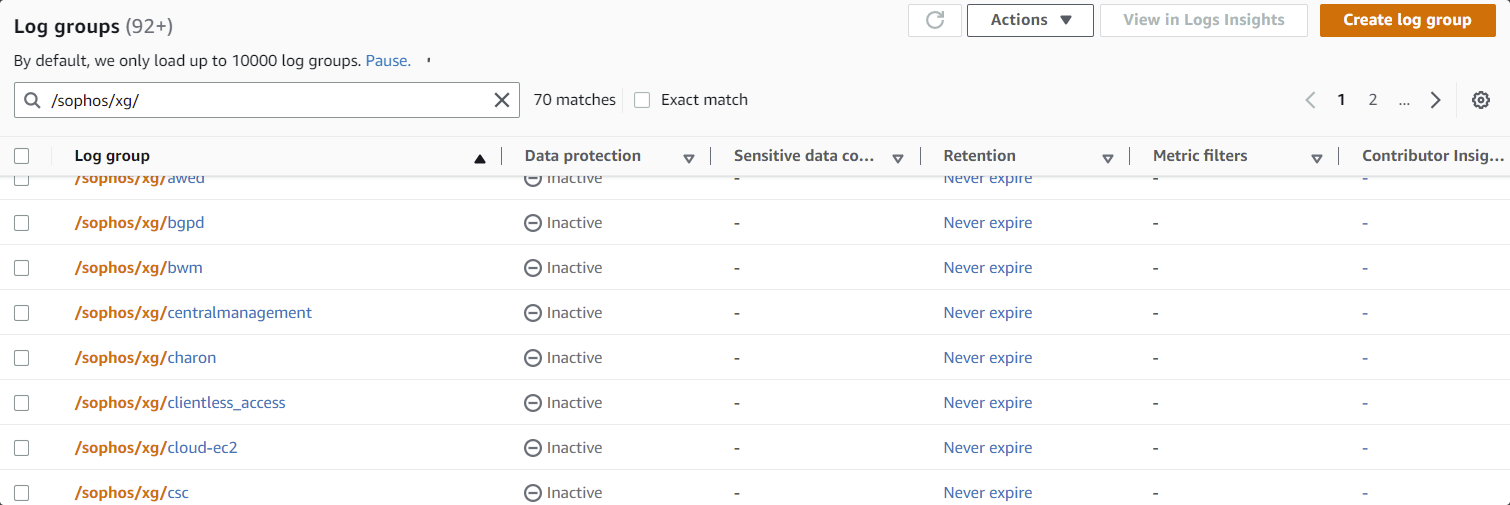
-
To maintain the dynamic nature of the load, the firewall EC2 instances may be terminated depending on the Auto Scaling trigger policy.
-
Terminated firewall instances from the AWS account remain in the Sophos Central firewall group they were assigned to. You must delete the terminated firewalls from the Sophos Central firewall group manually.