Connect on-premises Sophos Firewall to Microsoft Azure using route-based IPsec VPN and BGP
You can connect your on-premises Sophos Firewall to your Microsoft Azure virtual network using a route-based IPsec VPN connection and Border Gateway Protocol (BGP).
Network diagram
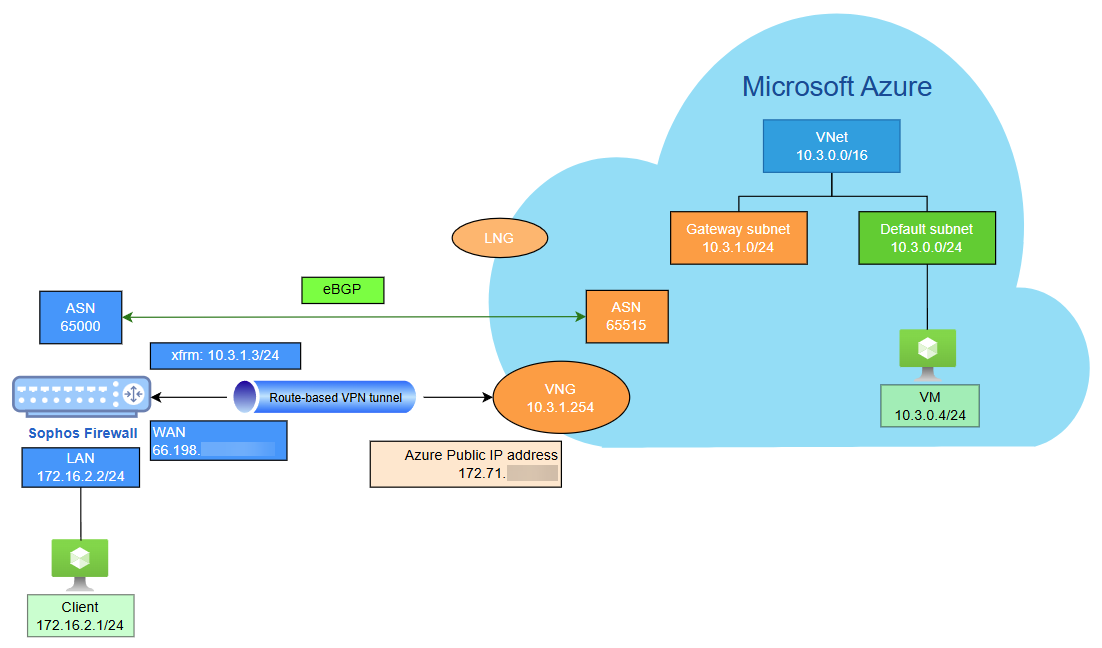
The network diagram shows two autonomous system (AS), one for the on-premises Sophos Firewall and another for the Azure virtual network, connected through a route-based IPsec VPN with BGP. This setup provides VPN connection and dynamic routing through BGP.
Microsoft Azure configuration
Configure an Azure site-to-site IPsec VPN with BGP, including local network gateways, VPN gateways, and secure connectivity setup.
Create a local network gateway
The local network gateway (LNG) represents your on‑premises environment. To configure it, make sure you have the following information:
- The public IP address assigned to your on‑premises firewall.
- The private IP address ranges used within your on‑premises network.
Note
This example assumes that your firewall has a public IP address. If your firewall is deployed behind a NAT device, your configuration requirements will differ slightly, and you will need to account for the upstream device's public IP address and NAT rules.
To configure a local network gateway, do as follows:
- Sign in to Microsoft Azure portal.
- Go to Local network gateways. You can also search for it in the search box.
- Click Create.
-
Under the Basics tab, configure the following settings:
Setting Value Subscription Select your Azure subscription. Resource group Click Create new, enter a name, then click OK. Region Select the deployment region. Name Enter a name. Endpoint Select IP address. IP address Enter the public IP address of your on-premises firewall. Address space(s) Enter your on-premises network address range. In this example, 172.16.2.0/24.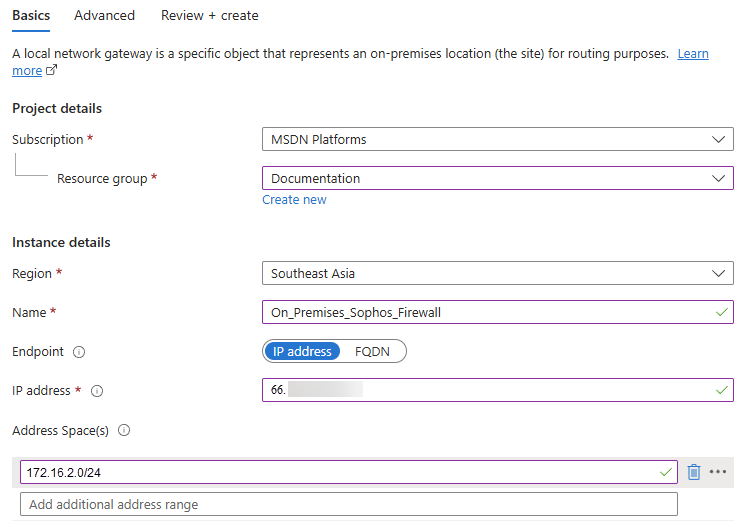
-
Click Next: Advanced.
-
Under the Advanced tab, configure the following settings:
Setting Value Configure BGP settings Select Yes. Autonomous system number (ASN) The ASN of your on-premises firewall.
In this example, it's
65000.A BGP-enabled connection between two network gateways requires their ASNs to differ. Additionally, the following ASNs are reserved by Azure: 8075, 8076, 12076 (public), 65515, 65517, 65518, 65519, 65520 (private). When connecting to Azure VPN gateways, you can't specify these ASNs for your on-premises VPN devices. While setting up IPsec connectivity from virtual network gateways to Azure virtual WAN VPN, the ASN for local network gateway must be 65515.
BGP peer IP address The public IP address of your on-premises firewall. 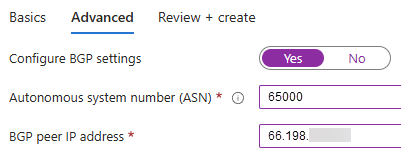
-
Click Next: Review + Create.
A validation test starts. If it fails, check your configuration.
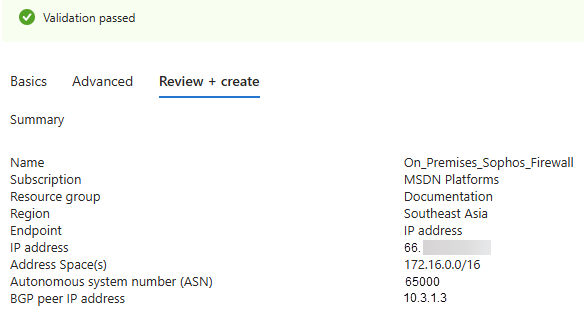
-
When the validation test succeeds, review the details and click Create.
The deployment process takes a few minutes.
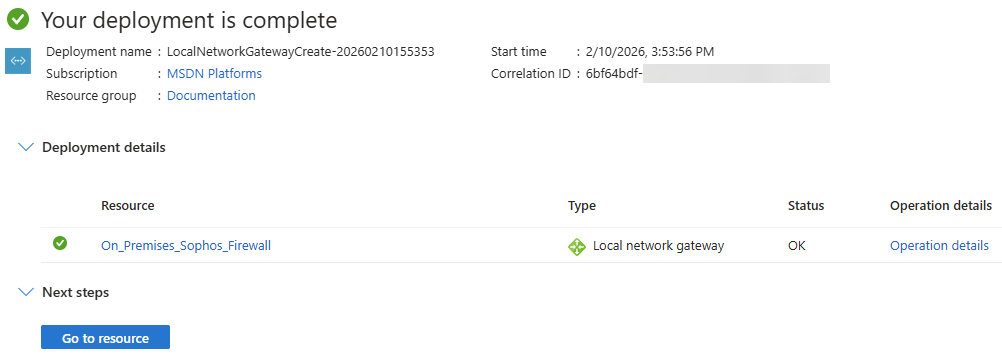
-
When the deployment is complete, click Go to resource to see the resources deployed in your account.
Create a gateway subnet
To create a gateway subnet, do as follows:
- Go to Virtual networks. You can also search for it in the search box.
- Click your Microsoft Azure virtual network.
- Go to Settings > Subnets, then click Subnet.
-
Configure the following settings:
Setting Value Subnet purpose Select Virtual network gateway. Starting address Enter a network address.
In this example, it's
10.3.1.0.Size Select a subnet mask.
In this example, it's
/24.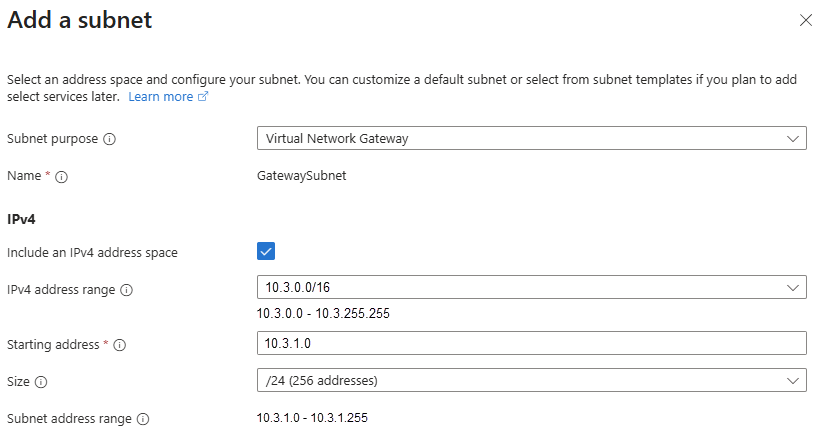
-
Click Add.
Tip
Use a large subnet, such as /24 or /28, to accommodate future expansion.
Create a virtual network gateway
To create a virtual network gateway (VNG), do as follows:
- Go to Hybrid connectivity. You can also search for it in the search box.
- Go to VPN gateway > VPN gateways.
- Click Create.
-
Under the Basics tab, configure the following settings:
Setting Value Subscription Select your Azure subscription. Name Enter a name. Region Select the same region you used. Gateway type Select VPN. SKU Select a SKU. See Gateway SKUs and performance. Generation Select Generation1. Virtual network Select the virtual network to which you want to add the gateway.
If the virtual network you want isn't shown, check if you've selected the correct Region.
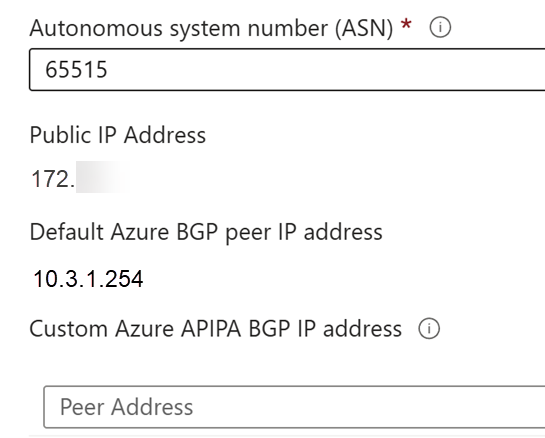
Public IP address Select Create new. Public IP address name Enter a name. Enable active-active mode Select Disabled. Configure BGP Select Enabled. Autonomous system number (ASN) The ASN of your Azure virtual network.
In this example, it's
65515.Azure Virtual Network Gateways use a default ASN of 65515. For BGP‑enabled connections, each participating network gateway must use a unique ASN. If required, you can modify the ASN either during gateway creation or after the gateway has been deployed.
Enable Key Vault Access Select Disabled. 
-
Leave other settings as default.
-
Click Review + create.
A validation test starts. If it fails, check your configuration.
-
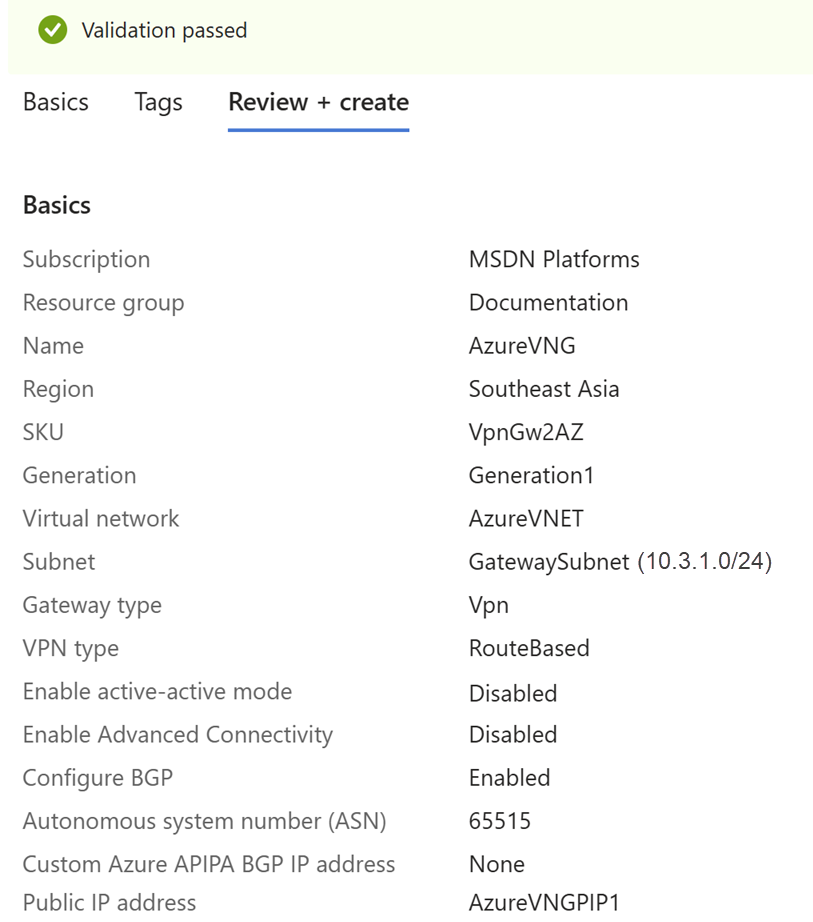
When the validation test succeeds, review the details and click Create.
The deployment process can take up to 45 minutes.
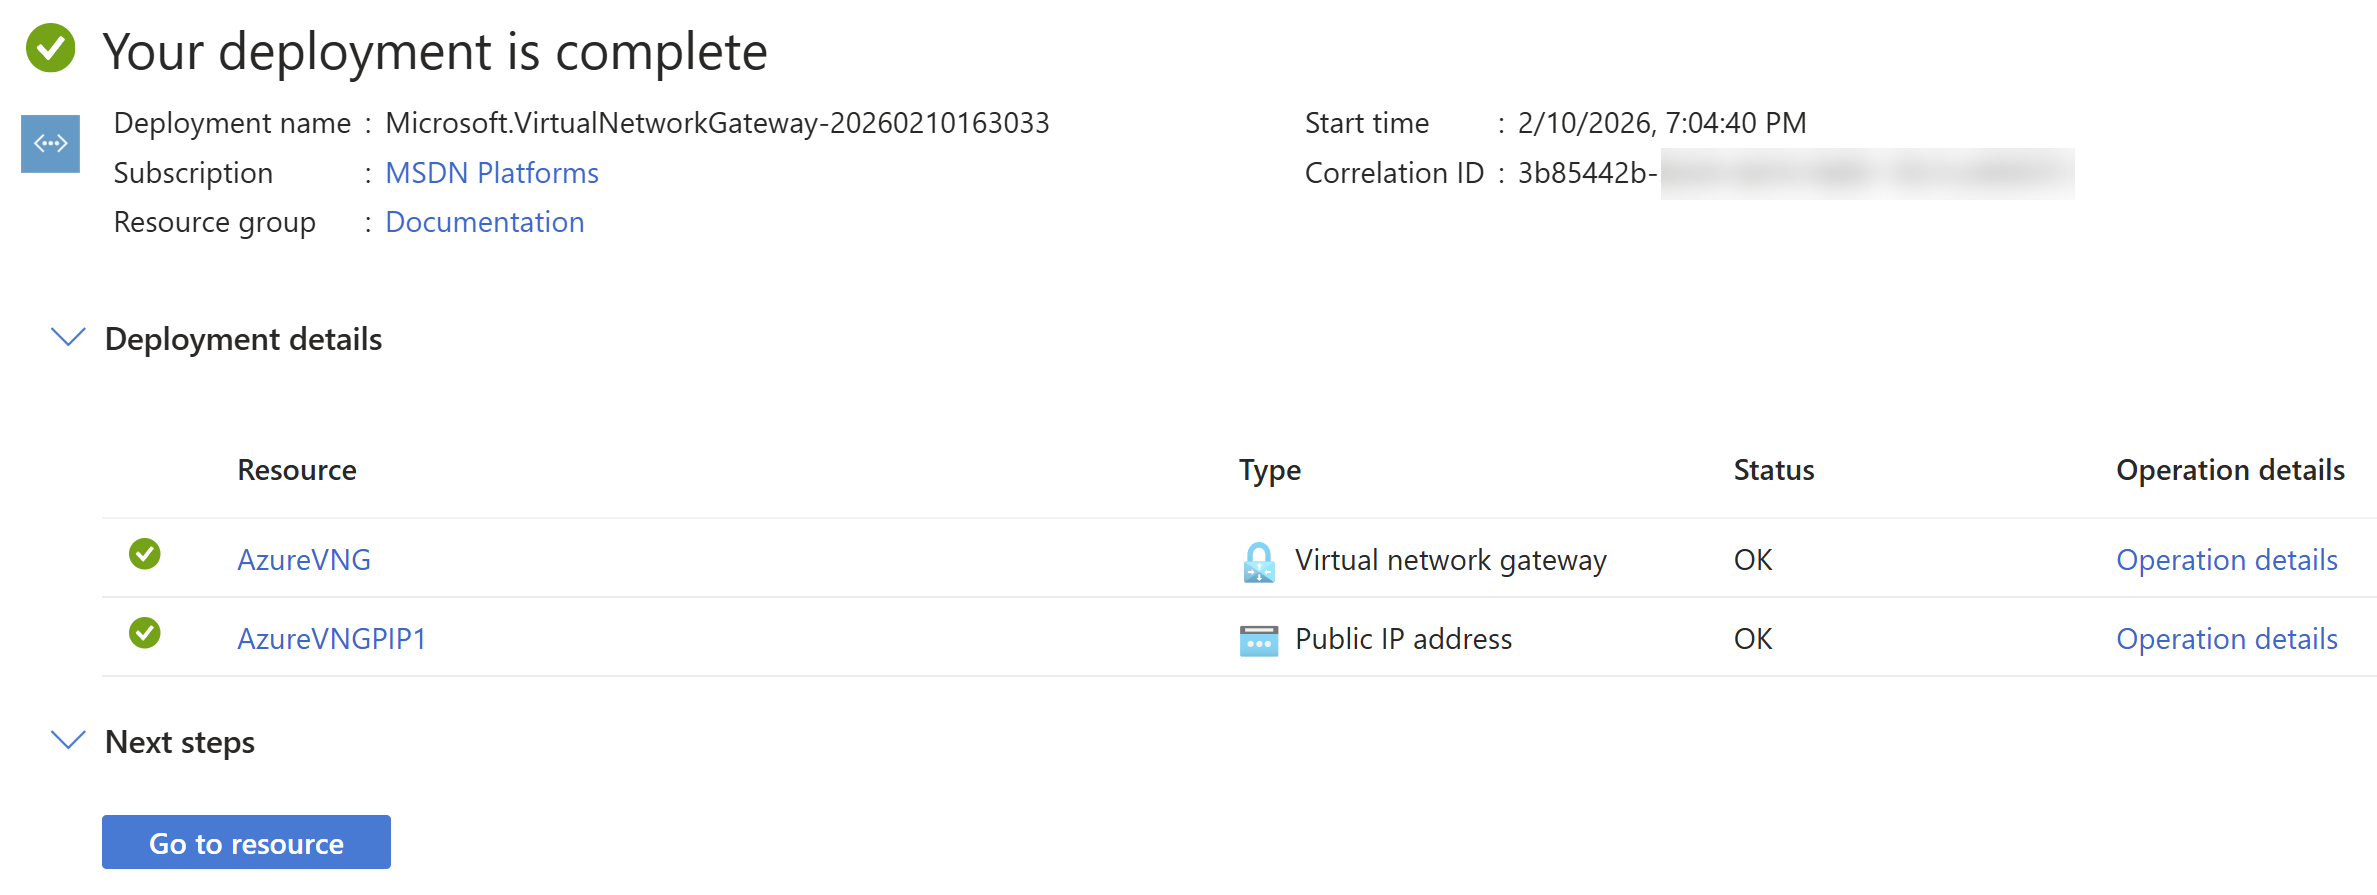
-
When the deployment is complete, click Go to resource to see the resources deployed in your account.
-
Go to Settings > Configuration.
-
Make a note of the following IP addresses:
- Public IP Address
- Default Azure BGP peer IP address
You'll need these IP addresses later.
Create an IPsec VPN connection
To create a VPN connection, do as follows:
- Go to Hybrid connectivity. You can also search for it in the search box.
- Go to VPN gateway > VPN gateways.
- Click the virtual network gateway you created.
- Go to Settings > Connections, then click Add.
-
Configure the following settings:
Setting Value Subscription Select your Azure subscription. Resource group Select the same resource group you used. Connection type Select Site-to-site (IPsec). Name Enter a name. Region Select the same region you used. 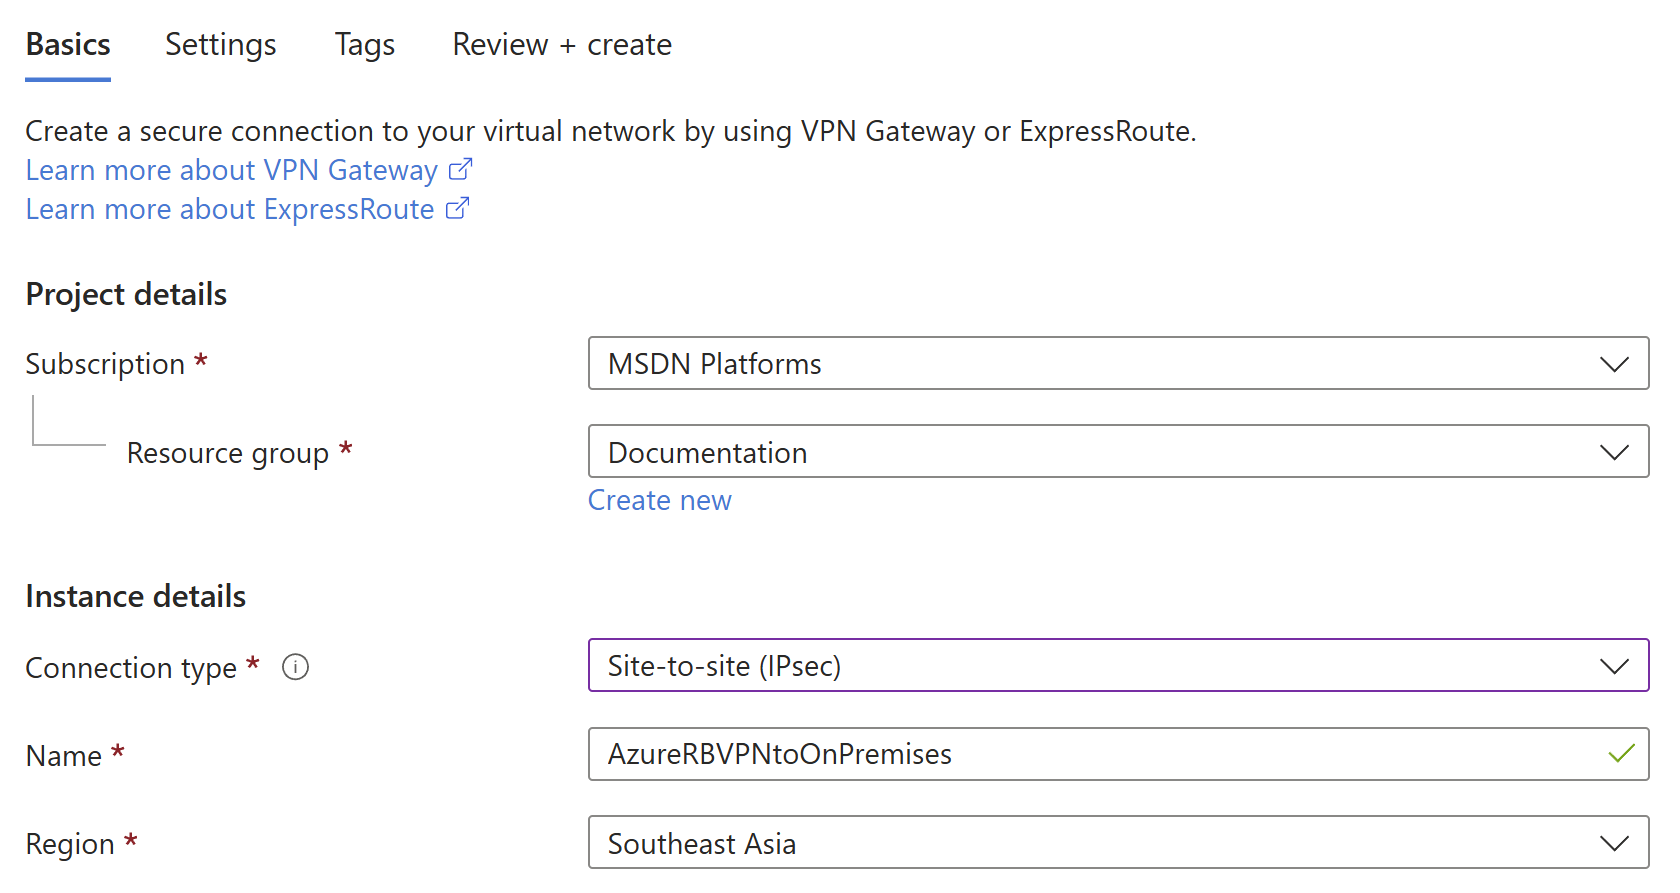
-
Click Next : Settings.
-
Configure the following settings:
Setting Value Virtual network gateway Select the virtual network gateway you created. Local network gateway Select the local network gateway you created. Authentication method Select Shared key(PSK). Shared key(PSK) Enter a shared key. You must also use this shared key in your on-premises firewall. IKE protocol Select IKEv2. Enable BGP Select this setting. IPsec / IKE policy Select Default.
Microsoft may change the default settings. Make sure you configure your on-premises firewall appropriately for both initial tunnel establishment and re-key. See About cryptographic requirements and Azure VPN gateways.
Use policy based traffic selector Select Disable. Connection Mode Select ResponderOnly. 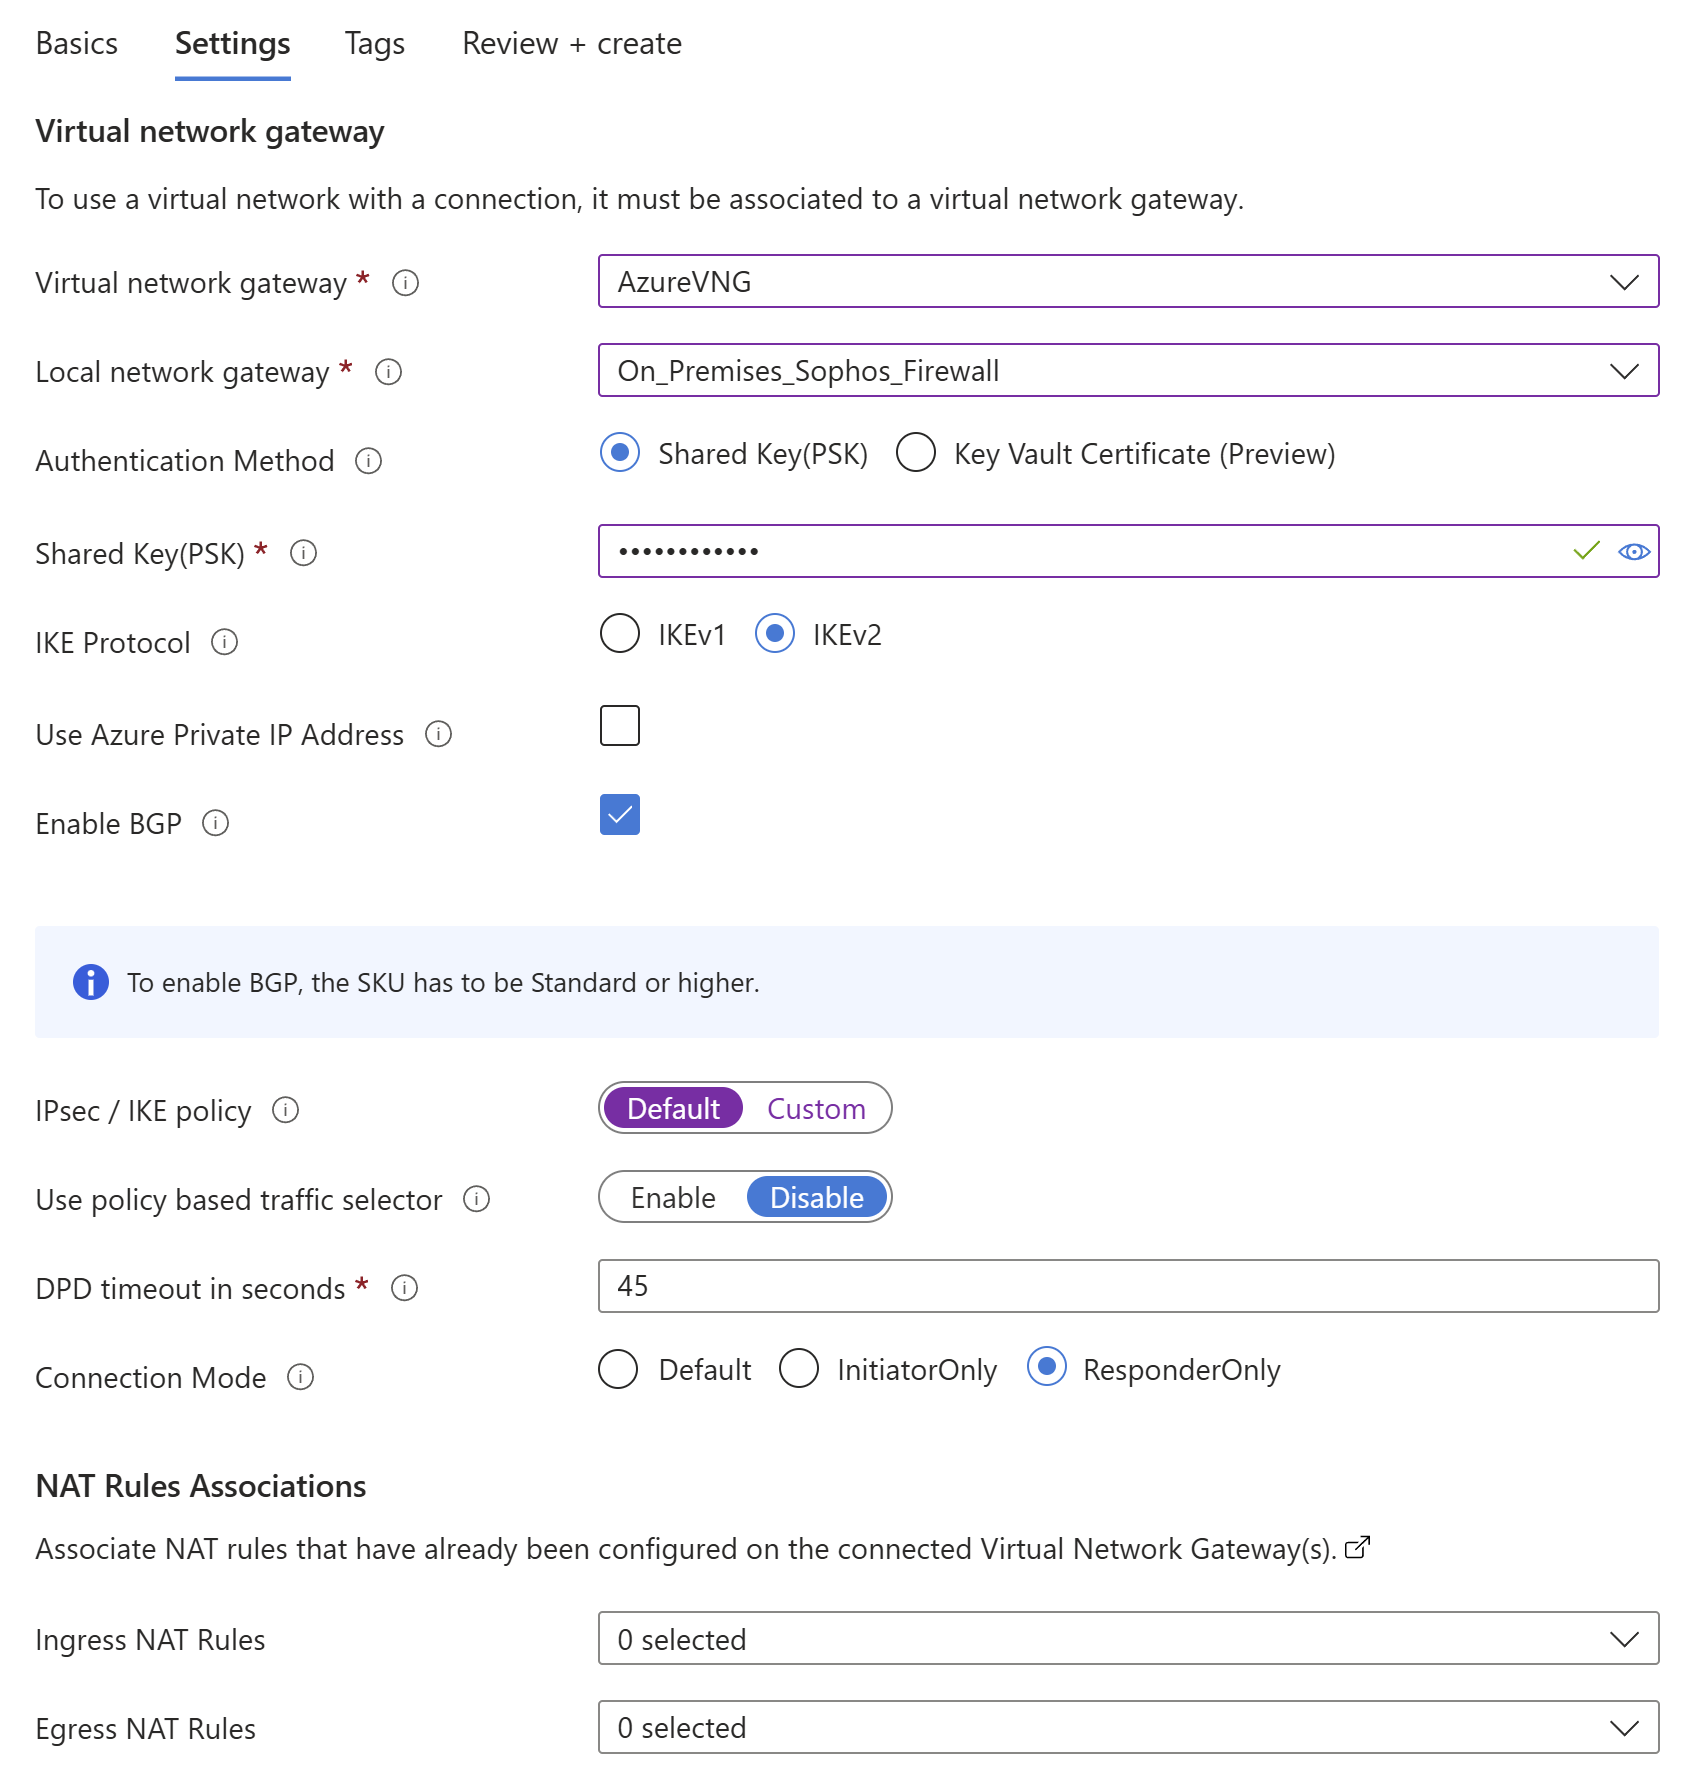
-
Leave other settings as default.
- Click Next: Tags.
-
Click Next: Review + create.
A validation test starts. If it fails, check your configuration.
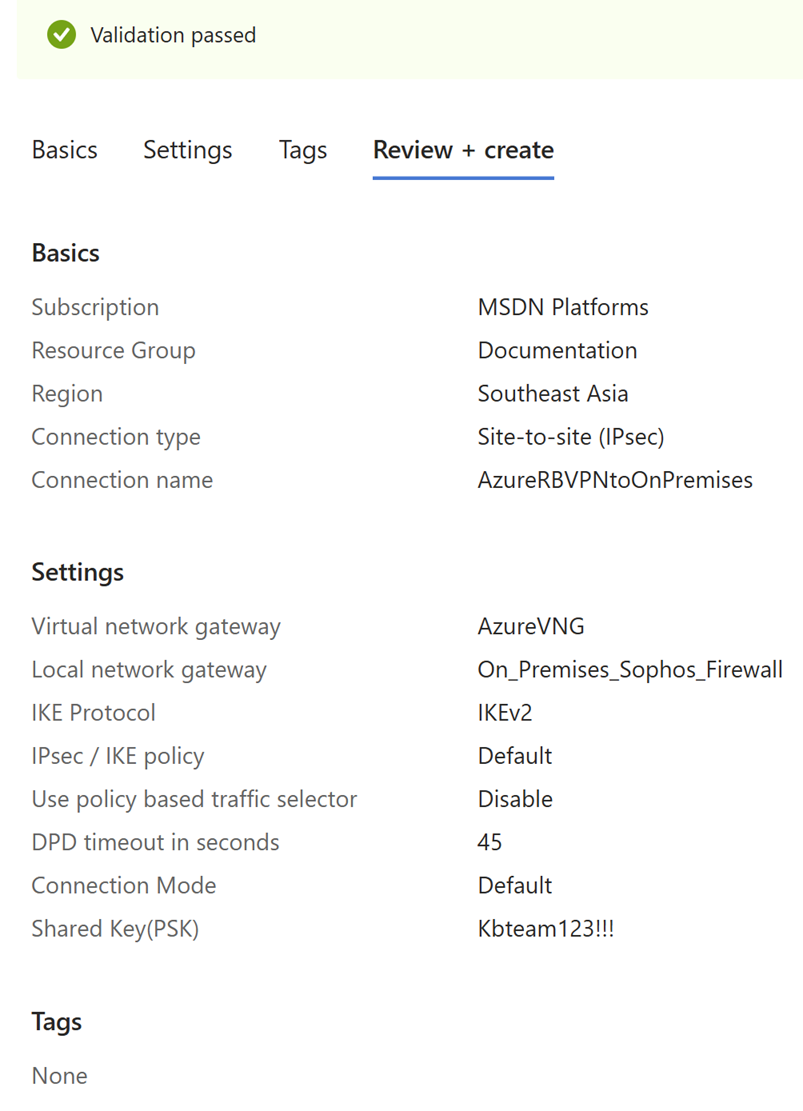
-
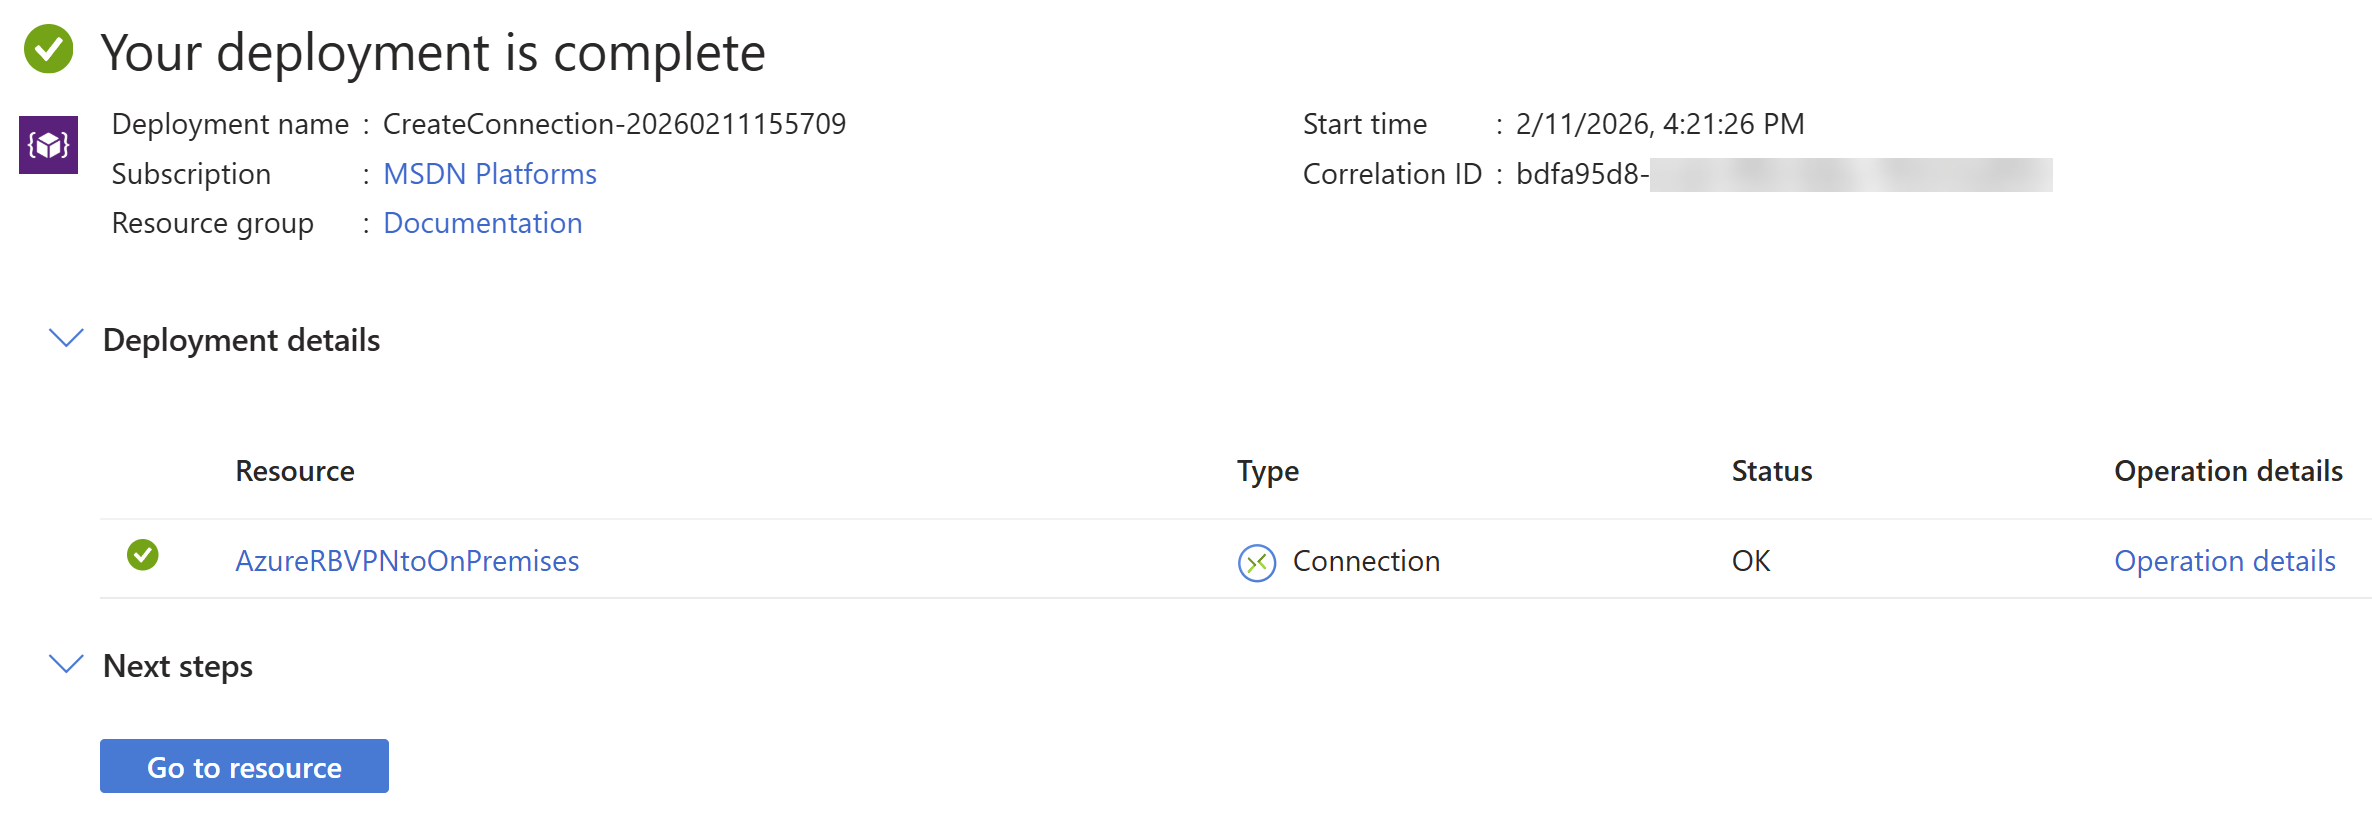
When the validation test succeeds, review the details and click Create.
The deployment process takes a few minutes.
-
When the deployment is complete, click Go to resource to see the resources deployed in your account.
Create a virtual machine
This is an optional step if you want to create a host within your Microsoft Azure network.
To create a host virtual machine (VM), do as follows:
- Go to Virtual machines. You can also search for it in the search box.
- Click Create and select Virtual machine.
-
Configure the following settings:
Setting Value Subscription Select your Azure subscription. Resource group Select the same resource group you used. Virtual machine name Enter a name. Region Select the same region you used. Availability options Select No infrastructure redundancy required. Security type Select Standard. Image Select an operating system (OS) image. In this example, it's Ubuntu Server 24.04 LTS - x64 Gen2. Size Select a size or use the default setting. Authentication type Select Password. Username Enter a username. Password Enter a password. Confirm password Enter the password again. Public inbound ports Select Allow selected ports. Select inbound ports Select SSH (22). 
-
Click Next: Disks.
- Click Next: Networking.
-
Configure the following settings:
Setting Value Virtual network Select the same virtual network you used.
If the virtual network isn't shown, check if you've selected the correct Region.
Subnet Select the LAN subnet. In this example, it's 10.3.0.0/24.Public IP Use the default setting. NIC network security group Select Basic. 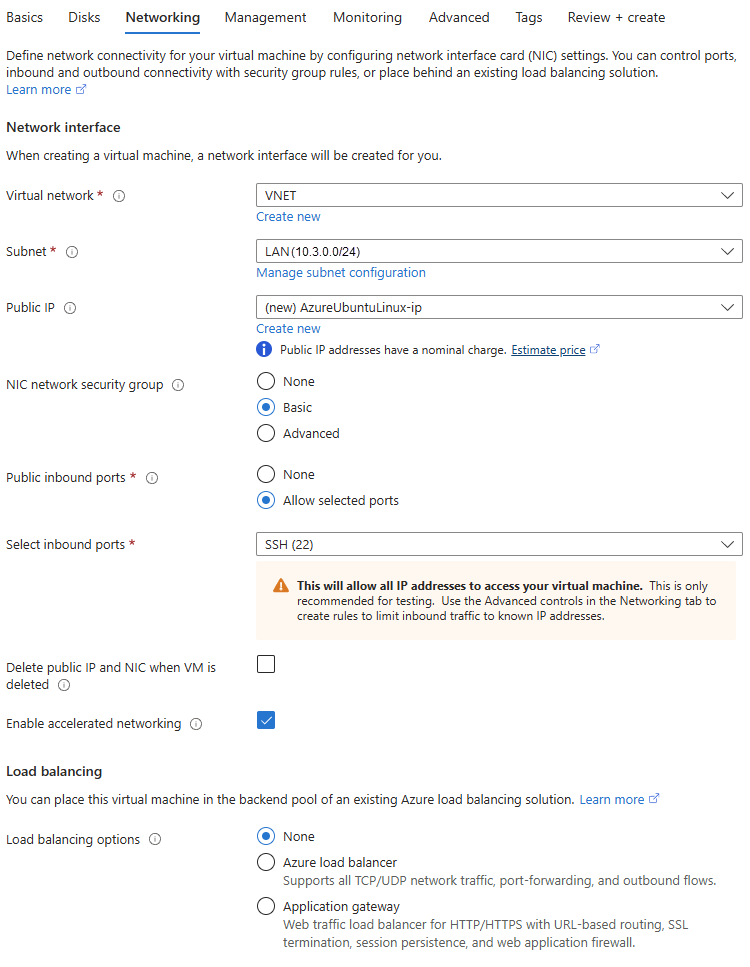
-
Click review + create.
- Check the details and click Create.
Sophos Firewall configuration
Configure a route-based IPsec VPN with Microsoft Azure using BGP, including firewall rules, XFRM interfaces, and routing verification.
Create a route-based IPsec VPN connection
To create a route-based IPsec VPN connection, do as follows:
- Sign in to the web admin console of your on-premises firewall.
- Go to Site-to-site VPN > IPsec, then click Add.
-
Configure the following settings:
Setting Value Name Enter a name. Connection type Select Route-based (Tunnel interface). Gateway type Select Initiate the connection. IP version Select IPv4.
Microsoft Azure doesn't support IPv6 and Dual.
Activate on save Select the checkbox. Profile Select Microsoft Azure (IKEv2).
The default settings of the IPsec / IKE policy on Microsoft Azure may change. If it changes, you must update the IPsec profile of the on-premises firewall according to the following guidelines:
- To avoid recurring tunnel disconnection, make sure that the Phase 1 and Phase 2 key life on the initiator is less than that of the responder.
- Make sure that the Phase 2 key life is less than the Phase 1 key life.
Authentication type Select Preshared key. Preshared key Enter the same key you used for the Shared key(PSK) when you created the VPN connection on Microsoft Azure. Repeat preshared key Re-enter the key. Listening interface Select the WAN interface of the firewall. Gateway address Enter the Public IP address you noted in Create a virtual network gateway. 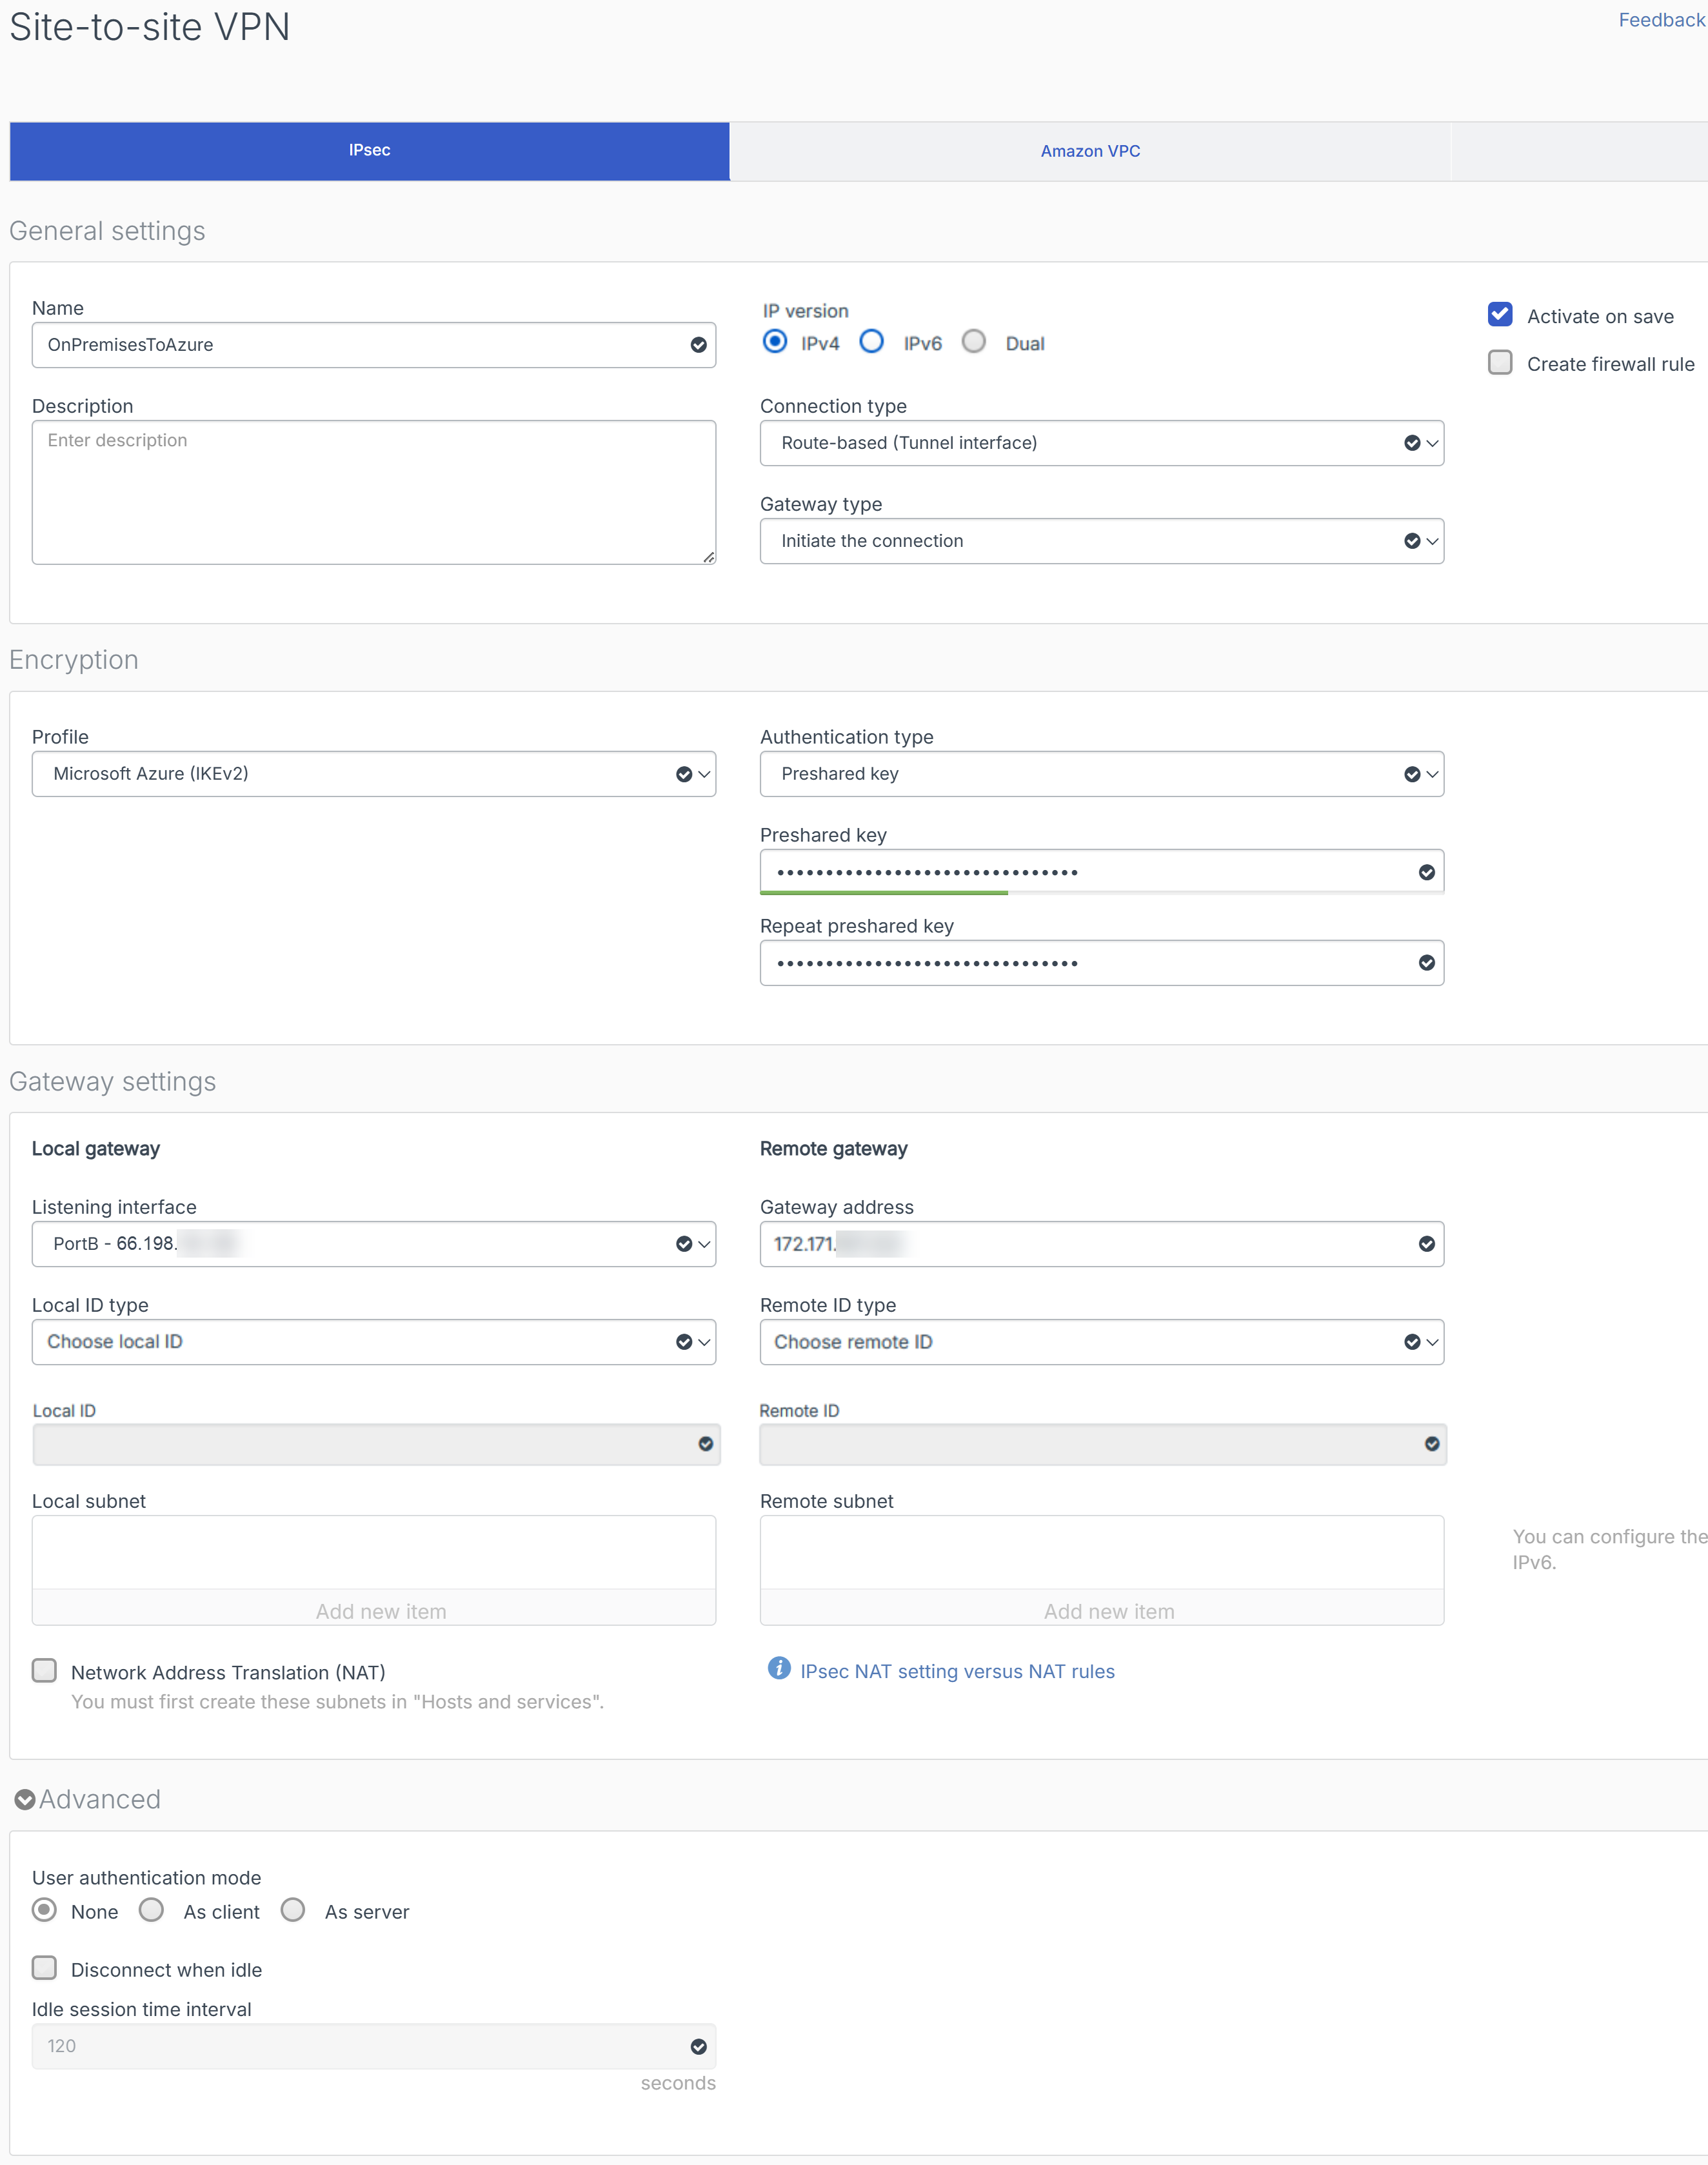
-
Click Save.
-
In the Preshared key prompt, click OK.
The firewall initiates the connection, and the connection is established.

Create firewall rule
To allow inbound and outbound traffic through the route-based IPsec VPN connection, you must create a firewall rule, do as follows:
- Go to Rules and policies > Firewall rules.
- Select IPv4 protocol.
- Click Add firewall rule and select New firewall rule.
-
Configure the following settings:
Setting Value Rule name Enter a name. Action Select Accept. Log firewall traffic Select the checkbox. Rule position Select Top. Rule group Select None. Source zones Select LAN and VPN. Source networks and devices Select Any. During scheduled time Select All the time. Destination zones Select LAN and VPN. Destination networks Select Any. Services Select Any. 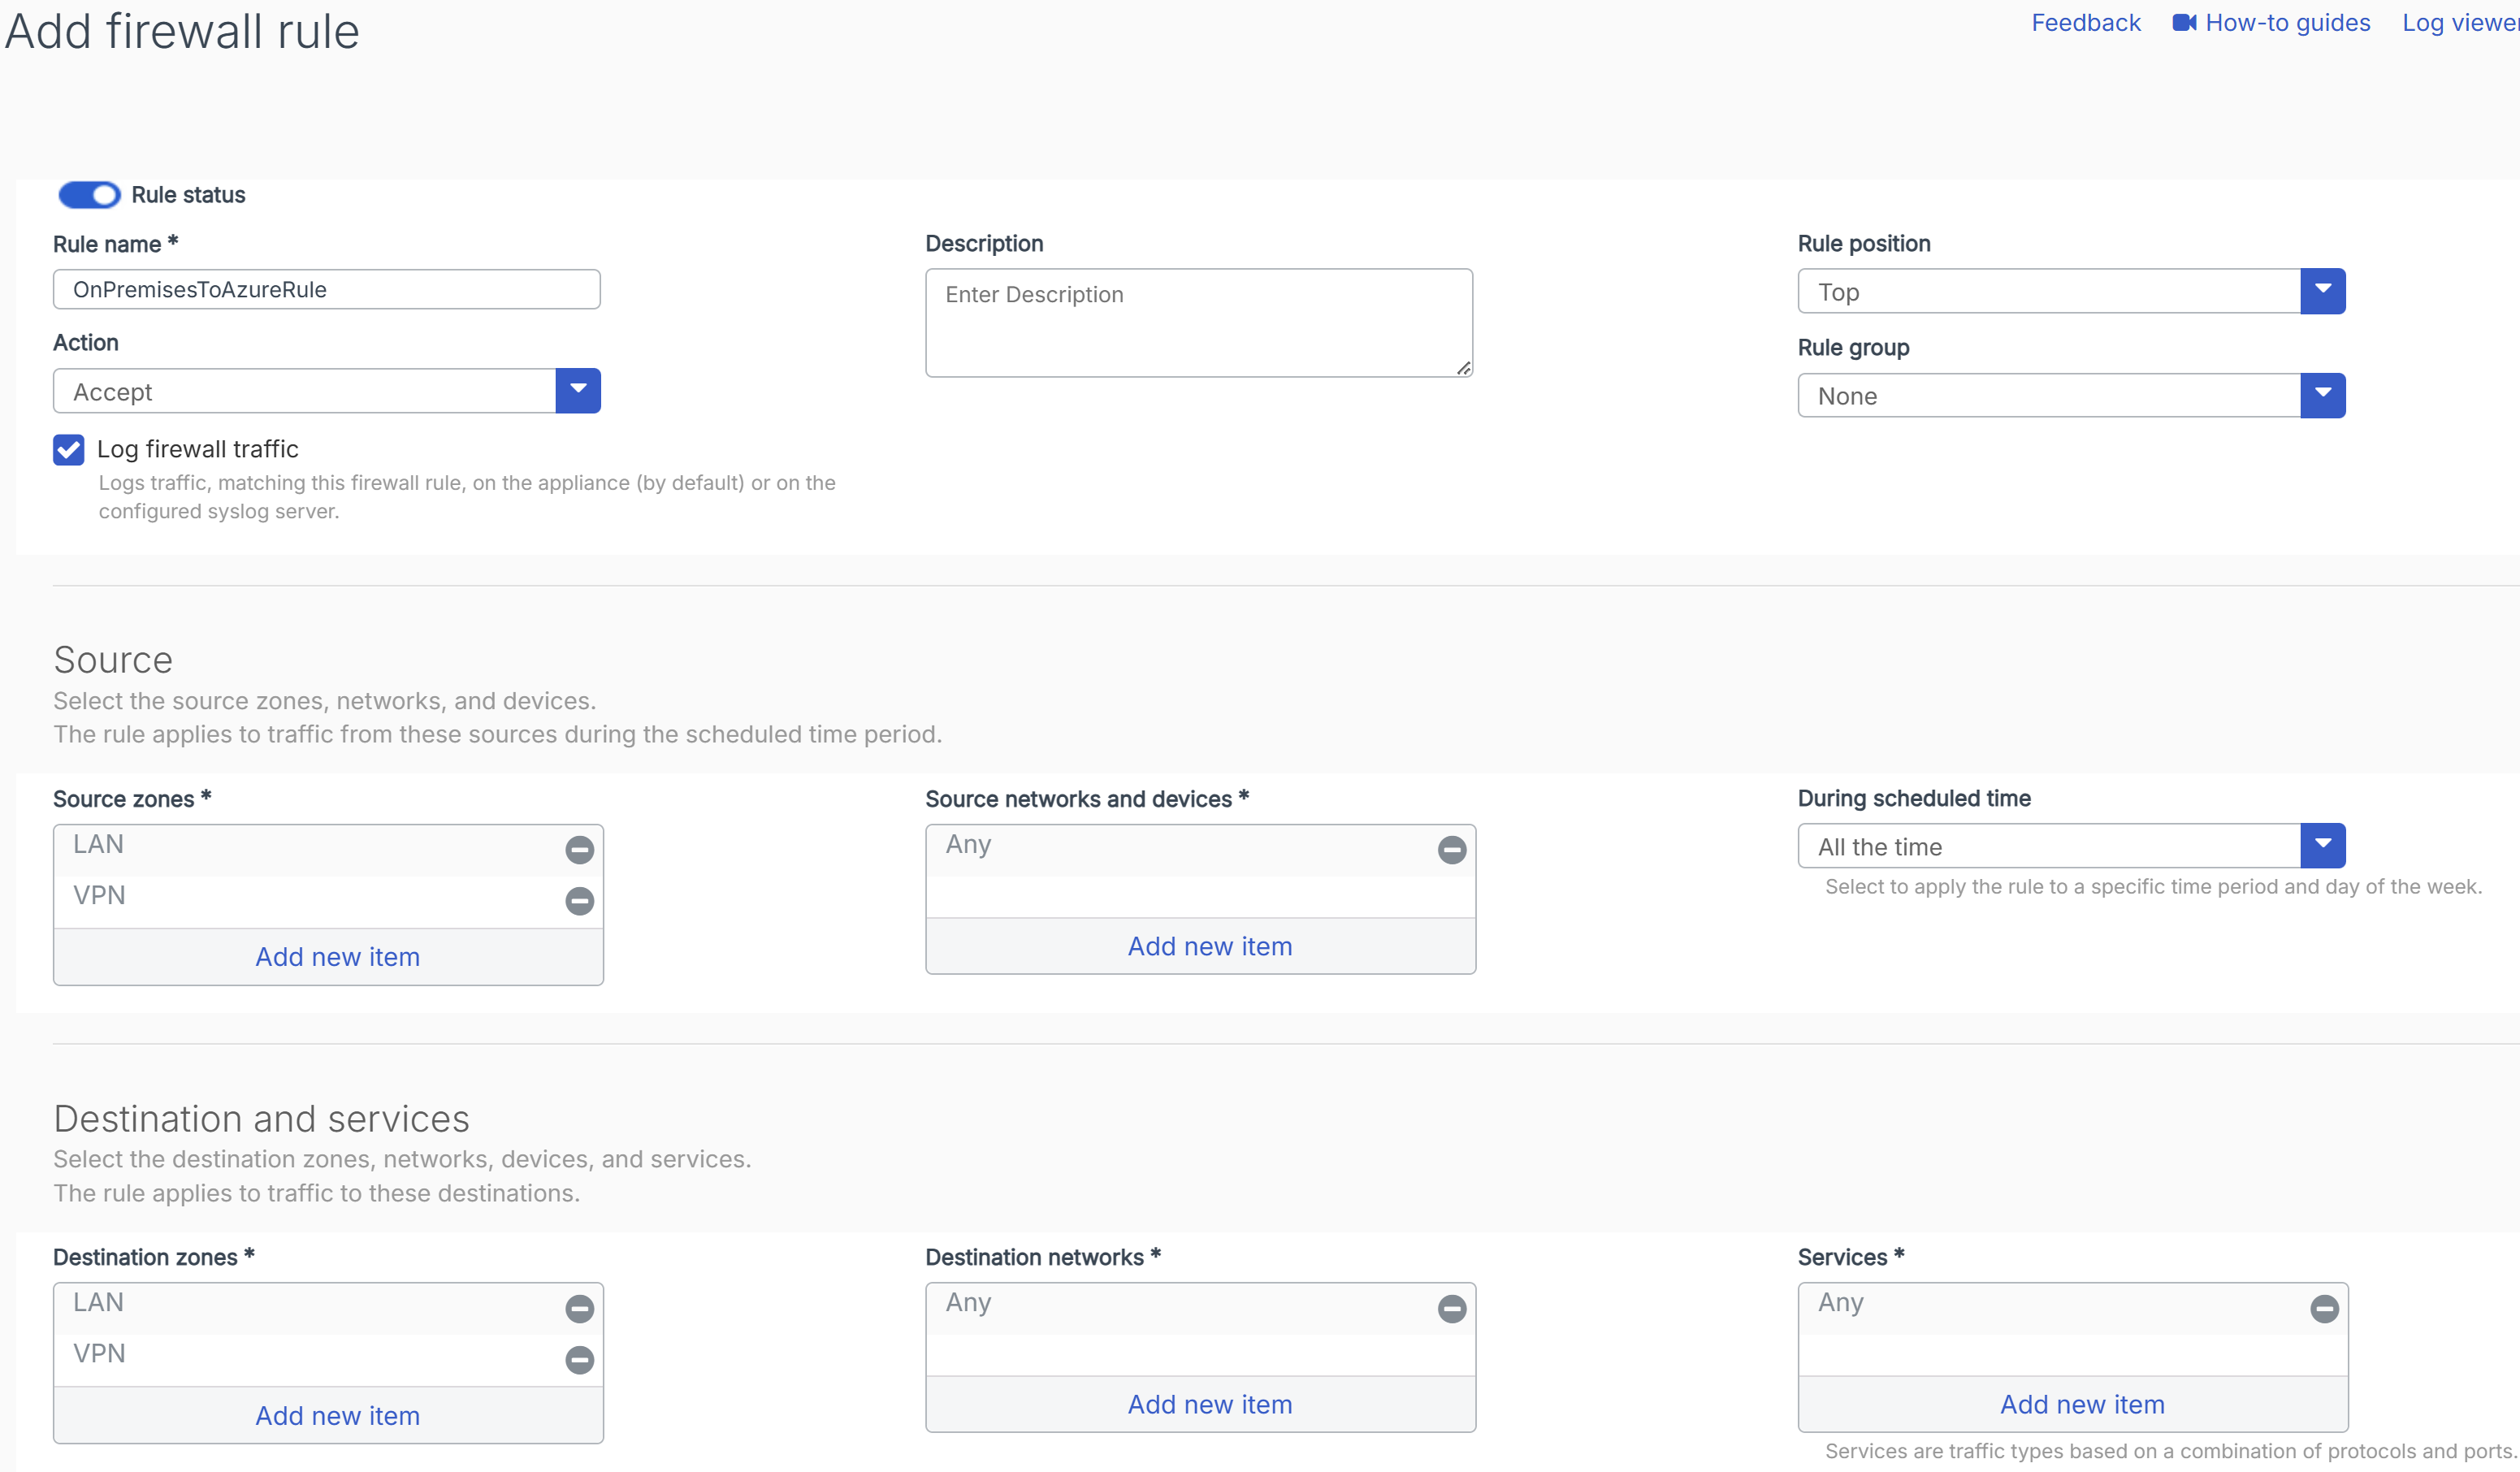
-
Click Save.
Configure the XFRM interface
To configure the XFRM interface, do as follows:
-
Go to Network > Interfaces, click the vertical blue bar, or anywhere on the WAN interface row.
You see the XFRM interfaces automatically created for the tunnels.

-
Click the XFRM interface.
-
Under IPv4/netmask, enter the BGP peer IP address you configured in Create a local network gateway and its subnet mask. In this example, it's
10.3.1.3/24.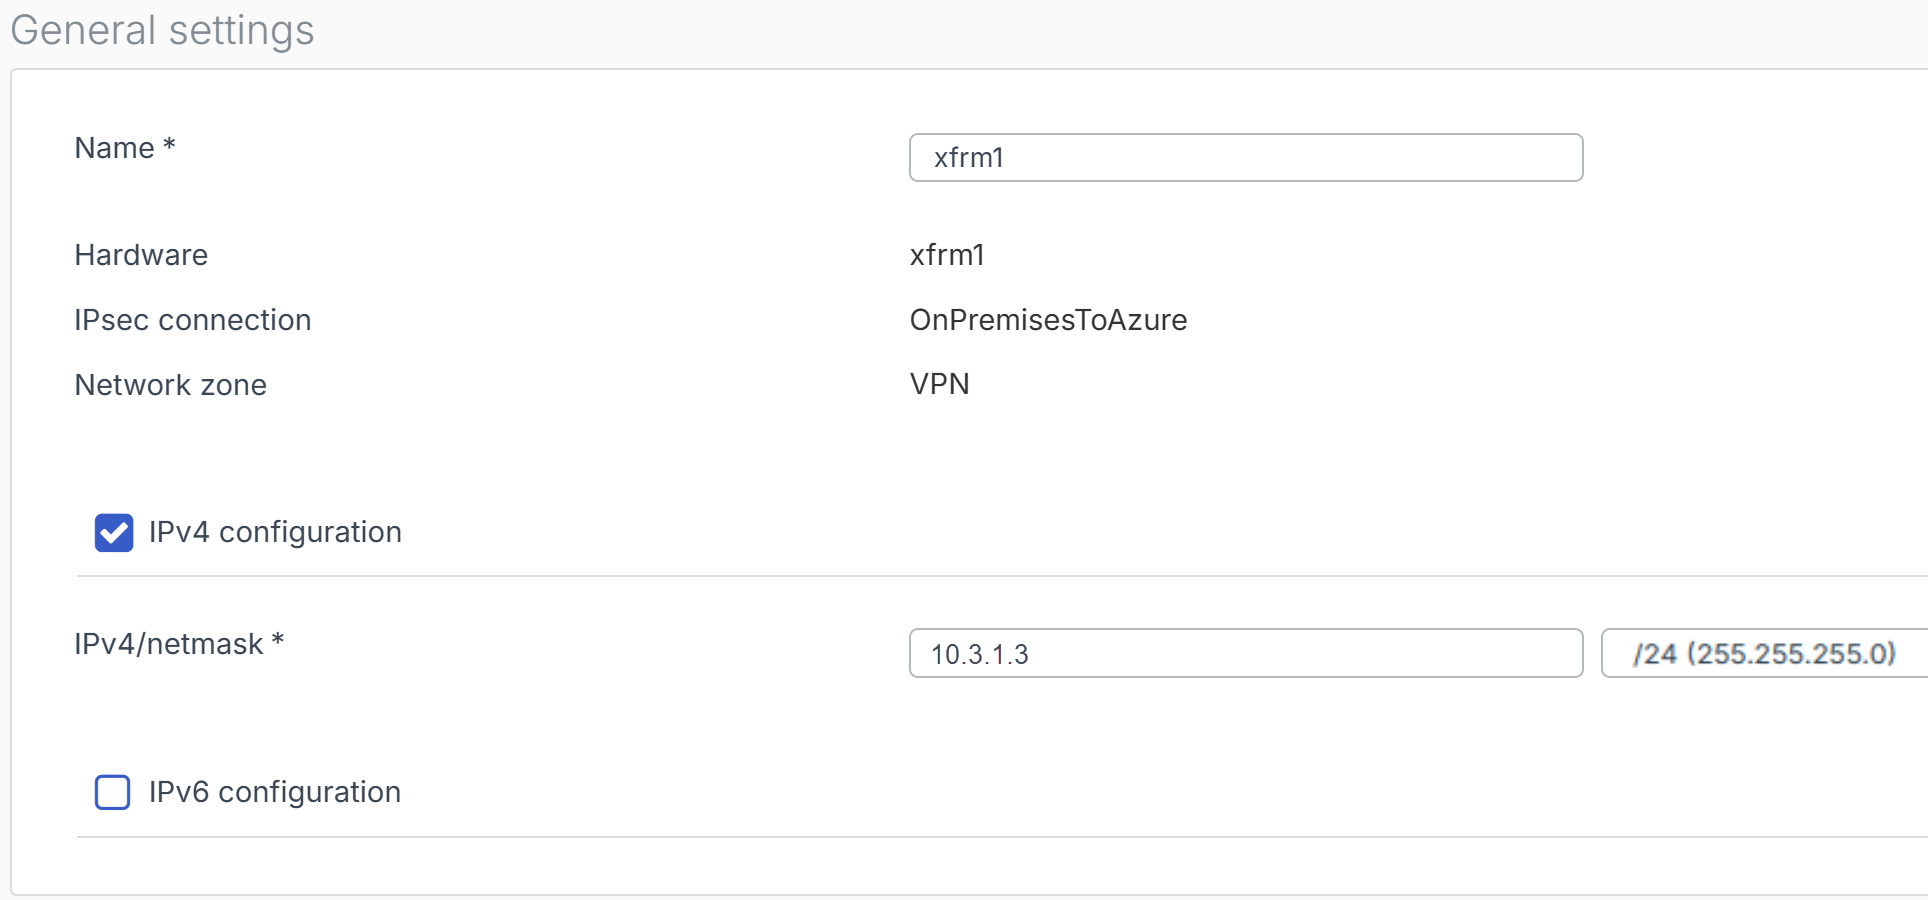
-
Click Save.
- In the Update interface prompt, click Update interface.
Configure BGP routing
To configure BGP routing, do as follows:
- Go to Routing > BGP.
-
Under Global configuration, configure the following settings:
Setting Value Router ID assignment Select Automatic. Local AS Enter the ASN of your on-premises firewall.
In this example, it's
65000.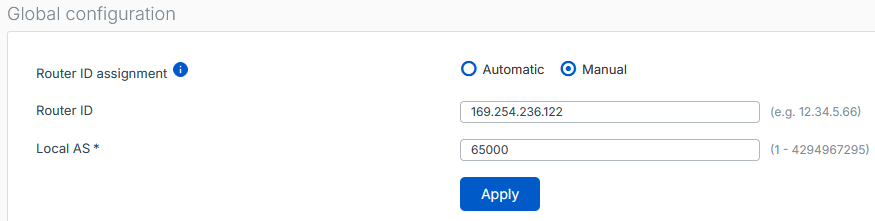
-
Click Apply.
- Under Neighbors, click Add.
-
Configure the following settings:
Setting Value IP version Select IPv4. IP address Enter the Azure virtual network gateway's Default Azure BGP peer IP address you noted in Create a virtual network gateway.
In this example, it's
10.3.1.254.Remote AS The ASN of the Azure virtual network gateway.
In this example, it's
65515.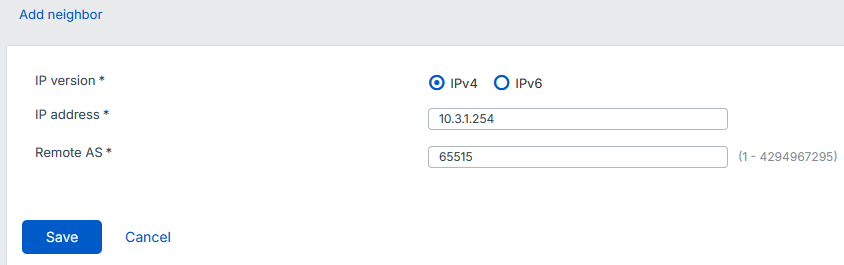
-
Click Save.
- Under Networks, click Add.
-
Configure the following settings:
Setting Value IP version Select IPv4. IP address Enter the LAN network address of your on-premises firewall.
In this example, it's
172.16.2.0/24.Subnet Enter the subnet mask of the LAN network address.
In this example, it's
/24. -
Click Save.
Turn on dynamic routing
To turn on dynamic routing, do as follows:
- Go to Administration > Device access.
-
Under Dynamic Routing, select the checkbox for VPN.
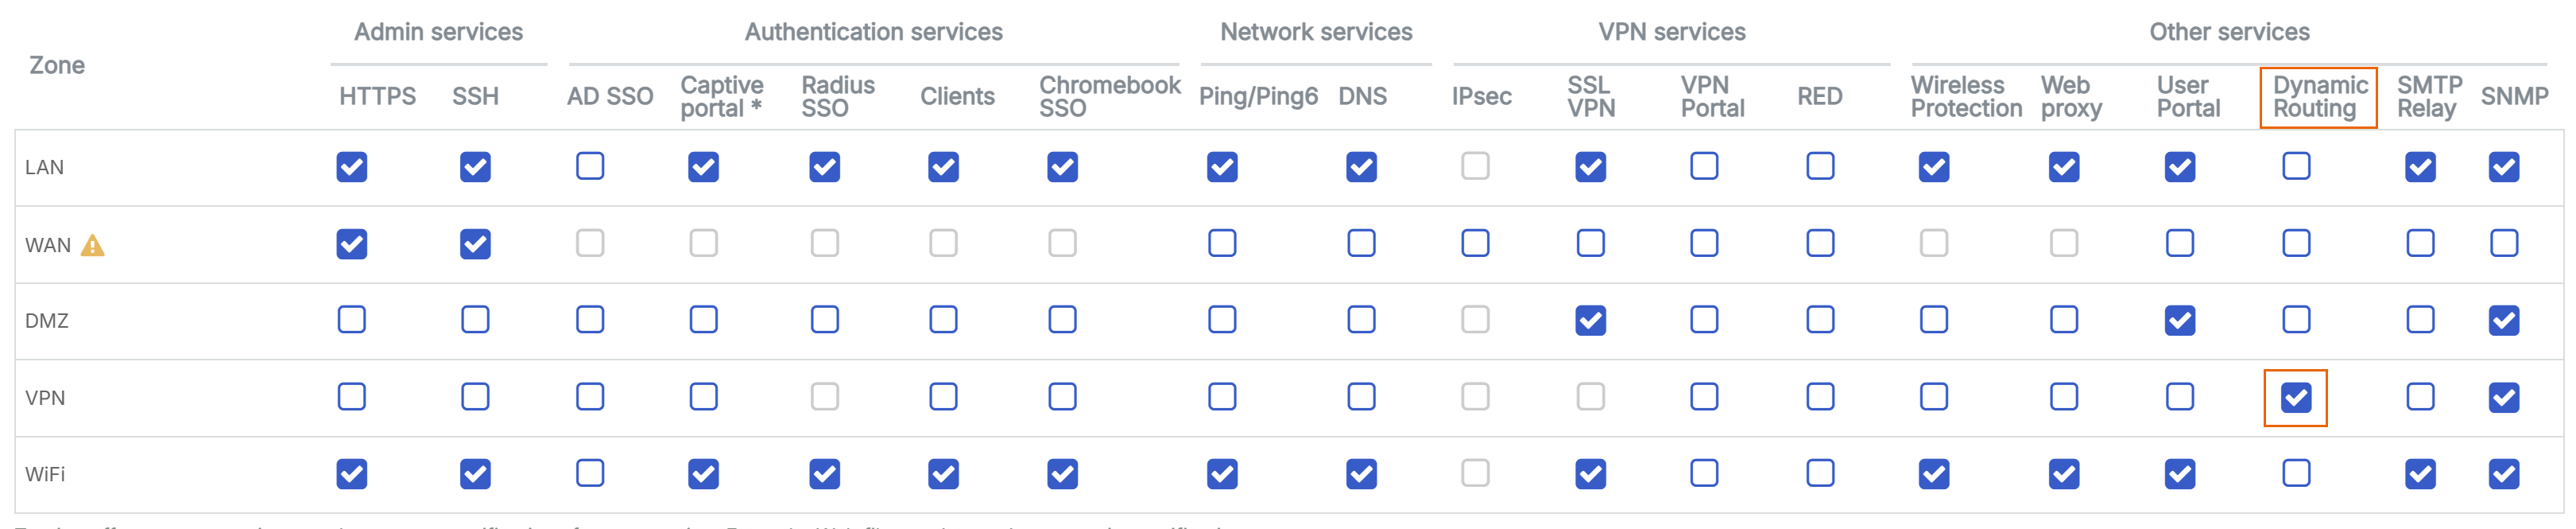
-
Click Apply, then click OK.
Verify BGP information
To verify the BGP information, do as follows:
- Sign in to the web admin console of your on-premises firewall.
- Go to Routing > Information.
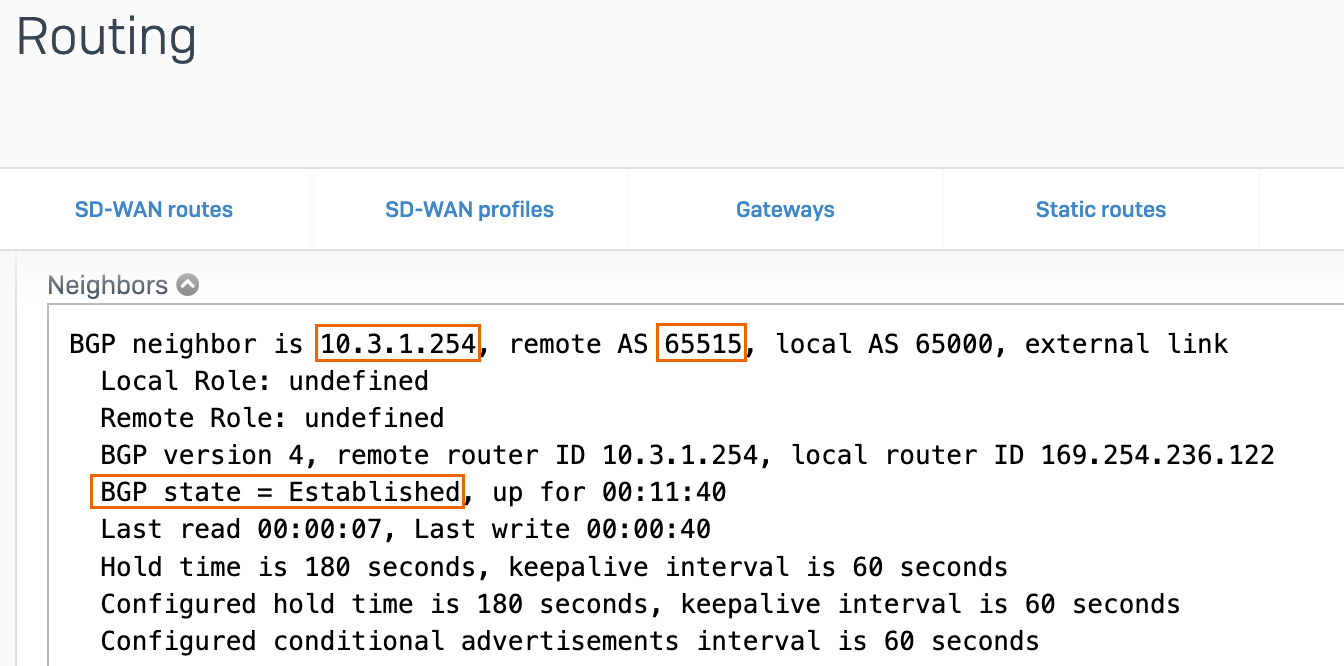
- Under BGP-IPv4, click Neighbors.
-
Verify that the BGP neighbor is Azure's BGP peer IP address, the Remote AS is Azure's ASN, and that the BGP state is Established.
-
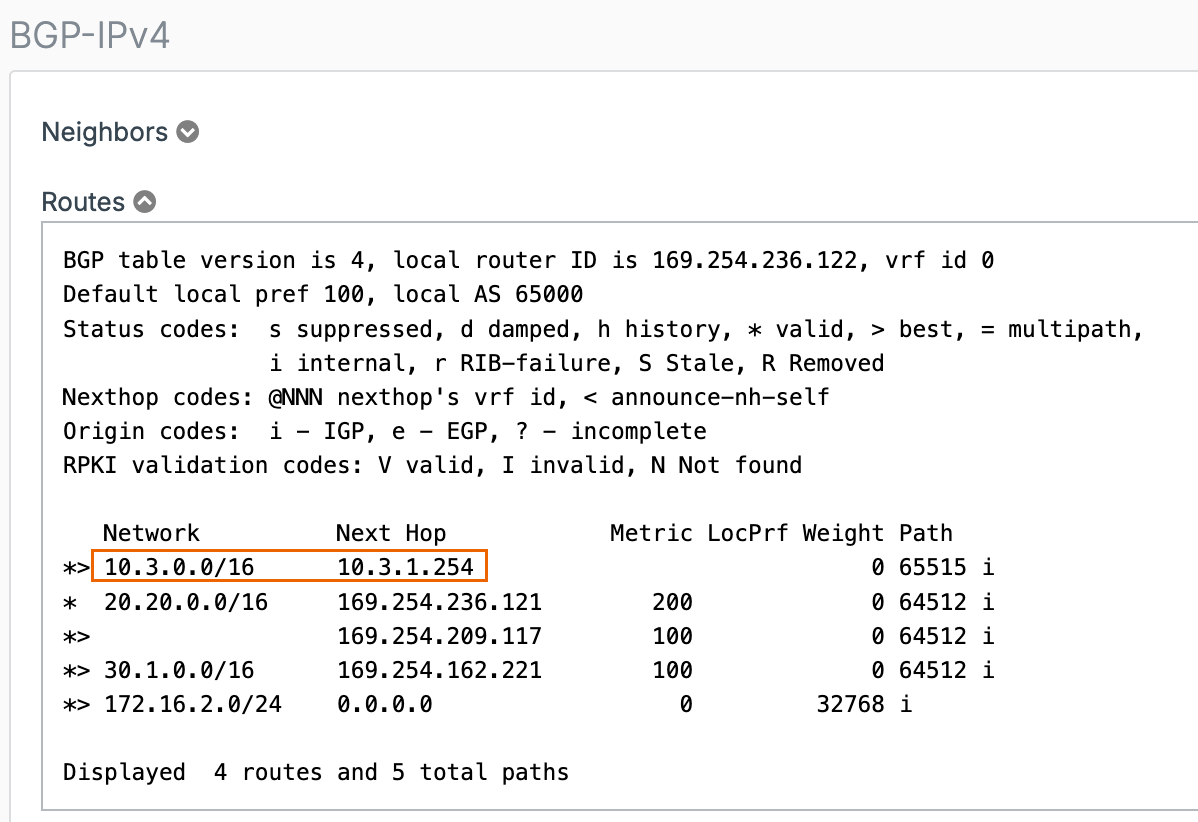
Under BGP-IPv4, click Routes.
-
Verify that the networks added to the BGP instance exists.
-
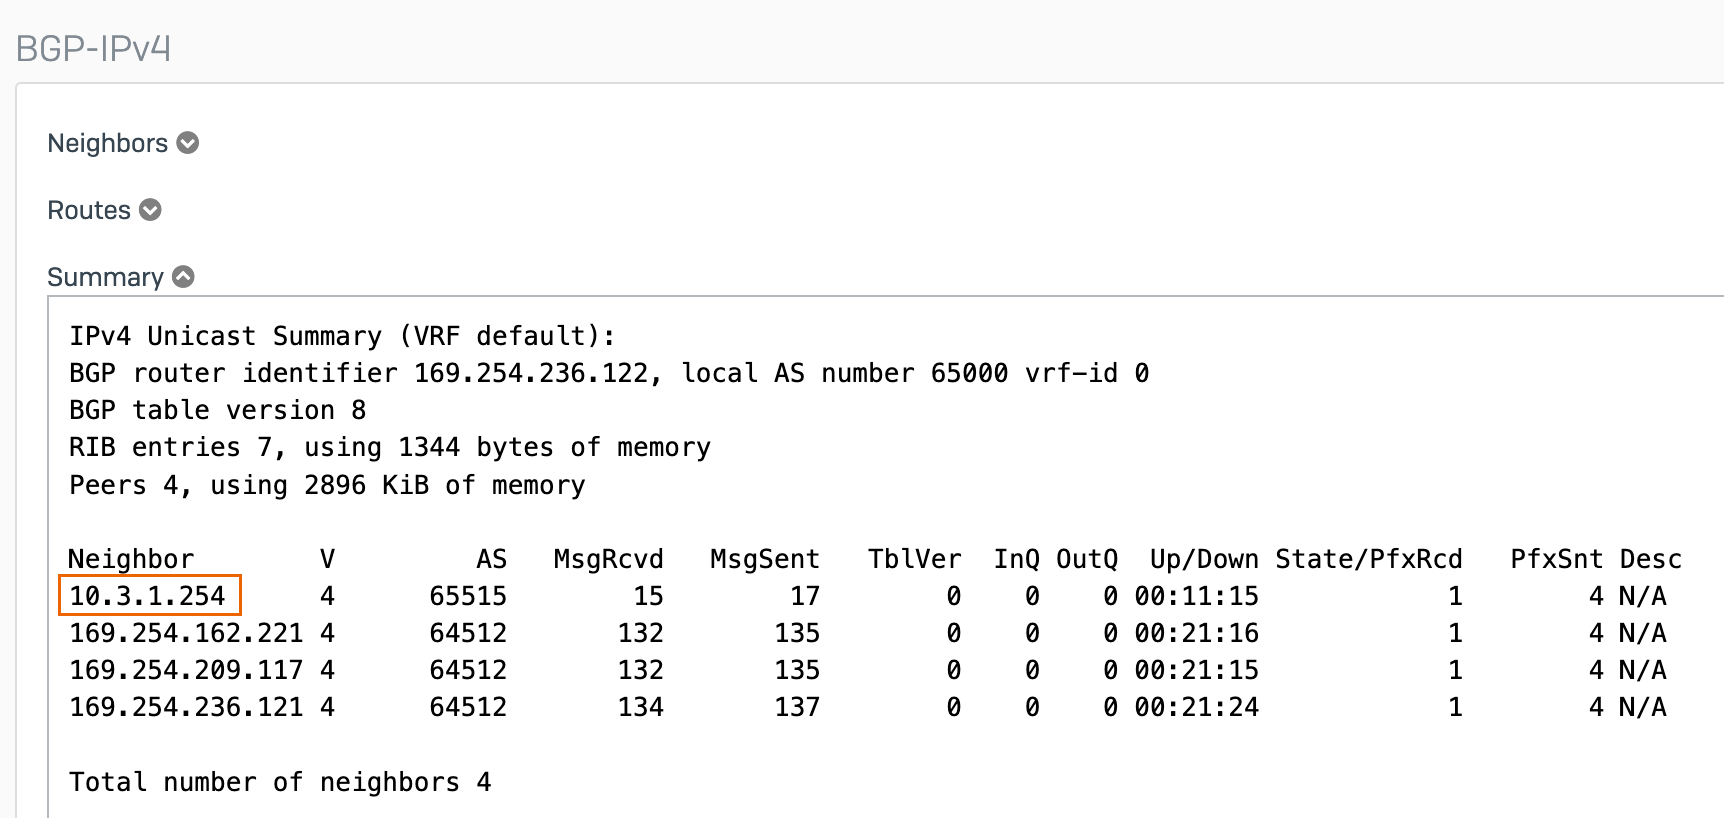
Under BGP-IPv4, click Summary.
-
Verify that the Azure's BGP peer IP address is listed as a neighbor.
Route system-generated traffic
To allow system-generated traffic to Azure's resources, you must configure an SNAT. Do as follows:
- Sign in to the CLI console. See Accessing Command Line Console.
- Type
4to selectDevice Console. -
Using your Azure's resource IP address or network address and your on-premises firewall LAN IP address, run the following command:
Syntax
set advanced-firewall sys-traffic-nat add destination <Azure's resource IP address or network address> snatip <On-premises firewall LAN IP address>Example
set advanced-firewall sys-traffic-nat add destination 10.3.0.4 snatip 172.16.2.2
Verify the connection
You can verify the connection through ping test, VPN connection status, traffic flow, and BGP information.
Ping test
To verify connectivity, run a ping test in both directions, as follows:
- From an endpoint behind the firewall to a Microsoft Azure VM.
- From the Microsoft Azure VM to an endpoint behind the firewall.
To connect to your Microsoft Azure VM using SSH and run a ping test, follow these steps:
- Sign in to Microsoft Azure portal.
- Go to Virtual machines. You can also search for it in the search box.
-
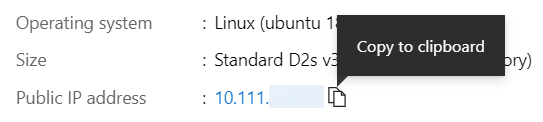
Select your VM and make a note of the public IP address.
-
Go to Networking > Network settings.
- Click the allow_ssh security group.
-
Under Source, select My IP address.
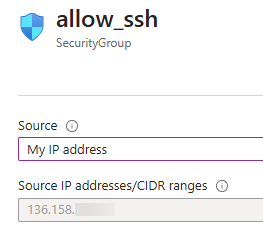
-
Click Save.
-
Sign in to your Microsoft Azure VM. In this example, we use the Terminal application in Linux.
Using the username you used for the VM and your VM's public IP address, run the following command:
Syntax
ssh <The username you used for the VM.>@<The VM's public IP address.>Example

-
Ping an endpoint behind the firewall.
VPN connection status and traffic flow
To verify the VPN connection status and traffic flow, do as follows:
- Sign in to Microsoft Azure portal.
- Go to Virtual network gateways. You can also search for it in the search box.
- Go to VPN gateways and click the virtual network gateway you connected to.
- Go to Settings > Connections.
-
Verify that the Status of the VPN connection you created is Connected.

-
Click the VPN connection and see if there's traffic flow.
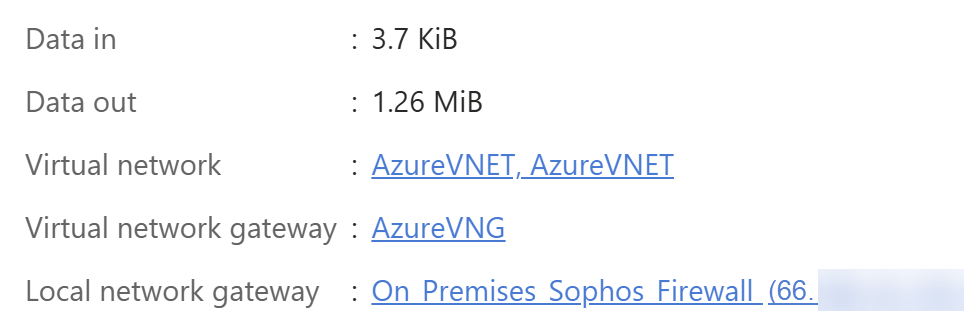
Note
If you see 0 B, it doesn't indicate a connection issue. There is likely no traffic flowing on the Microsoft Azure side.