Basic Configuration
The second step of the installation is performed through WebAdmin, the web based administrative interface of Sophos UTM. Prior to configuring basic system settings, you should have a plan how to integrate Sophos UTM into your network. You must decide which functions you want it to provide, for example, if you want to operate it in bridge mode or in standard (routing) mode, or how you want it to control the data packets flowing between its interfaces. However, you can always reconfigure Sophos UTM at a later time. So if you have not yet planned how to integrate Sophos UTM into your network, you can begin with the basic configuration right away.
-
Start your browser and open WebAdmin.
Browse to the URL
 of Sophos UTM (i.e., the IP address of eth0). In order to stay consistent with our configuration example above, this would be https://192.168.2.100:4444 (note the HTTPS protocol and port number 4444).
Deviating from the configuration example, each Sophos UTM ships with the following default settings:
- Interfaces: Internal network interface (eth0)
- IP address: 192.168.0.1
- Network mask: 255.255.255.0
- Default gateway: none
To access WebAdmin of any Sophos UTM, enter the following URL instead:
https://192.168.0.1:4444
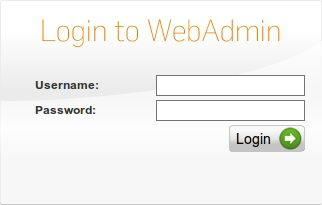
To provide authentication and encrypted communication, Sophos UTM comes with a self-signed security certificate. This certificate is offered to the web browser when an HTTPS-based connection to WebAdmin is established. If unable to check the certificate's validity, the browser will display a security warning. Once you have accepted the certificate, the initial login page is displayed.

WebAdmin: Initial Login Page
-
Fill out the Basic System Setup form.
Enter accurate information of your company in the text boxes presented here. In addition, specify a password and valid email address for the administrator account.
If you run an Amazon Machine Image (AMI) of Sophos UTM, you will see an additional text field AWS Instance ID. Enter that ID to prove that you are the owner of that Amazon instance.
If you accept the license agreement, click the Perform Basic System Setup button to continue logging in. While performing the basic system setup, a number of certificates and certificate authorities are being created:
- WebAdmin CA: The CA with which the WebAdmin certificate was signed (see Management > WebAdmin Settings > HTTPS Certificate).
- VPN Signing CA: The CA with which digital certificates are signed that are used for VPN connections (see Site-to-site VPN > Certificate Management > Certificate Authority).
- WebAdmin Certificate: The digital certificate of WebAdmin (see Site-to-site VPN > Certificate Management > Certificates).
- Local X.509 Certificate: The digital certificate of Sophos UTM that is used for VPN connections (see Site-to-Site VPN > Certificate Management > Certificates).
The login page appears. (With some browsers it may, however, happen that you are presented another security warning because the certificate has changed according to your entered values.)
- WebAdmin CA: The CA
WebAdmin: Regular Login Page
-
Log in to WebAdmin.
Type admin in the Username field and enter the password you have specified on the previous screen.
A configuration wizard is presented to you which will guide you through the initial configuration process.
Continue: If you want to use the wizard, select this option and then click Next. Follow the steps to configure the basic settings of Sophos UTM.
Restore a backup: If you have a backup file, you can decide to restore this backup file instead. Select this option and then click Next. How to continue is described in section Backup Restoration.
Alternatively, you can safely click Cancel (at any time during the wizard’s steps) and thereby exit the wizard, for example if you want to configure Sophos UTM directly in WebAdmin. You can also click Finish at any time to save your settings done so far and exit the wizard.
-
Install your license.
Click the Folder icon to upload your purchased license (a text file). Click Next to install the license. In case you did not purchase a license, click Next to use the built-in 30-day trial license with all features enabled that is shipped with Sophos UTM.
Note – If the selected license does not contain a certain subscription, the respective page will be disabled during the further procedure.
-
Configure the internal network interface.
Check the presented settings for the internal network interface (eth0). The settings for this interface are based on the information you provided during the installation of the software. Additionally, you can set Sophos UTM to act as DHCP
server on the internal interface by selecting the checkbox.Note – If you change the IP address of the internal interface, you must connect to WebAdmin again using the new IP address after finishing the wizard.
-
Select the uplink type for the external interface.
Select the connection type of your uplink/Internet connection the external network card is going to use. The type of interface and its configuration depend on what kind of connection to the Internet you are going to use. Click Next.
In case Sophos UTM has no uplink or you do not want to configure it right now, select the Setup Internet connection later checkbox. If you configure an Internet uplink, IP
masquerading will automatically be configured for connections from the internal network to the Internet.If you select Standard Ethernet interface with static IP address, specifying a Default gateway is optional. If you leave the text box blank, your default gateway setting of the installation routine will persist. You can skip each of the following steps by clicking Next. You can make and change those skipped settings later in WebAdmin.
Note – If your license does not allow one of the following features, the concerning feature will not be displayed.
-
Make your basic firewall settings.
You can now select what types of services you want to allow on the Internet. Click Next to confirm your settings.
-
Make your advanced threat protection settings.
You can now make settings regarding intrusion prevention and command&control/botnet detection for several operation systems and databases. Click Next to confirm your settings.
-
Make your web protection settings.
You can now select whether the web traffic should be scanned for viruses and spyware. Additionally, you can select to block webpages that belong to certain categories. Click Next to confirm your settings.
-
Make your email protection settings.
You can now select the first checkbox to enable the POP3 proxy. You can also select the second checkbox to enable Sophos UTM as inbound SMTP relay: Enter the IP address of your internal mail server and add SMTP domains to route. Click Next to confirm your settings.
-
Make your wireless protection settings.
You can now select the checkbox to enable wireless protection. In the box, select or add the interfaces that are allowed to connect your wireless access points to your system. Click the Folder icon to add an interface or click the Plus icon to create a new interface. Enter the other wireless network parameters. Click Next to confirm your settings.
-
Make your advanced threat adaptive learning settings.
You can now select if you want to send anonymous data to the Sophos research team. This data is used to improve future versions and to improve and enlarge the network visibility and application control library.
-
Confirm your settings.
A summary of your settings is displayed. Click Finish to confirm them or Back to change them. However, you can also change them in WebAdmin later.
After clicking Finish your settings are saved and you are redirected to the Dashboard of WebAdmin, providing you with the most important system status information of the Sophos UTM unit.
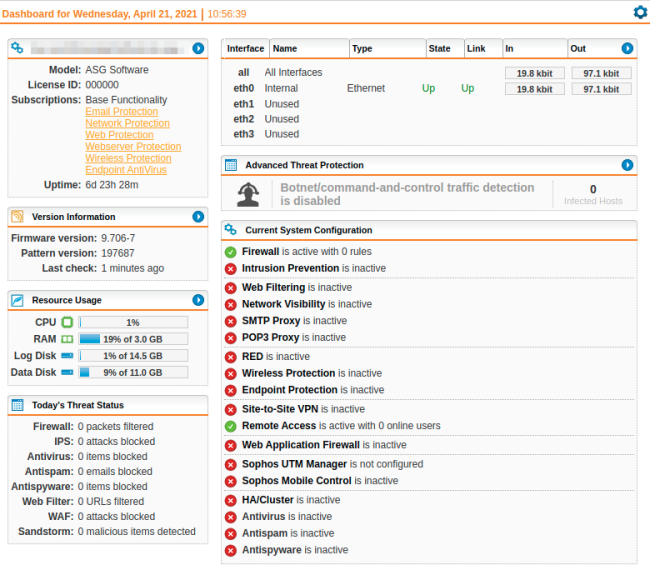
WebAdmin: Dashboard
If you encounter any problems while completing these steps, please contact the support department of your Sophos UTM supplier. For more information, visit the following websites: