Configure SSL settings
-
Go to Remote Access > SSL > Settings.
-
In Server Settings, make the following settings:
Interface address: Select the interface address that all SSL VPN clients must use. Default: Any. When using the web application firewall, you must give a specific interface address for the service to listen for SSL connections.
Protocol: Select the network protocol that all SSL VPN clients must use. Default: TCP.
Port: Select the port that all SSL VPN clients must use. Default: 443.
Override hostname: Leave this field empty if you want the UTM hostname to be the target hostname for client VPN connections.
If the UTM hostname can’t be reached from the internet, enter the publicly available hostname of the UTM.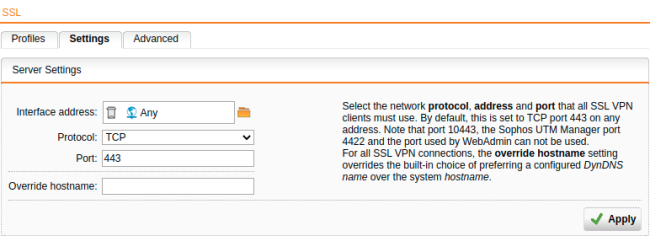
-
Click Apply to save your settings.
-
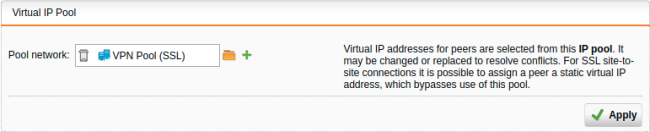
In Virtual IP Pool, select a pool network:
By default, the UTM assigns addresses from the private IP space 10.242.2.x/24, which is named VPN Pool (SSL) internally. If you want to use a different network, change the definition of VPN Pool (SSL) or create a different range under Definitions & Users > Network Definitions.
-
Click Apply to save your settings.
-
Go to Remote Access > SSL > Advanced.
-
Make cryptographic settings.
These settings control the encryption parameters for the SSL VPN remote access clients.
Encryption algorithm: Supported algorithms are (all in Cipher Block Chaining (CBC) mode): DES-EDE3 168bit (3DES), AES (Rijndael) 128bit/192bit/256bit, and Blowfish (BF).
Authentication algorithm: Supported algorithms are MD5 128bit and SHA1 160bit.
Key size: The key size (key length) is the length of the Diffie-Hellman key exchange. The longer this key is, the more secure the symmetric keys are. You can choose between a key size of 1024 or 2048 bits.
Server certificate: Select a local SSL certificate to be used by the SSL VPN server to identify itself against the clients. Example: Local X.509 Cert (default).
Key lifetime: Enter a time period after which the key expires. Default: 28,800 seconds.
-
Click Apply to save your settings.
-
Optionally, turn on traffic compression.
-
Click Apply to save your settings.
-
Optionally, enable debug mode.
If you select Enable debug mode, the SSL daemon log file contains extended information about SSL connection negotiation.
-
Click Apply to save your settings.
-
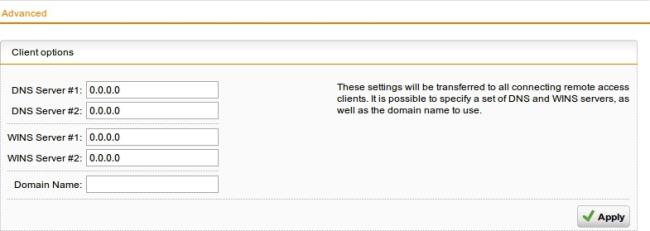
Open the Remote Access > Advanced page.
You can define name servers (DNS and WINS) and the name service domain that is assigned to hosts during the connection establishment.
-
Click Apply to save your settings.