Lists
Many pages in WebAdmin consist of lists. The buttons on the left of each list item enable you to edit, delete, or clone the item (for more information, see chapter Buttons and Icons). To add an item to the list, click the New … button, where "…" is a placeholder for the object being created (e.g., interface). This opens a dialog box where you can define the properties of the new object.
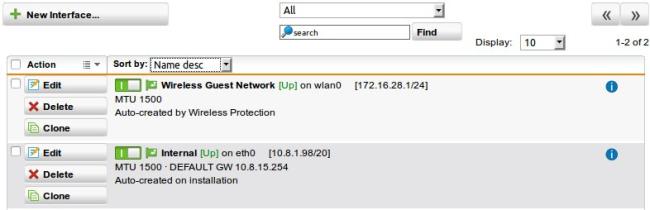
WebAdmin: Example of a List
With the first drop-down list on the top you can filter all items according to their type or group. The second field on the top lets you search for items specifically. Enter a search string and click Find.
Lists with more than ten items are split into several chunks, which can be browsed with Forward (>>) and Backward (<<) buttons. With the Display drop-down list, you can temporarily change the number of items per page. Additionally, you can change the default setting for all lists on the Management > WebAdmin Settings > User Preferences tab.
The header of a list provides some functionality. Selecting an item from the Sort by dropdown sorts the list for that item, e.g. selecting Name asc sorts the list ascending by object names. The Action field in the header contains some batch options you can carry out on previously selected list objects. To select objects, select their checkbox. Note that the selection stays valid across multiple pages, that is, while browsing between pages of a list already selected objects stay selected.
Tip – Clicking on the Info icon will show all configuration options in which the object is used.
 Related Topics