
Configure the advanced IPsec settings
-
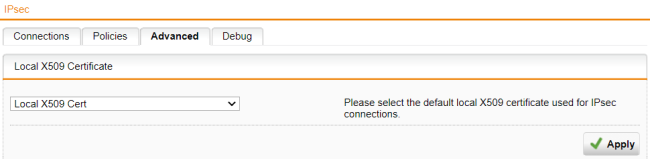
Go to Remote Access > IPsec > Advanced.
-
In the Local X.509 Certificate section, select a certificate.
By default, the Local X509 Cert is used for IPsec connections to authenticate the server.
-
Click Apply if you've changed the certificate.
-
In the Dead Peer Detection (DPD) section, make sure DPD is turned on.
This is the default. DPD is used to automatically determine whether a remote IPsec peer can still be reached. Usually, it is safe to always enable this option. The IPsec peers automatically determine whether the remote side supports DPD and fall back to normal mode if not.

-
Click Apply to save any changes.
-
In the NAT Traversal (NAT-T) section, make sure NAT-T is turned on.
By default, NAT-T is turned on with a keepalive of 60 seconds. It allows IPsec traffic to pass upstream systems that use Network Address Translation (NAT). You can change the keepalive interval for NAT traversal in the field NAT traversal keepalive.

-
Click Apply to save any changes.
-
Configure CRL Handling (optional).
Certificate Revocation Lists (CRLs) allow certificate providers to revoke certificates that are no longer valid or have been compromised.
- Automatic fetching: Automatically requests the CRL through the URL defined in the partner certificate via HTTP, Anonymous FTP, or LDAP version 3. On request, the CRL can be downloaded, saved, and updated, once the validity period has expired.
- Strict policy: Use this option to reject any partner certificate without a corresponding CRL.

-
Click Apply to save any changes.
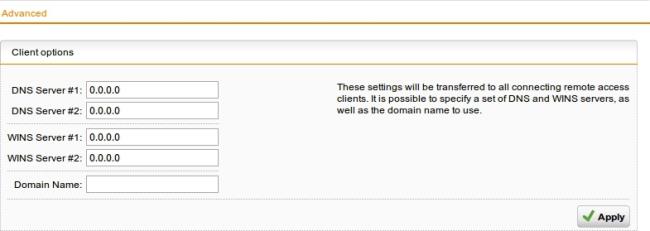
You can define name servers (DNS and WINS) and the name service domain that must be assigned to hosts during the connection establishment.
-
Go to Remote Access > Advanced.
Define name servers (DNS and WINS) and the name service domains.
-
Click Apply.