
Add an SSL profile
This topic shows how you enable SSL remote access, configure basic settings and access control.
-
Go to Remote Access > SSL > Profiles.
-
Click New Remote Access Profile.
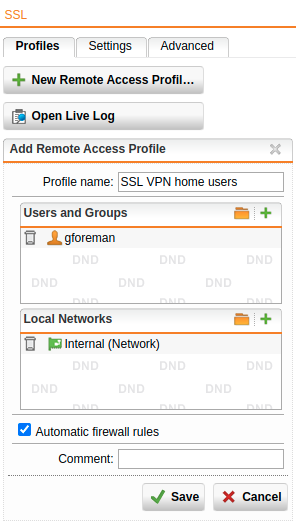
The Add Remote Access Profile dialog box opens.
-
Specify the following settings:
Profile name: Enter a descriptive name for the profile.
Users and groups: Select the users and user groups who should be able to use SSL remote access (in this example: gforeman).
Local networks: Select the local networks that endpoint devices should be able to reach. Example: Internal (Network)).
Note: If you want SSL-connected users to be able to access the internet, select Any in Local networks. Then you must define appropriate Masquerading or NAT rules to allows this network traffic.
Automatic firewall rules: Select to automatically create firewall rules for the tunnel traffic. These rules exist only for the lifetime of the tunnel. If you don’t select this option, you must define the firewall rules manually (see "Create the firewall and masquerading rules""Create the firewall and masquerading rules").
Comment (optional): Add a description or other information.
-
Click Save.
The profile shows in the list and is active.
Cross Reference: For more information about remote access, go to Remote Access in the UTM administration guide.