Use an existing AWS CloudTrail
If you want to add an AWS environment to Sophos Cloud Optix using an existing CloudTrail, not a new one, you must configure it first.
The key steps are as follows:
- Review your trail.
- Configure SNS topic and access policy.
- Configure S3 bucket notifications.
- Add AWS account with existing CloudTrail to Sophos Cloud Optix.
Review your trail
- Sign in to Amazon CloudTrail console.
-
In your CloudTrail dashboard, copy your export bucket name.
You'll use the name to configure the SNS topic and later need it for the Sophos Cloud Optix setup.
-
You can also copy the S3 bucket prefix to use later. Bucket prefixes are optional.
-
(Optional) Copy the S3 bucket prefix for later use.
For more details on S3 bucket prefixes, see the steps in Creating a Trail.
The following image shows an example of how to select the bucket name and bucket prefix.

Configure SNS topic and access policy
- Sign in to Amazon SNS console.
- Create an SNS topic in the same region where you use your S3 bucket to export CloudTrail or edit an existing SNS topic.
- Copy the name of this SNS topic.
-
In the JSON editor, specify the access policy as follows:
-
Copy the following JSON code.
{ "Version": "2012-10-17", "Statement": [ { "Sid": "__default_statement_ID", "Effect": "Allow", "Principal": { "Service": "s3.amazonaws.com" }, "Action": [ "SNS:Publish" ], "Resource": "arn:aws:sns:us-west-1:%ACCOUNT_ID%:%SNS_TOPIC_NAME%", "Condition": { "StringEquals": { "AWS:SourceArn": "arn:aws:s3:::%S3_BUCKET_NAME%" } } } ] } -
Replace the
Resourcevalue with the SNS ARN you're using. -
Replace the bucket name in
Conditionwith the CloudTrail bucket name you copied earlier.Here's an example:
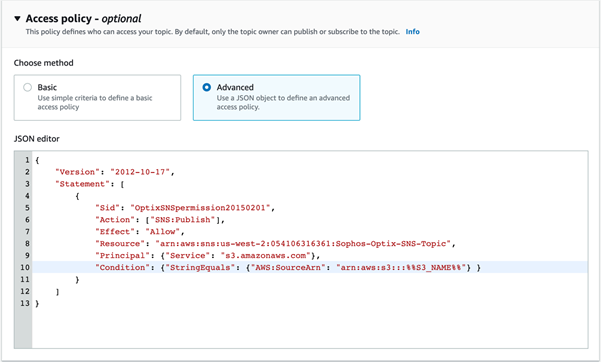
While the access policy may appear optional in AWS, it's mandatory with Sophos Cloud Optix. You must configure it to turn on S3 bucket notifications.
-
-
Save the SNS topic.
Configure S3 bucket notifications
- Sign in to Amazon S3 console.
- Go to your S3 bucket.
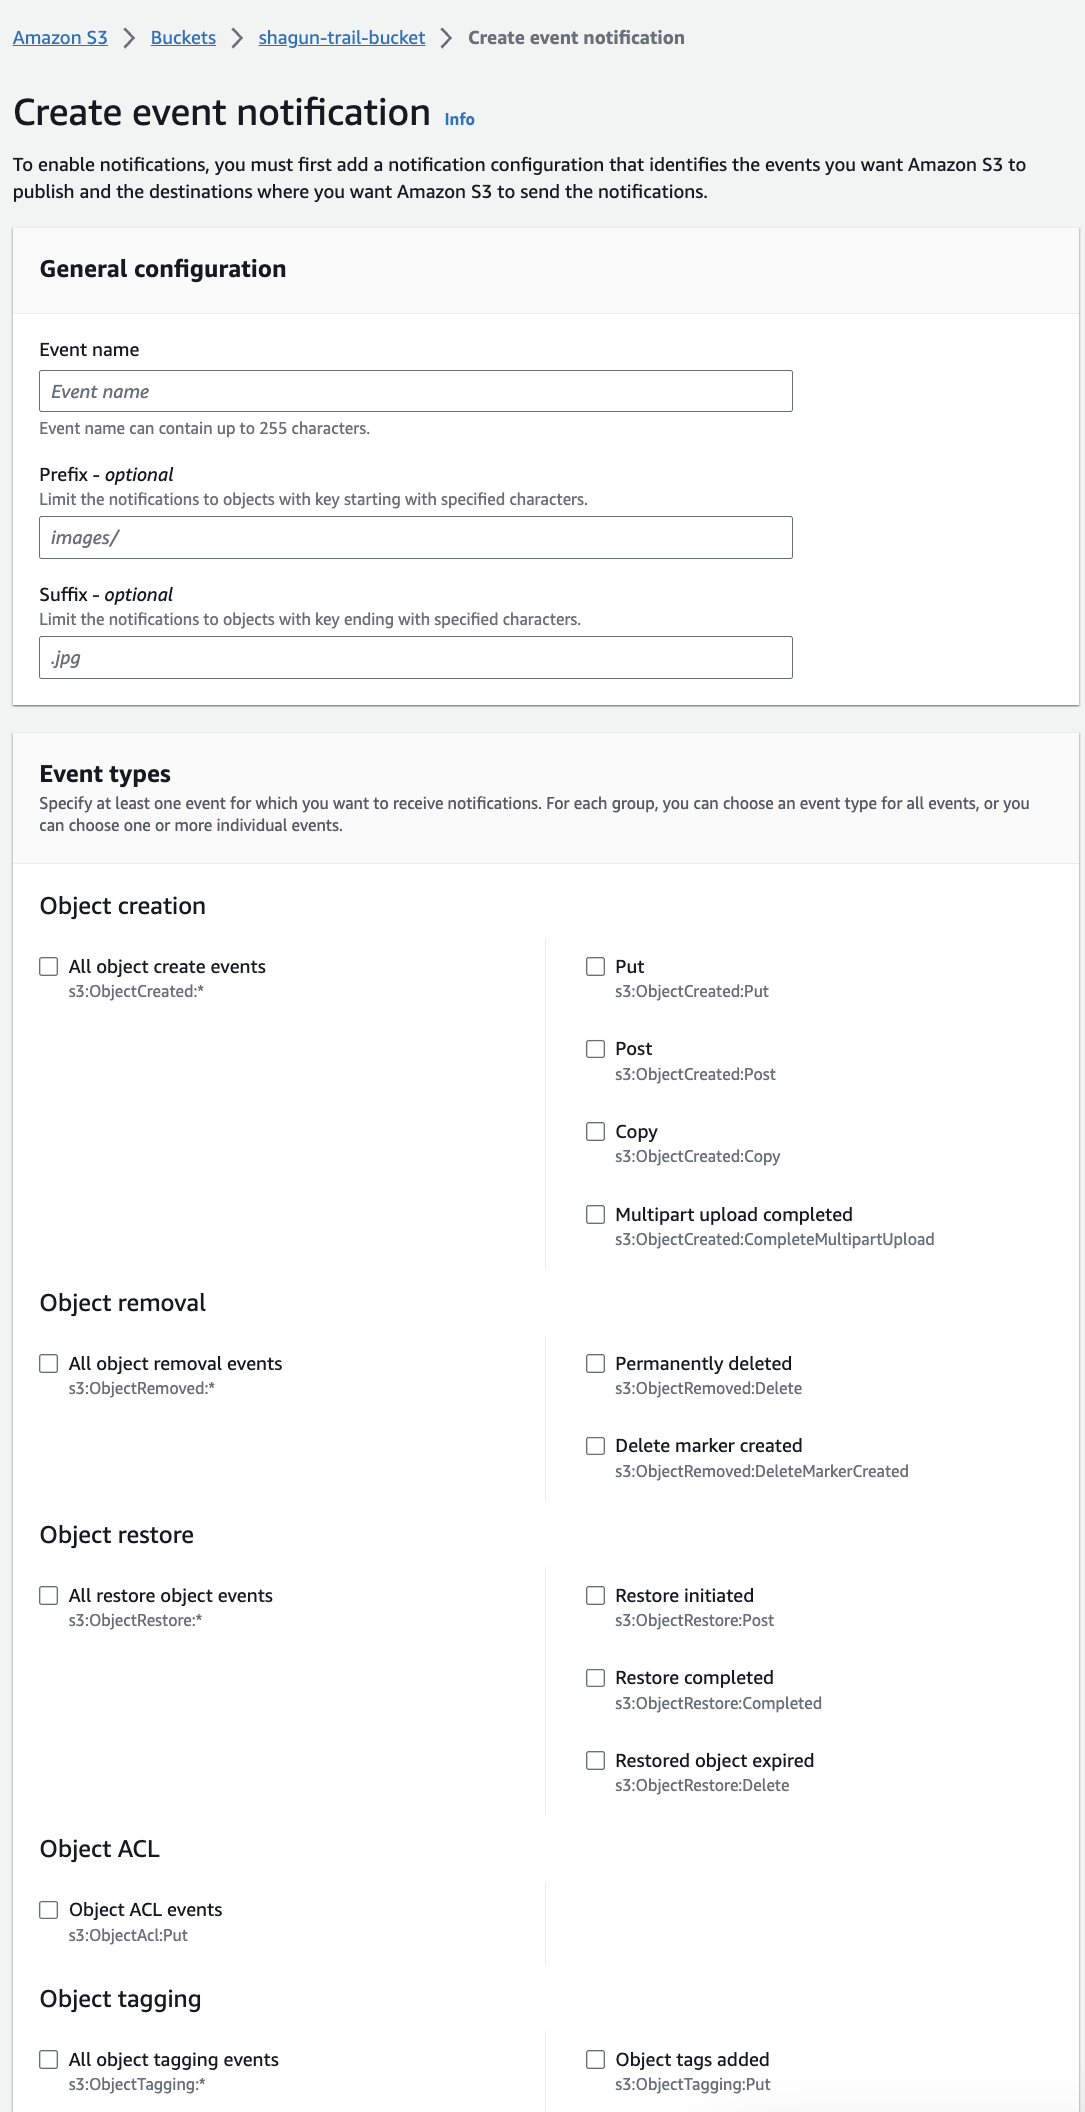
- To set up a new notification event, select Properties > Event notifications > Create event notification.
- Check that you don't have any existing notifications set on CloudTrail for creating events.
- Enter a name for the notification event.
-
To create your Prefix value, enter the bucket prefix you copied earlier, followed by
/AWSLogs/, your account ID, and then/CloudTrail/.The format must be:
<Bucket-prefix>/AWSLogs/<AccountId>/CloudTrail/When you use an AWS Organizations-managed CloudTrail or export CloudTrails from multiple accounts into a single account, you must either leave the prefix blank or create a distinct event for each account ID.
-
Enter
json.gzas the Suffix value. - Select All object create events.
-
Set Destination to
SNS topicand use the name of the SNS topic you created earlier.Here's an example:
-
Click Save changes.
Success notifications now appear in your S3 bucket properties.
Go to Sophos Cloud Optix and continue with the Add your AWS environment assistant.
Add AWS account with existing CloudTrail to Sophos Cloud Optix
To add the AWS account with existing CloudTrail to Sophos Cloud Optix, do as follows:
- Sign in to your Sophos Cloud Optix.
- Click Add Environments then click AWS.
- Click Choose a full setup option.
- Click AWS CloudShell or CLI (Linux and Mac only) or the relevant Go button.
- Select Customize your setup and click Continue.
- In CloudTrail Logs Setup Options, set Export CloudTrail logs to Cloud Optix to Yes.
- In Create new resources or use existing infrastructure, select Use existing resources.
-
Enter your SNS and S3 bucket details.
Note
Make sure to set the S3 Bucket Prefix with the bucket prefix you copied earlier.
-
Click Continue.
-
Finish the Add your AWS Environment assistant.
You can set the rest of the options according to your needs.
-
Click Continue.
-
Follow the on-screen instructions to add your AWS account to Sophos Cloud Optix.
The assistant creates your script and other commands. After the script finishes, you'll see the message:
All steps done!. -
If there are no errors, click Finish.
The AWS account is added and appears in Environments.