Run the migration assistant
The migration assistant moves your data from Sophos Mobile to Sophos Central.
Warning
Ensure that no other administrator is signed in to the account that you want to migrate. For an on-premise Sophos Mobile server, this also applies to the super administrator account.
If data is changed after you start the migration assistant, migrated data might be inconsistent and, in the worst case, you must re-enroll all devices.
This restriction applies from the time you click Next on the Preview export page until the first device is migrated.
Warning
You can’t undo migration after you click Start migration in the migration assistant.
Warning
When you migrate iPhones, iPads, Macs, or Windows computers, you must keep your Sophos Mobile server running after migration. These devices remain connected with your Sophos Mobile server even after migration.
However, you’re not required to update licenses or the Sophos Mobile server software. Because the server load after migration is reduced, you may consider scaling down server hardware.
Run the migration assistant
Do as follows:
-
Sign in to Sophos Mobile Admin.
For an on-premise Sophos Mobile server, sign in as an administrator of the customer that you want to migrate.
-
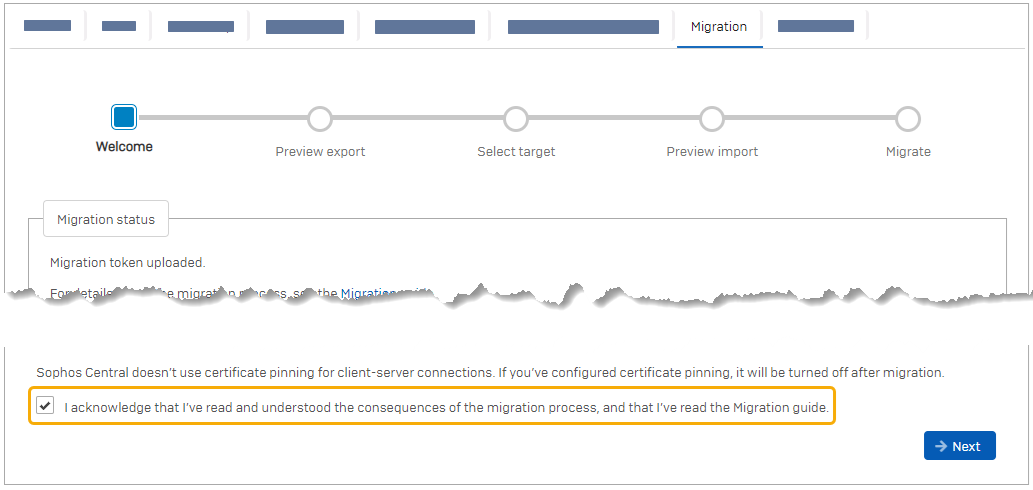
On the menu sidebar, under SETTINGS, select Setup > Sophos setup, and then select the Migration tab.
-
Read and acknowledge the information that is displayed on the Welcome page.
-
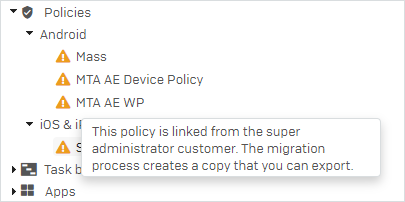
On the Preview export page, check if there are any issues:
 : A condition that blocks migration. You must resolve the issue before you can start migration.
 : A condition where the migration assistant changes your data. If you agree to the change, no action is required.
Hover over an item to show details about the issue.
For information on how to update out-of-date apps, see Update Sophos Mobile apps.
For information on other issues, see Migration issues.
-
Click Next.
If the migration assistant has to modify your data, this starts now and might take a few minutes.
Review the changes on the Preview export page and click Next again.
-
On the Select target page, upload the
sophosmobile_migration.targetfile with the migration token that you downloaded from your Sophos Central account.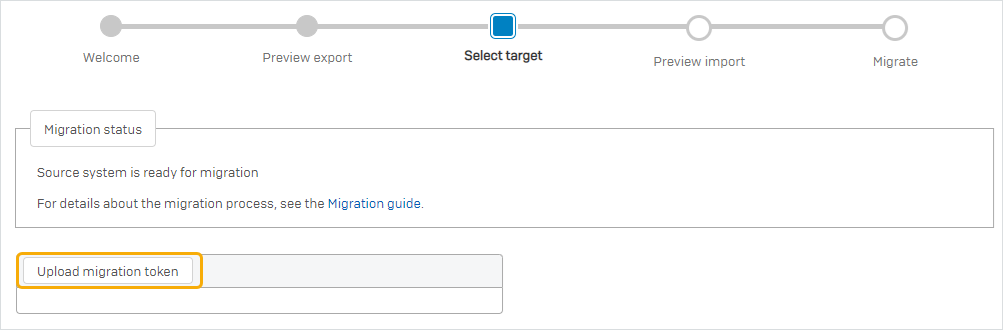
-
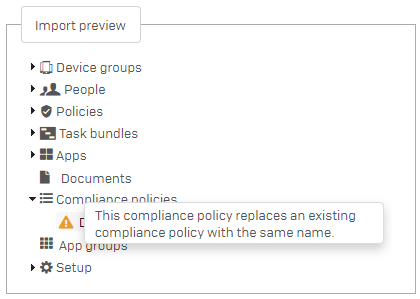
On the Preview import page, check if there are any issues.
-
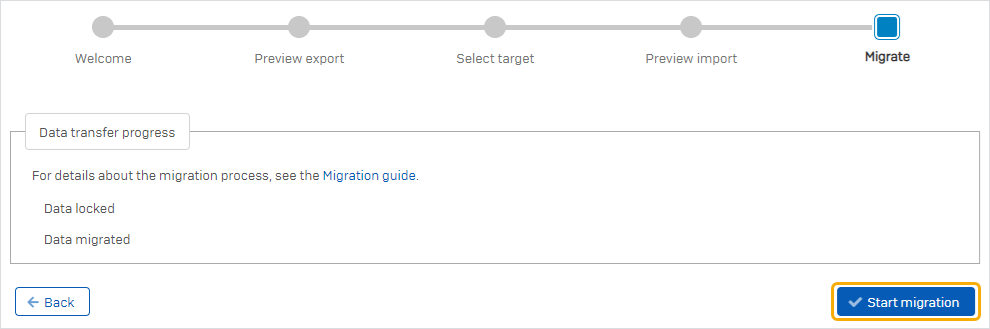
On the Migrate page, click Start migration.
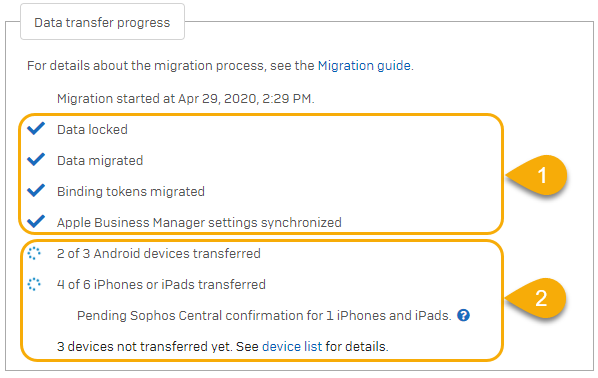
Migration phases
Migration runs in two phases:
-
In the data migration phase (labeled 1 in the subsequent image), the migration assistant copies your user accounts, policies, app packages, documents, and other settings. The history of tasks, alerts, and privacy-related events isn’t migrated.
With the exception of changes the migration assistant performs to make your data migratable, no data is changed in Sophos Mobile.
-
In the device migration phase (labeled 2 in the subsequent image), the migration assistant transfers your devices. For details, see Device migration.
During migration, you can’t edit any data in Sophos Mobile. Only device actions Lock, Unenroll, Wipe, and Delete are available.
Depending on your configuration, you must perform a few manual tasks in Sophos Central to complete migration.